Leather and headlight restoration by TSC17
 05-03-2009, 07:12 PM
#1
2012 SH-AWD / Advanced
Thread Starter
Leather and headlight restoration by TSC17
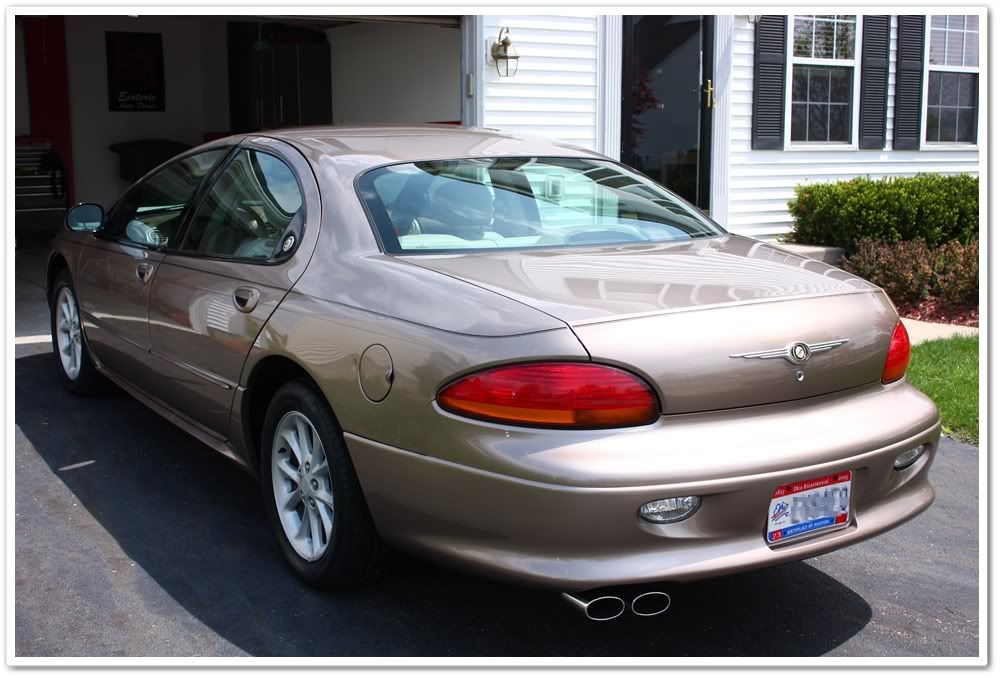
Here we have a '99 Chrysler LHS that quite frankly has been a bit neglected for the past 10 years. The paint was in bad condition, but the customer simply wanted it cleaned up, protected, and shiny.
Their big concern was to bring the interior back to life, as well as repair one of the damaged headlights. I don't think that the leather had ever been cleaned, and it was showing a bit of wear. I saw this as a great opportunity to outline the processes of simple leather restoration, and to show the required steps for headlight repair.
First up was the leather interior. Even in a short period of time, light colored leather in particular starts to get soiled from dirt, grime, perspiration, airborne contaminants, etc. Without the occasional cleaning, this will build up over time making it quite difficult to remove. Since this vehicle probably was never cleaned, I knew it was going to require a lot of effort.
Given this, I decided to use Leatherique as it has always performed very well with the more challenging leather restoration jobs. Two products are actually used...Rejuvinator Oil and Prestine Clean. The Leatherique system works backwards compared to what you're normally used to. First you use the conditioner, and then you use the cleaner! Yes, it sounds counter-intuitive, but it works (well)!
For the before and after photos, I tried to use the exact same lighting and exposure setting so they are all accurate comparisons. I also do not use any post-processing either other than to re-size and add a border.
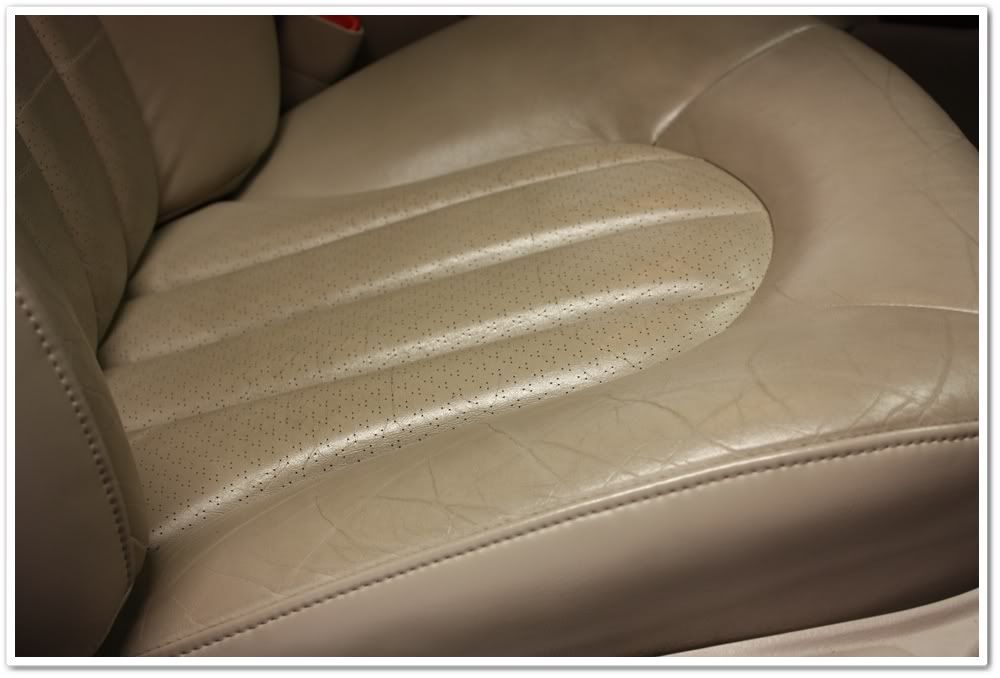
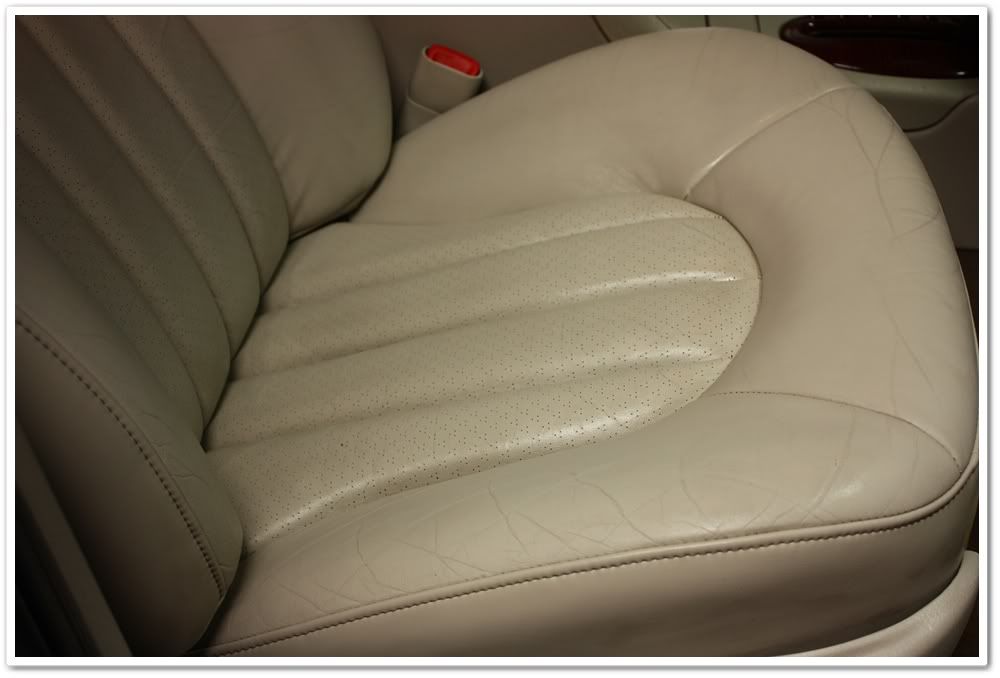
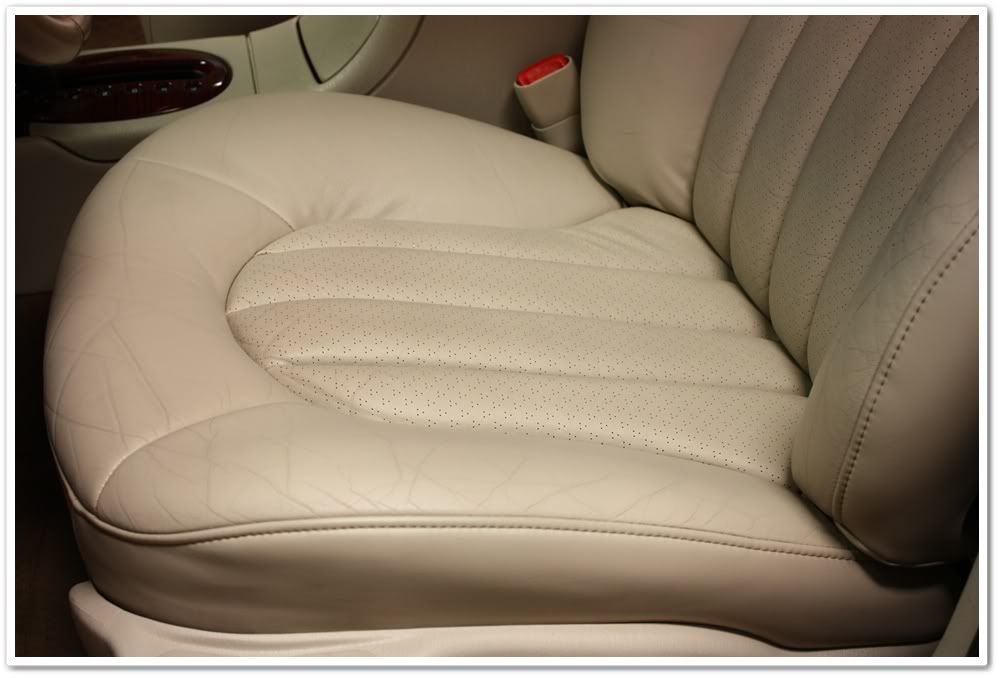
Here are a few �before� pictures showing the condition of the interior. As always, the driver's seat was the worst.
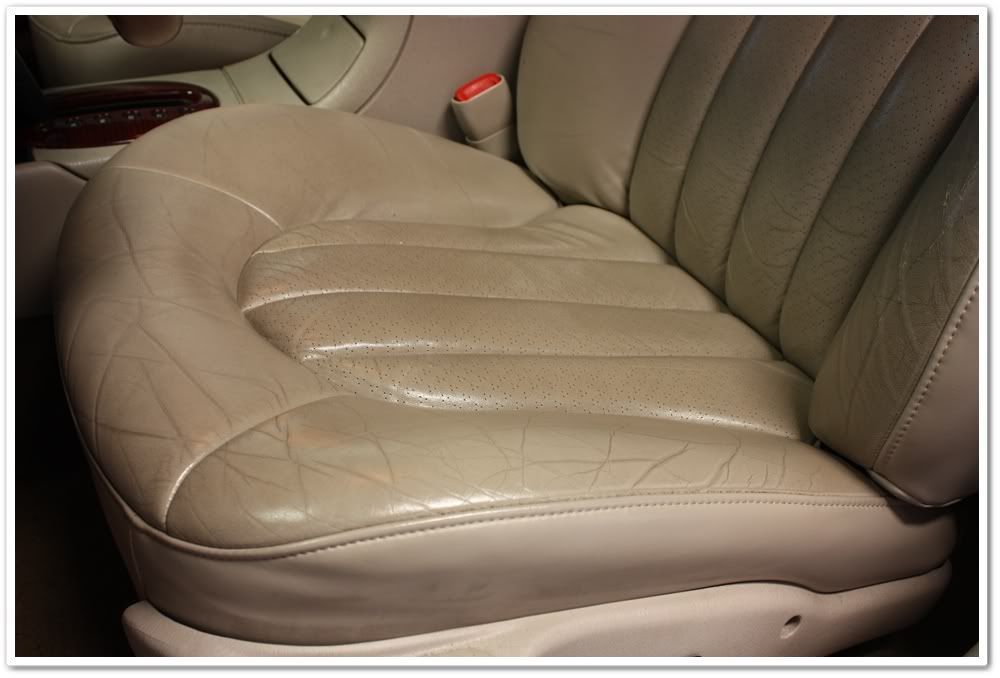
Here you can see that the lumbar support is actually cracking.
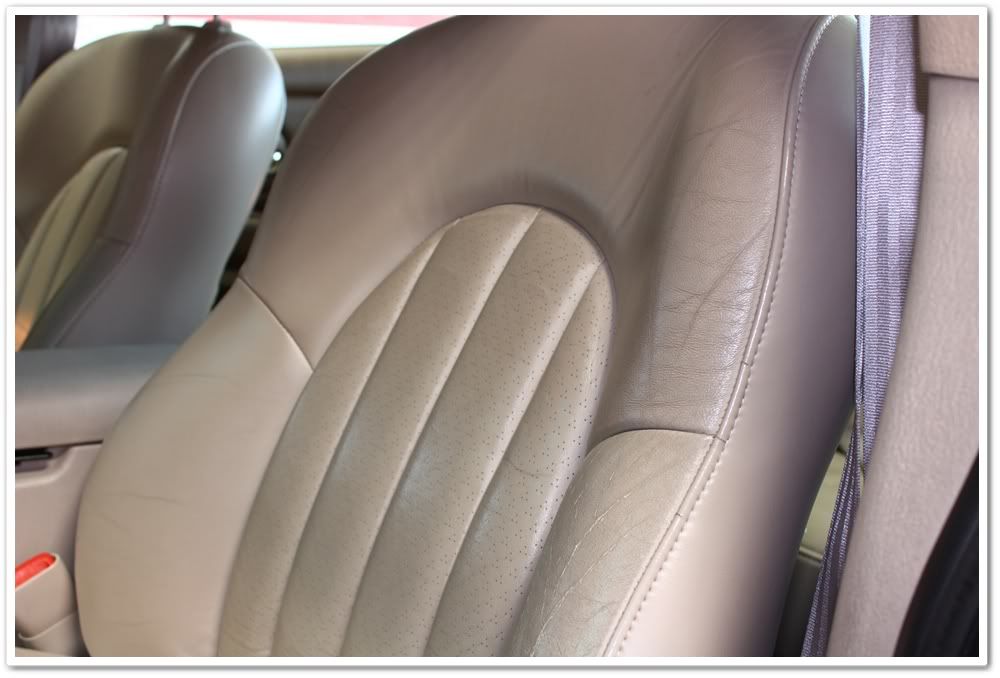
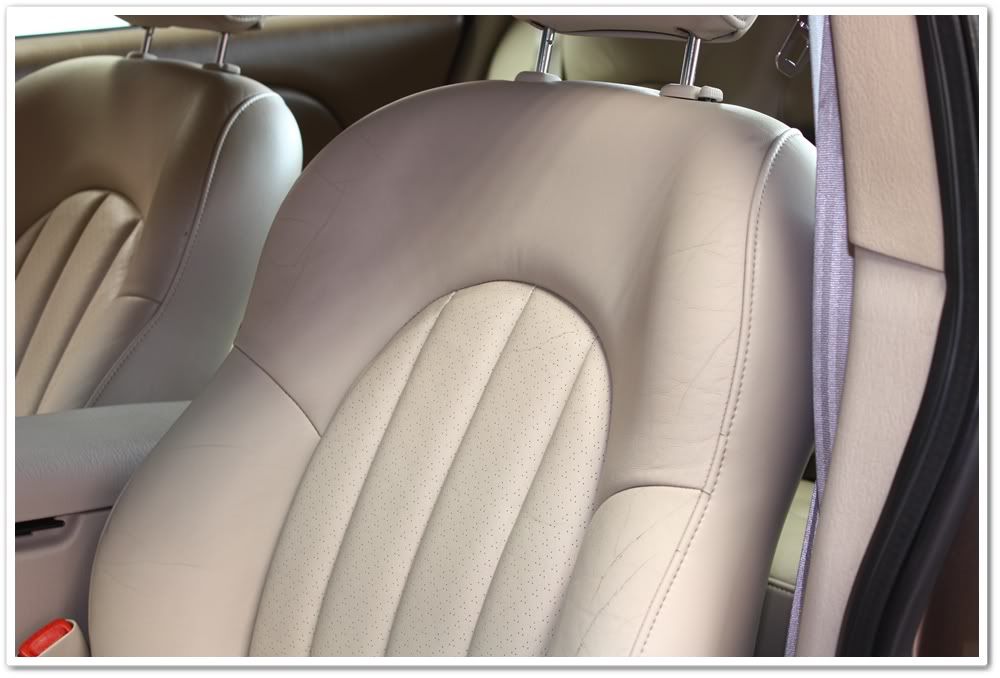
Passenger seat:
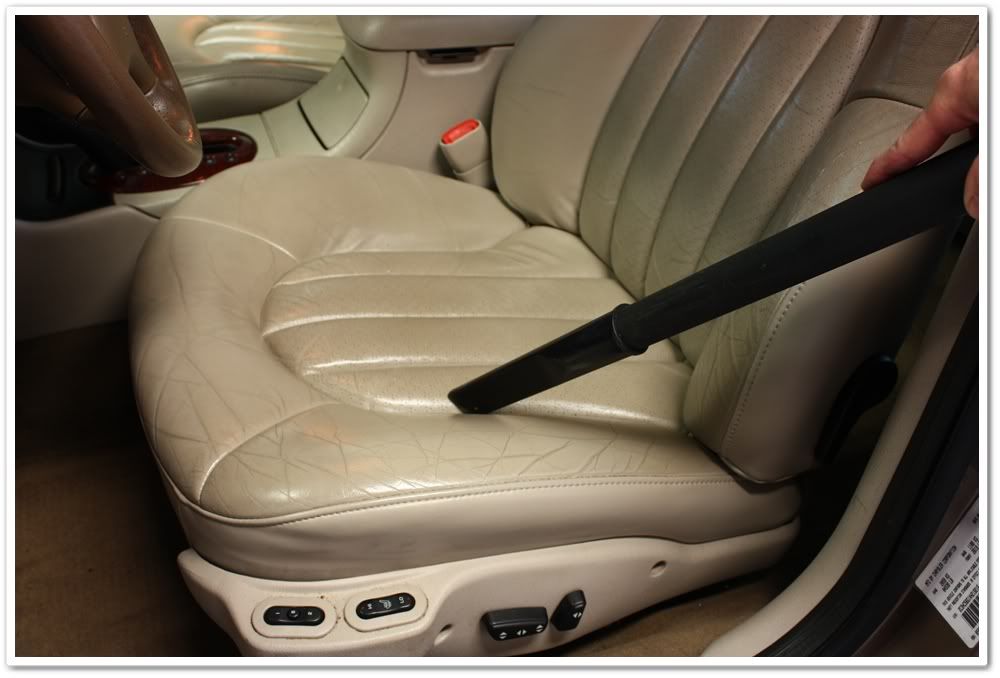
The first step in the process is to vacuum the surfaces to make sure all of the debris is picked up.
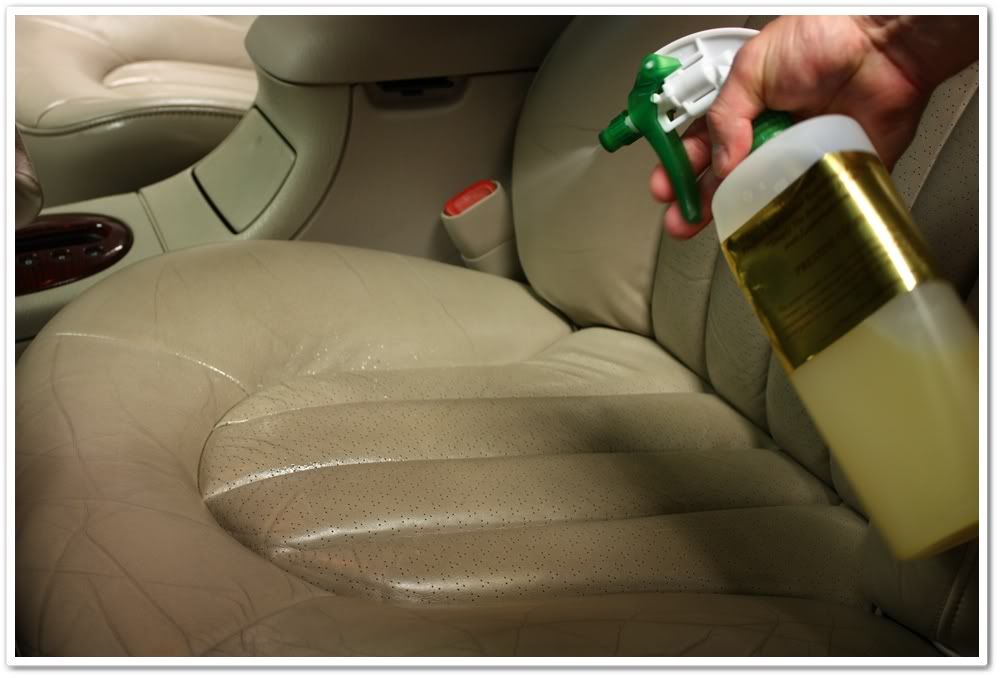
Here I have the Rejuvinator Oil and Prestine Clean ready to go. To make it easier, I utilize a spray nozzle on the Prestine Clean, and I put the Rejuvinator Oil in a small bowl and apply it with a foam brush. Leatherique recommends applying it with your hands so you can rub it in, but I find that I have much more control of the Oil when using the brush. When you're climbing in and out of the vehicle for this step, it's also nice not having it all over your hands where you could potentially get it everywhere.
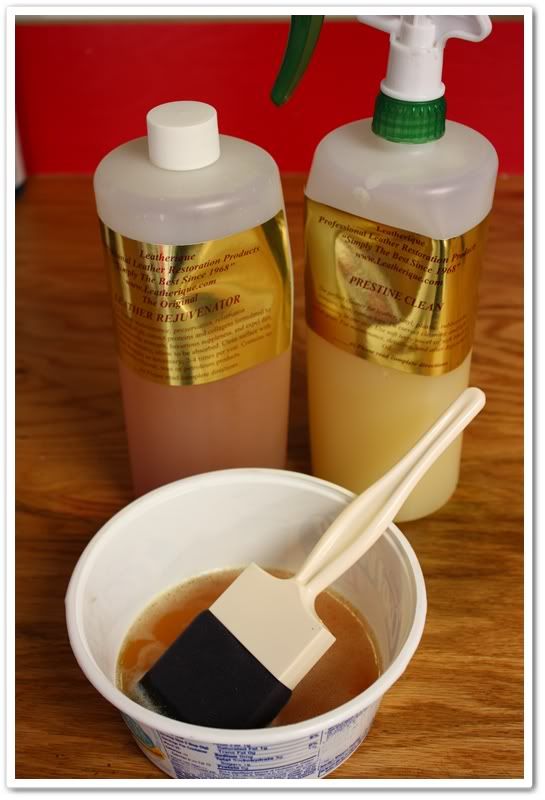
Here I am applying the Rejuvinator Oil. Be sure to get a thick coating everywhere, and work it into the stitching as well. After you're done applying the product, you could further work it into the surface, folds, seams, and stitching either with your hands or with a leather brush.
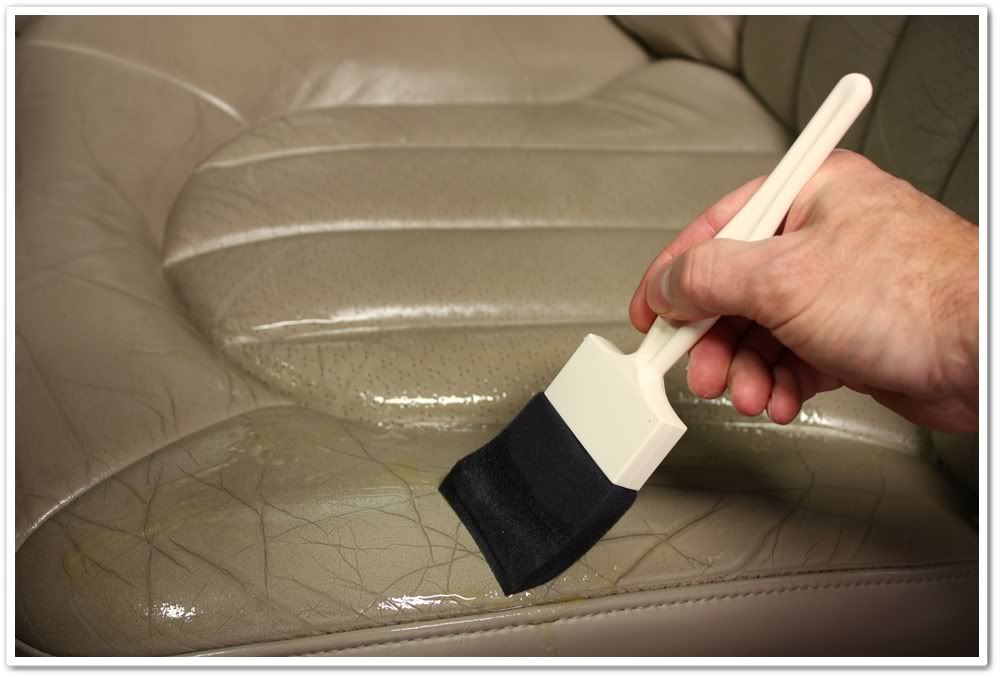
You can see where the seating surface is completely coated.
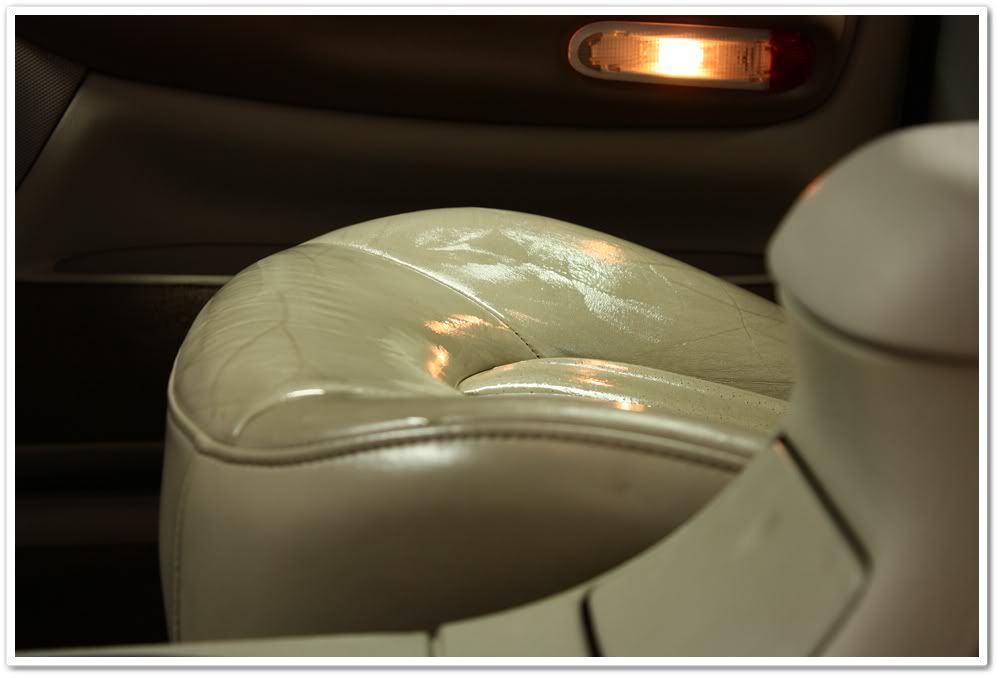
The Rejuvinator Oil works with time and heat. The best way to allow the product to work is to roll up the windows, and let the car sit outside in the sunshine for the day to create a steam room effect. During this time it conditions the surface (especially on non-coated leather), and brings all of the dirt, grime, salt, and other toxins to the top leaving a sticky or tacky finish before it's removed. I prefer to let it sit for about a 24 hour period. If it's cooler outside, you'll need to leave it on longer. You could cover the seats with plastic wrap and heat it up with a hair dryer (or drive around with the heater and seat warmers on!)
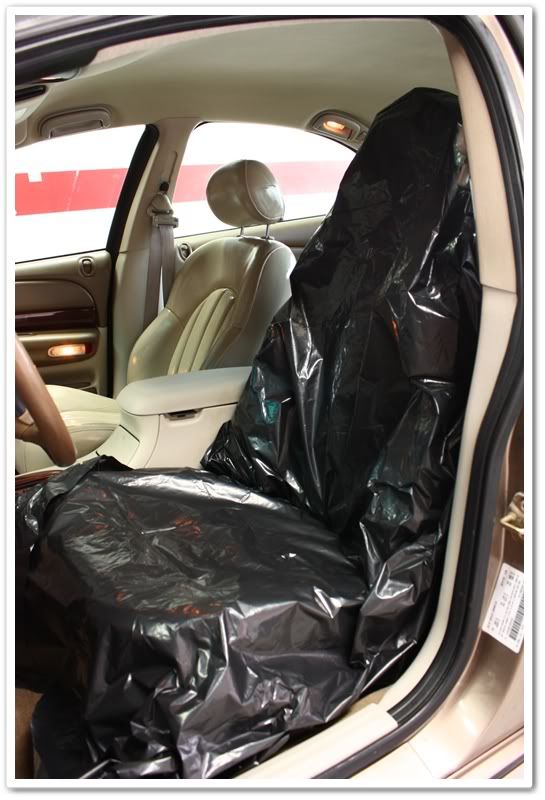
Here's a good tip. If you need the ability to pull the car in and out of the garage, then cut up a large plastic garbage bag and cover the seat. You won't have the worry of getting the Oil all over yourself, and the plastic won't remove it from the leather. Afterwards I wipe down the plastic, fold it up, and store it in the cabinet for future use.
Their big concern was to bring the interior back to life, as well as repair one of the damaged headlights. I don't think that the leather had ever been cleaned, and it was showing a bit of wear. I saw this as a great opportunity to outline the processes of simple leather restoration, and to show the required steps for headlight repair.
First up was the leather interior. Even in a short period of time, light colored leather in particular starts to get soiled from dirt, grime, perspiration, airborne contaminants, etc. Without the occasional cleaning, this will build up over time making it quite difficult to remove. Since this vehicle probably was never cleaned, I knew it was going to require a lot of effort.
Given this, I decided to use Leatherique as it has always performed very well with the more challenging leather restoration jobs. Two products are actually used...Rejuvinator Oil and Prestine Clean. The Leatherique system works backwards compared to what you're normally used to. First you use the conditioner, and then you use the cleaner! Yes, it sounds counter-intuitive, but it works (well)!
For the before and after photos, I tried to use the exact same lighting and exposure setting so they are all accurate comparisons. I also do not use any post-processing either other than to re-size and add a border.
Here are a few �before� pictures showing the condition of the interior. As always, the driver's seat was the worst.
Here you can see that the lumbar support is actually cracking.
Passenger seat:
The first step in the process is to vacuum the surfaces to make sure all of the debris is picked up.
Here I have the Rejuvinator Oil and Prestine Clean ready to go. To make it easier, I utilize a spray nozzle on the Prestine Clean, and I put the Rejuvinator Oil in a small bowl and apply it with a foam brush. Leatherique recommends applying it with your hands so you can rub it in, but I find that I have much more control of the Oil when using the brush. When you're climbing in and out of the vehicle for this step, it's also nice not having it all over your hands where you could potentially get it everywhere.
Here I am applying the Rejuvinator Oil. Be sure to get a thick coating everywhere, and work it into the stitching as well. After you're done applying the product, you could further work it into the surface, folds, seams, and stitching either with your hands or with a leather brush.
You can see where the seating surface is completely coated.
The Rejuvinator Oil works with time and heat. The best way to allow the product to work is to roll up the windows, and let the car sit outside in the sunshine for the day to create a steam room effect. During this time it conditions the surface (especially on non-coated leather), and brings all of the dirt, grime, salt, and other toxins to the top leaving a sticky or tacky finish before it's removed. I prefer to let it sit for about a 24 hour period. If it's cooler outside, you'll need to leave it on longer. You could cover the seats with plastic wrap and heat it up with a hair dryer (or drive around with the heater and seat warmers on!)
Here's a good tip. If you need the ability to pull the car in and out of the garage, then cut up a large plastic garbage bag and cover the seat. You won't have the worry of getting the Oil all over yourself, and the plastic won't remove it from the leather. Afterwards I wipe down the plastic, fold it up, and store it in the cabinet for future use.
 05-03-2009, 07:13 PM
#2
2012 SH-AWD / Advanced
Thread Starter
Fast forward now to 24 hours later...
Now that you're done with the first step, it's time to clean the surface off with Prestine Clean. You'll need to have a bucket of warm water, a soft brush and towel, and a spray nozzle for the next stage as the Prestine Clean isn't thick like the Rejuvinator Oil.
First, spray the Prestine Clean directly on the leather surface.
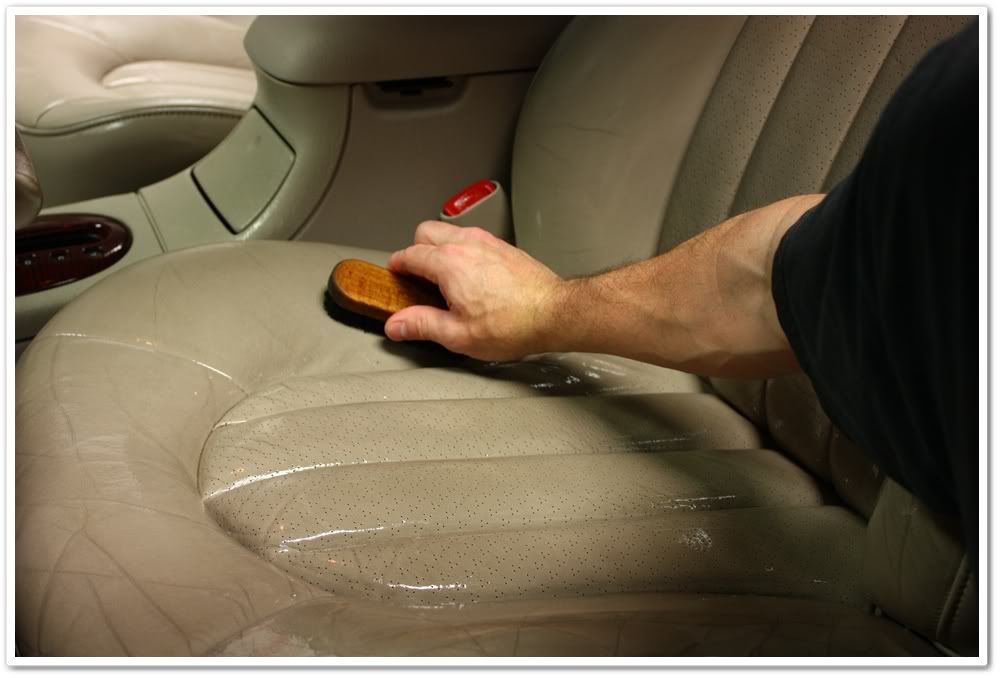
Now you want to use your leather brush and work the product in. Pay particular attention to the creases, seams, and stitching. You'll quickly see the grime being removed.
Now that you've worked that particular area, wet your towel in the bucket, wring it out, and then wipe down the leather to reveal a remarkable new look. I like to wipe it down, rinse out the towel, and then wipe it once again. After I've done this, I'll then move on to the next section and spray, scrub, and wipe. In this picture the surface has already been wiped down...look at the difference in the color of the leather in comparison to the photo above!
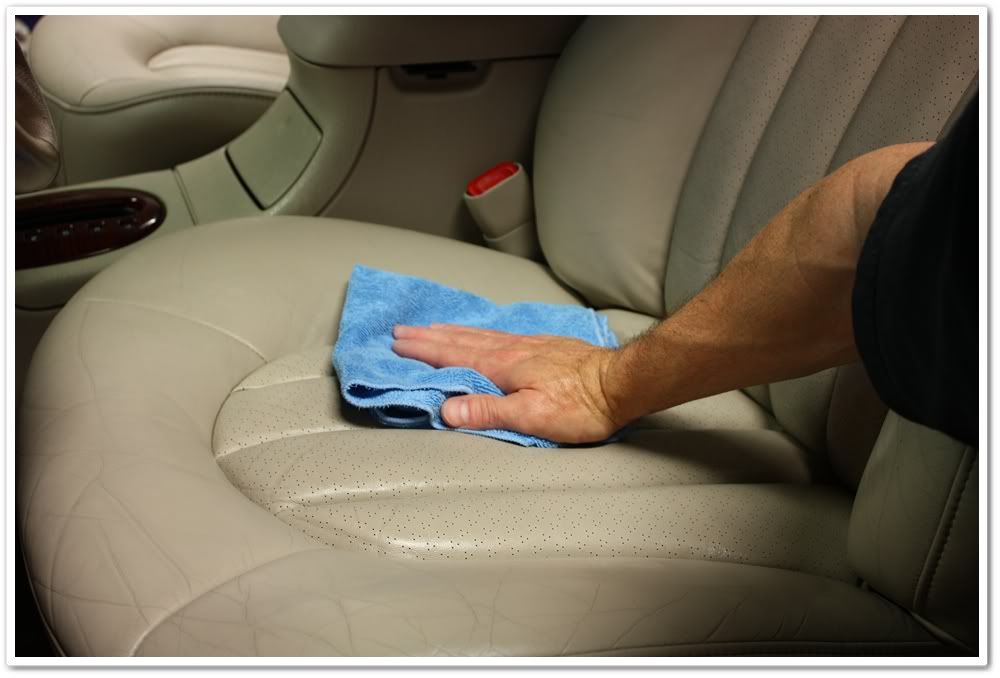
Since this process removes so much dirt and grime, you'll probably want to refresh your bucket with clean water halfway through the cleaning to make sure you're not re-introducing dirt (or use a two-bucket method).
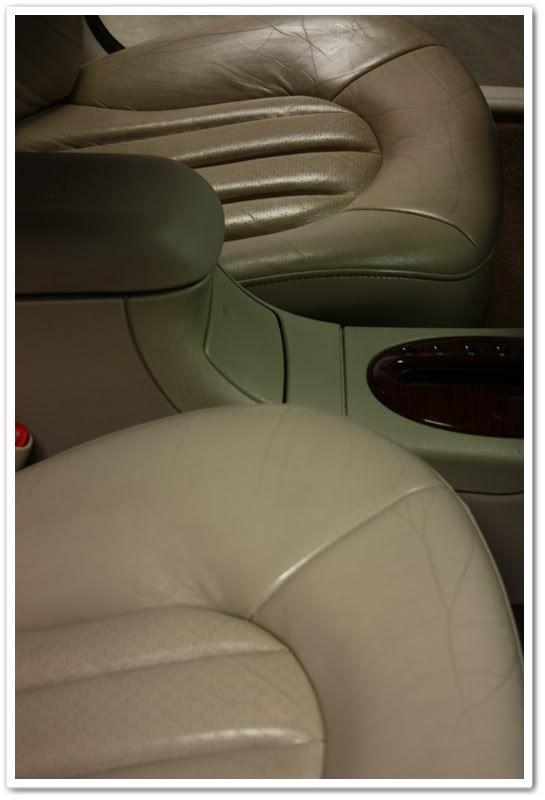
In this photo, the passenger seat has been finished, but not the driver's seat...notice the difference in color on this one as well.
Passenger seat before:
After:
Driver's before:
After:
Before:
After:
Now that you're done with the first step, it's time to clean the surface off with Prestine Clean. You'll need to have a bucket of warm water, a soft brush and towel, and a spray nozzle for the next stage as the Prestine Clean isn't thick like the Rejuvinator Oil.
First, spray the Prestine Clean directly on the leather surface.
Now you want to use your leather brush and work the product in. Pay particular attention to the creases, seams, and stitching. You'll quickly see the grime being removed.
Now that you've worked that particular area, wet your towel in the bucket, wring it out, and then wipe down the leather to reveal a remarkable new look. I like to wipe it down, rinse out the towel, and then wipe it once again. After I've done this, I'll then move on to the next section and spray, scrub, and wipe. In this picture the surface has already been wiped down...look at the difference in the color of the leather in comparison to the photo above!
Since this process removes so much dirt and grime, you'll probably want to refresh your bucket with clean water halfway through the cleaning to make sure you're not re-introducing dirt (or use a two-bucket method).
In this photo, the passenger seat has been finished, but not the driver's seat...notice the difference in color on this one as well.
Passenger seat before:
After:
Driver's before:
After:
Before:
After:
05-03-2009, 07:14 PM
#3
2012 SH-AWD / Advanced
Thread Starter
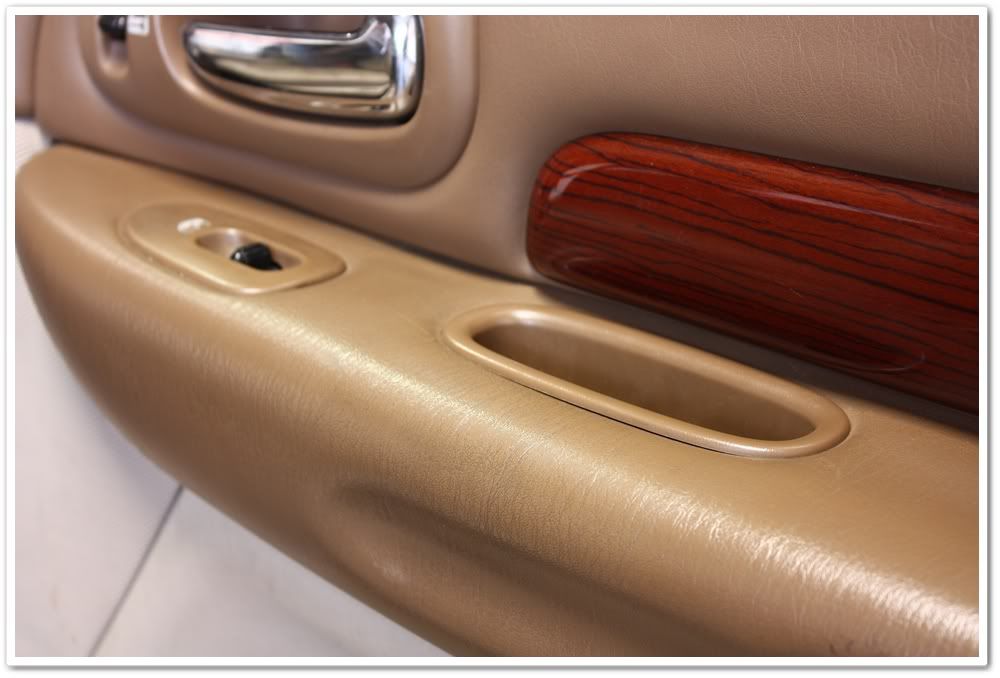
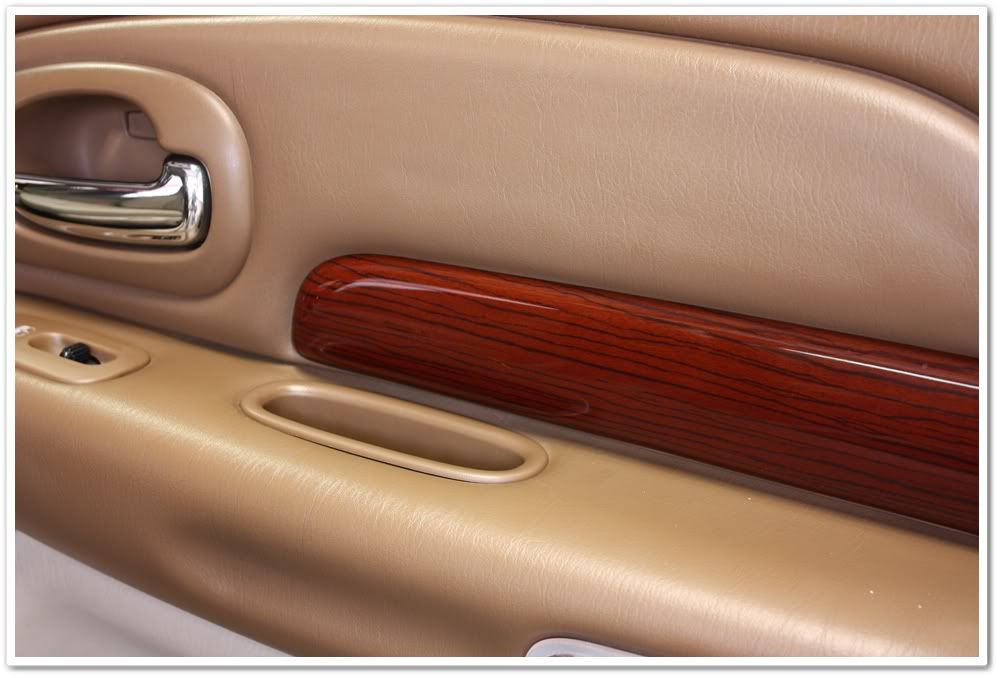
Door before (notice the grime built up in the texture of the armrest):
After:
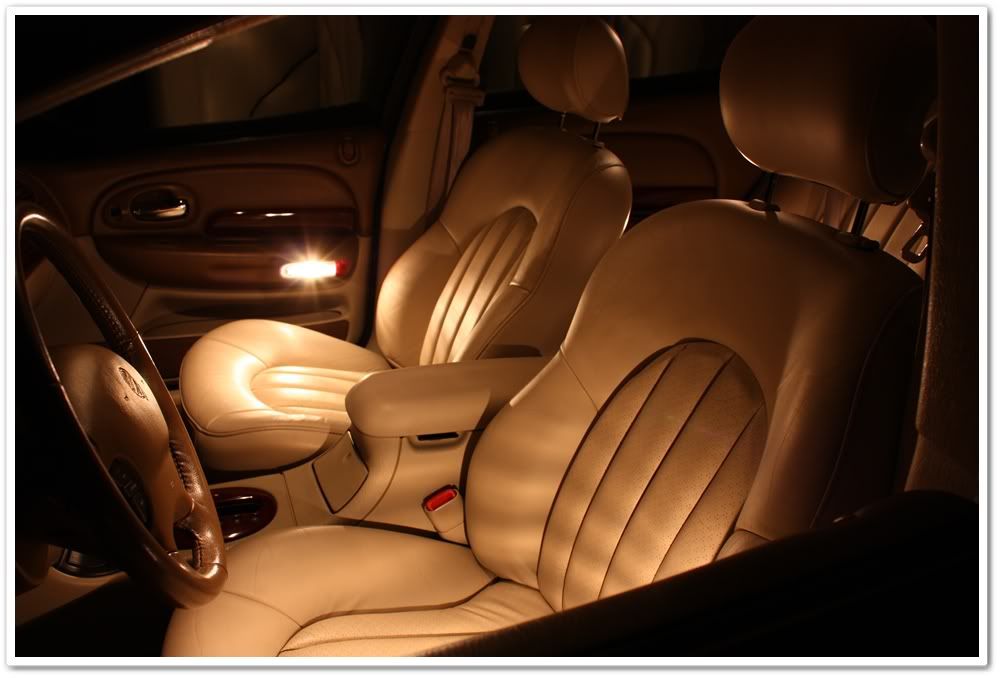
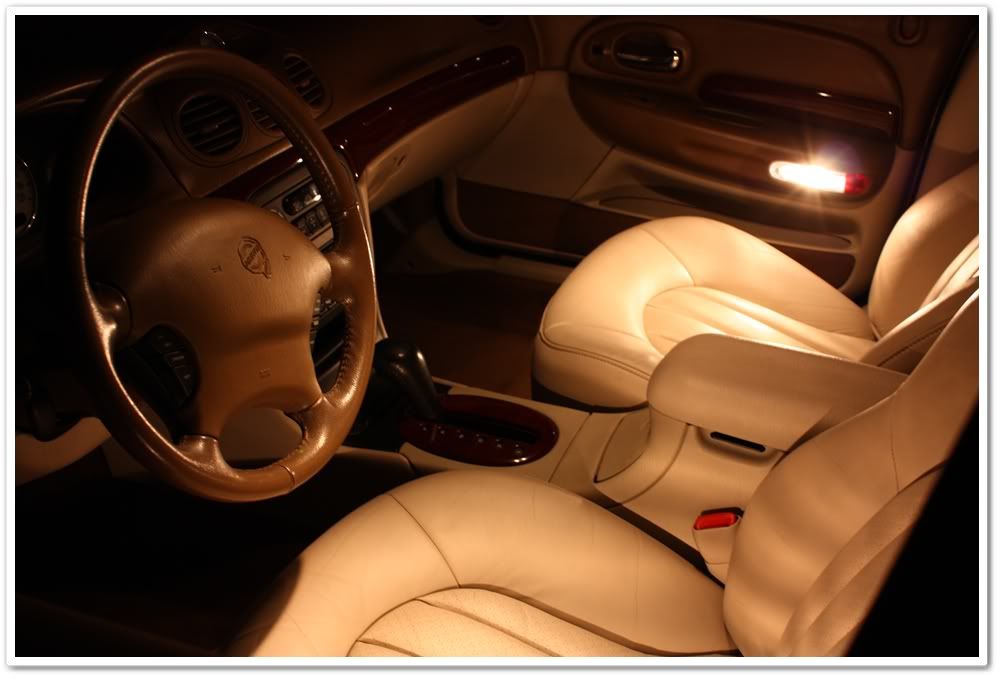
�Mood� shots:
The rest of the interior was cleaned up with woolite/water mix, and the plastic and vinyl was dressed with 303 Aerospace Protectant. The gauges and console were cleaned with Megs Quick Interior Detailer. Kick panels and other heavily scuffed plastic parts were cleaned with Megs APC+ and Magic Erasers.
We're not done yet, so if you need to take a quick break that's OK...
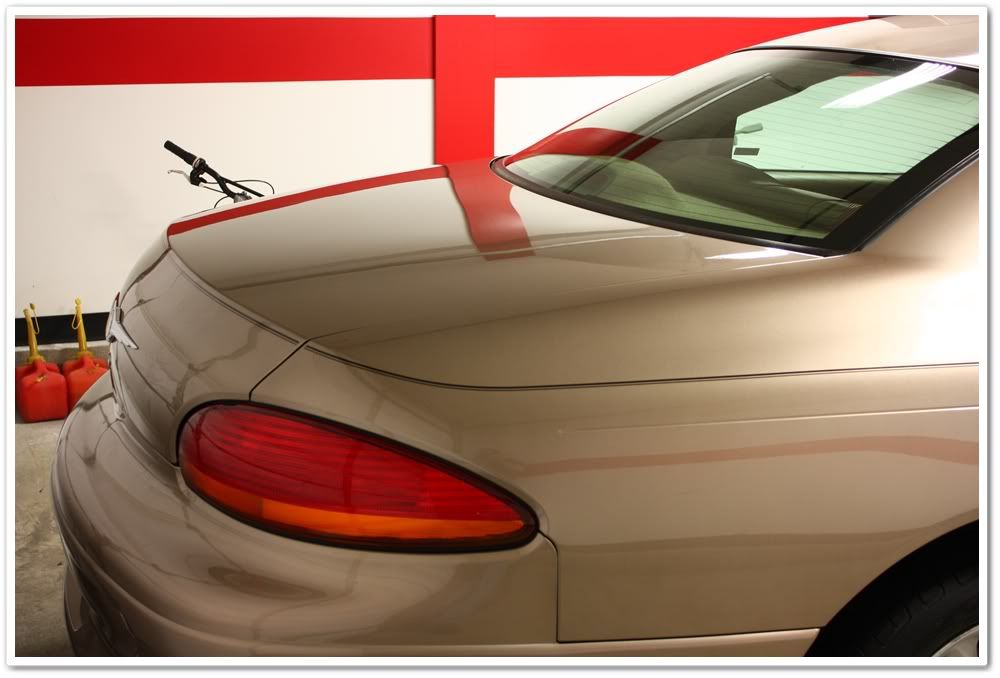
Ready to go some more? Alright then, let's get working on that headlight.
We've all seen car headlights that have turned into a foggy haze. Not only does it look bad, but it's also unsafe. Sure you could buy a new headlight, but for modern cars you can plan on paying a couple hundred bucks for one.
I'm going to take you through the steps to restore a headlight. Depending on the condition, you can probably get it back to about 90% of new.
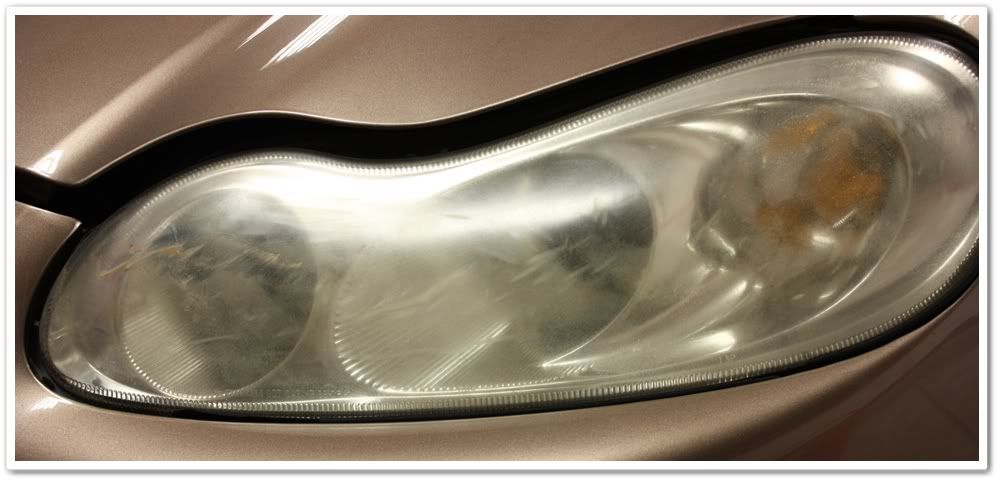
This was had some pretty serious damage to it. I could tell that it had been hit by something as it had pretty deep gouges all across the light. Given the condition, I knew I was going for �better� as opposed to like-new.
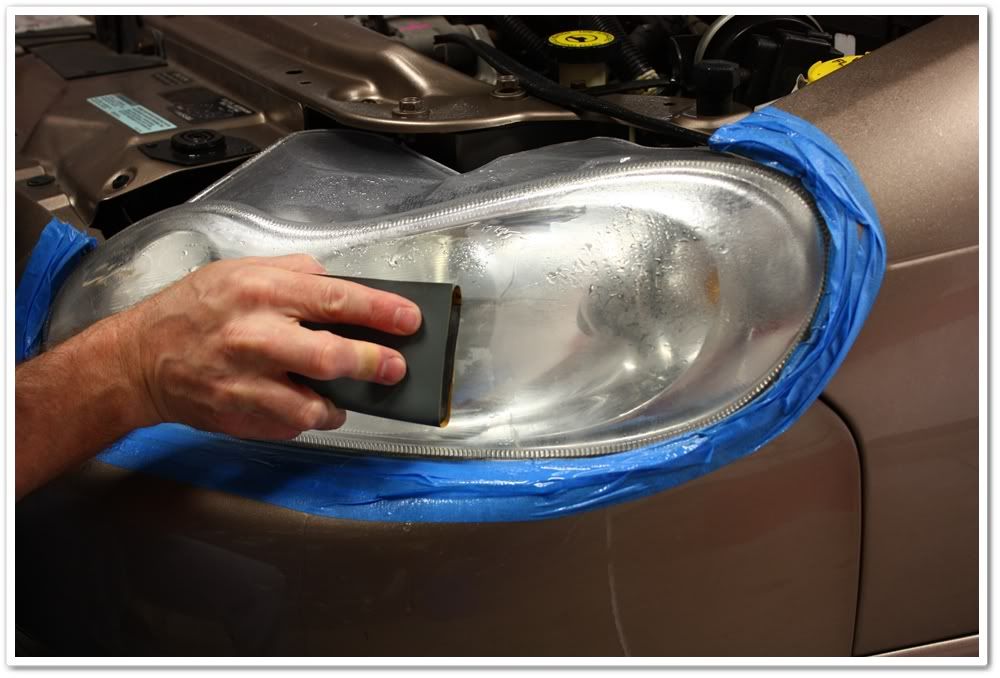
For this condition, you're going to need at least several steps of wetsanding followed by several steps of machine polishing. You also want to tape all around the headlight to protect any seals/trim as well as painted finishes. Here I am starting with 1500 grit sandpaper. I started off just like I would with any wetsanding project...go in one direction first, and then alternate directions as you move up through the different levels of paper. Here I started with horizontal passes. (Hey Todd...nice tape job!)
The next step up I went to vertical passes:

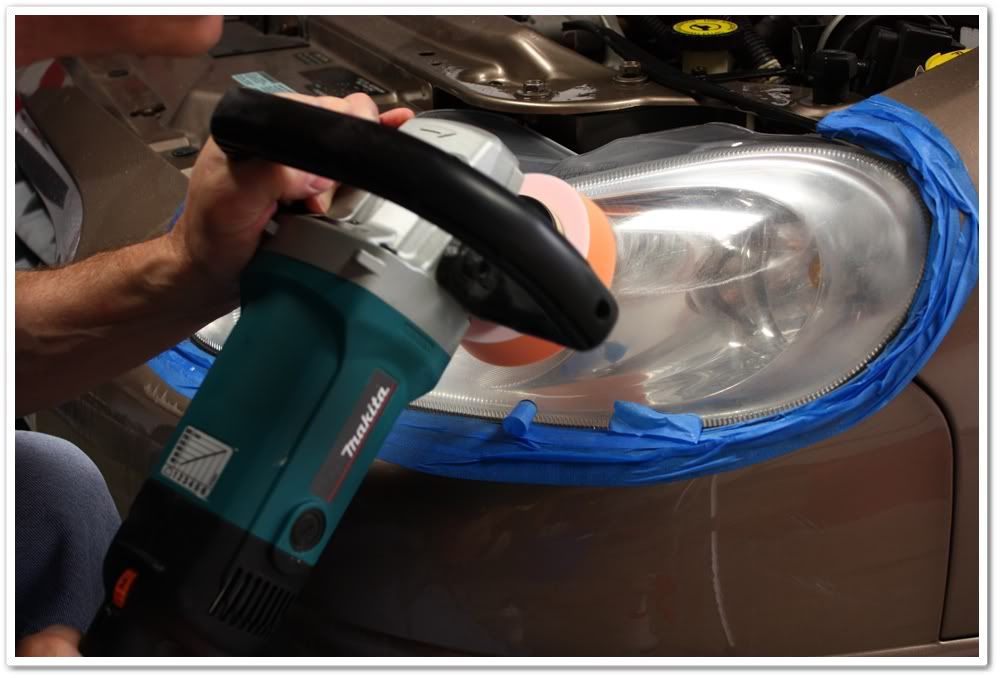
After about 4 different grits of paper, I switched to the rotary to take out the sanding haze and to polish out the finish. I first used a 4� PFW pad with Megs 105 compound, and then used an orange pad with SIP, and finally finished it up with 106FF and a white pad.
Once again...before:
After:
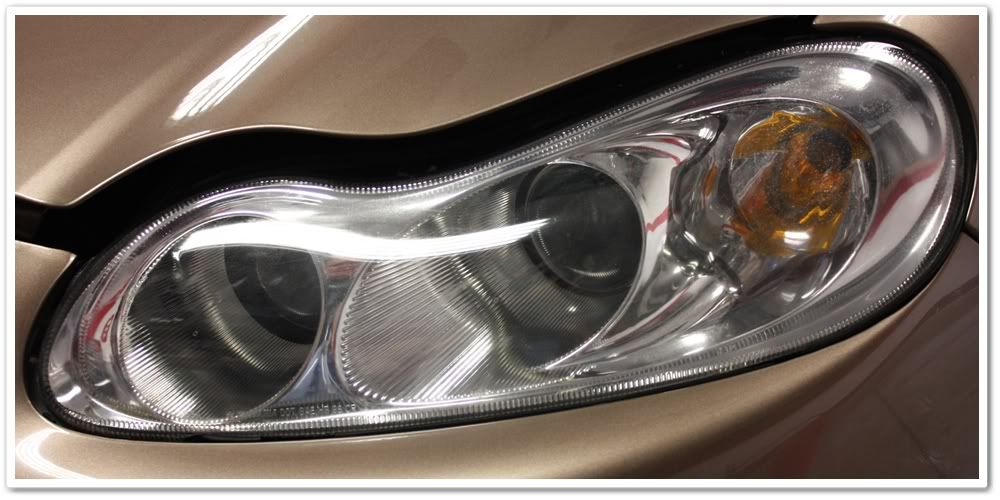
Since this light was hit with some force, it had micro-fractures all through the light that was well below the surface and obviously couldn't be corrected. When it was done, it looked probably 75%-80% of a new one.
After:
�Mood� shots:
The rest of the interior was cleaned up with woolite/water mix, and the plastic and vinyl was dressed with 303 Aerospace Protectant. The gauges and console were cleaned with Megs Quick Interior Detailer. Kick panels and other heavily scuffed plastic parts were cleaned with Megs APC+ and Magic Erasers.
We're not done yet, so if you need to take a quick break that's OK...
Ready to go some more? Alright then, let's get working on that headlight.
We've all seen car headlights that have turned into a foggy haze. Not only does it look bad, but it's also unsafe. Sure you could buy a new headlight, but for modern cars you can plan on paying a couple hundred bucks for one.
I'm going to take you through the steps to restore a headlight. Depending on the condition, you can probably get it back to about 90% of new.
This was had some pretty serious damage to it. I could tell that it had been hit by something as it had pretty deep gouges all across the light. Given the condition, I knew I was going for �better� as opposed to like-new.
For this condition, you're going to need at least several steps of wetsanding followed by several steps of machine polishing. You also want to tape all around the headlight to protect any seals/trim as well as painted finishes. Here I am starting with 1500 grit sandpaper. I started off just like I would with any wetsanding project...go in one direction first, and then alternate directions as you move up through the different levels of paper. Here I started with horizontal passes. (Hey Todd...nice tape job!)
The next step up I went to vertical passes:
After about 4 different grits of paper, I switched to the rotary to take out the sanding haze and to polish out the finish. I first used a 4� PFW pad with Megs 105 compound, and then used an orange pad with SIP, and finally finished it up with 106FF and a white pad.
Once again...before:
After:
Since this light was hit with some force, it had micro-fractures all through the light that was well below the surface and obviously couldn't be corrected. When it was done, it looked probably 75%-80% of a new one.
05-03-2009, 07:14 PM
#4
2012 SH-AWD / Advanced
Thread Starter
I was only going for a quick polish to clean the surface and add a layer of protection and gloss, so I didn't take a bunch of before/after photos. For this application, the easy choice with Optimum Poliseal because it's an absolutely tremendous all-in-one...very easy to use, has durable protection, and looks great even on neglected paint. I polished the car with a PC on speed 6 with an orange 5.5� pad.
Yes, there's trim missing from the top of the hood.
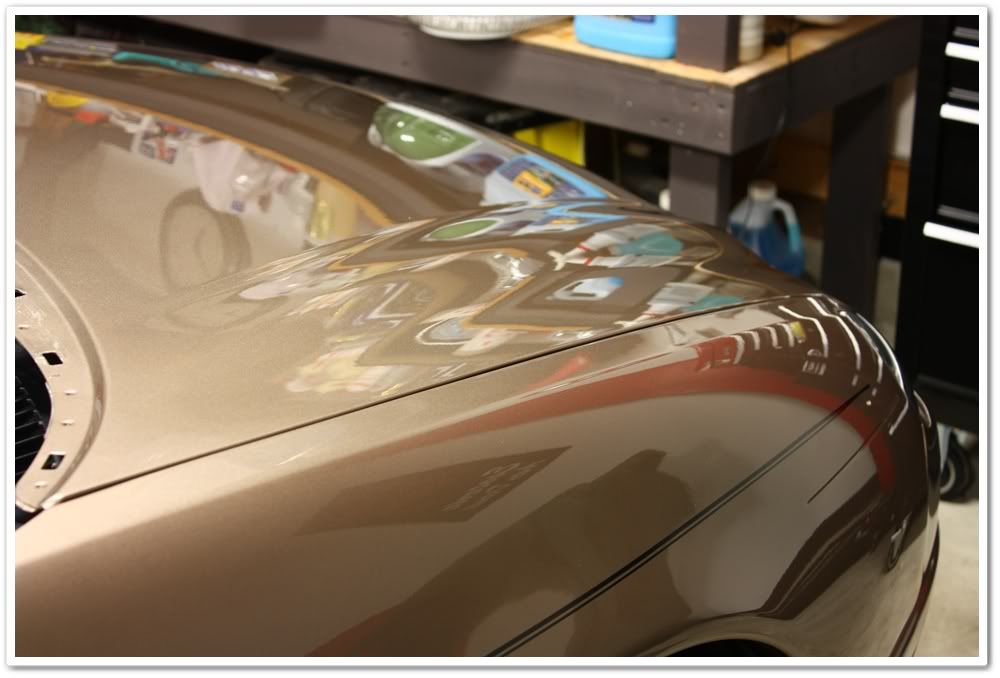
This paint was �dead� before I started (I don't think it had even been waxed...EVER). Now it has a nice gloss without spending a tremendous amount of time.
All done!
Thanks as always for checking out my work. I tried to make this one a little educational since I didn't have all of the glossy exterior photos to show off. I hope you enjoyed...
Yes, there's trim missing from the top of the hood.
This paint was �dead� before I started (I don't think it had even been waxed...EVER). Now it has a nice gloss without spending a tremendous amount of time.
All done!
Thanks as always for checking out my work. I tried to make this one a little educational since I didn't have all of the glossy exterior photos to show off. I hope you enjoyed...
 05-03-2009, 08:19 PM
#6
Pro

Join Date: Oct 2007
Location: Montreal, Canada
Age: 36
Posts: 597
Likes: 0
Received 5 Likes
on
5 Posts
I discovered your threads not long ago after searching for information on how to detail my car, and I am really glad to have found them. You always to a terrific job, and all the cars you detail look absolutely fantastic. I wish I'd live not too far away from you so you could detail my TL.
05-03-2009, 09:11 PM
#7
Former Sponsor

Todd, beautiful once again.
Were you able to bring the sheen back to the seating? What does the seating feel like after your particular products used? Im a believer that if they arent slick and slippery, they tend to deteriorate prematurely? Attrition is leathers worst enemy.....
Great job on the lights also!!
Were you able to bring the sheen back to the seating? What does the seating feel like after your particular products used? Im a believer that if they arent slick and slippery, they tend to deteriorate prematurely? Attrition is leathers worst enemy.....
Great job on the lights also!!
Last edited by exceldetail; 05-03-2009 at 09:15 PM.
Trending Topics
05-03-2009, 09:24 PM
#8
Wow that leather restoration is amazing!
I'm going to try Leatherique in a few weeks when the weather gets hot.
Quick question though, does the Prestine Clean remove the conditioner from the first step? It does look like it has a matte look in the after shots.
I'm going to try Leatherique in a few weeks when the weather gets hot.
Quick question though, does the Prestine Clean remove the conditioner from the first step? It does look like it has a matte look in the after shots.
05-03-2009, 10:48 PM
#11
Advanced

Do you think it would be alright to use the Leatherique on the TSX seats? I am a little concerned with soaking the seats and having all that dripping through the small cracks on the seat bottom/back.
Anyone have success with this?
Anyone have success with this?
 Another great read!
05-04-2009, 06:39 AM
Another great read!
05-04-2009, 06:39 AM
#13
2012 SH-AWD / Advanced
Thread Starter
CocheseUGA...thanks! I've done plenty of them...just do a search for my threads and you'll find plenty of reading material!
Dainius...Thank you for the kind words!
Patrick...I don't know how much sheen these seats had originally. In the before photos it looks like it has some, but that's more of the "polished dirt" (I don't know how better to describe it) than it is the leather finish itself. Afterwards the leather was soft and smooth with a high quality feel to it.
handycaptd...Thanks. No, the Prestine clean does not remove the conditioner.
kamlung...Thank you once again. I'm glad you enjoyed it.
Denzil...Thanks! Yeah, definitely give it a try.
ofusball21...All you would really need for your TSX is the Prestine Clean. You have coated leather that should be in good condition. Use the Prestine Clean a few times a year...just spray it on, agitate with a soft brush if heavily soiled, and then wipe down with a damp cloth. No need to worry about the perforated areas.
nf3d...Thanks. It won't fix your cracking issues...that area would need to be sanded and re-dyed to fix it. It will help the overall look and feel though.
05-04-2009, 10:15 AM
#14
Matt
Join Date: Apr 2006
Location: St. Louis, MO
Age: 43
Posts: 2,663
Likes: 0
Received 0 Likes
on
0 Posts
Awesome Job (as always)! Quick question regarding the headlights. I will be attempting this on my car (not as bad). After the wet sanding process, what products are those you used with the machine? Im not familiar with 105, SIP, 106ff. What kind of products are each of those? I assume that they all are a step down from the next as far as abrasiveness?
05-04-2009, 10:35 AM
#15
2012 SH-AWD / Advanced
Thread Starter
Awesome Job (as always)! Quick question regarding the headlights. I will be attempting this on my car (not as bad). After the wet sanding process, what products are those you used with the machine? Im not familiar with 105, SIP, 106ff. What kind of products are each of those? I assume that they all are a step down from the next as far as abrasiveness?
Meguiars 105...heavy cut compound
Menzerna Super Intensive Polish (SIP)...Medium cut polish
Menzerna 106FF...Fine cut polish
Yes, they are in order of most abrasive to least just like the wetsanding part.
If you finish down with a fine enough sand paper, you could probably just use an OTC product like Meguiars PlastX and clean it up by hand polishing afterwards. Micro-Surface sells a sampler kit of their Micro-Mesh product for wetsanding. Their numbering system is a little different than normal, but it starts at I believe 3200 and goes all the way up to 12000. If you used that system, you might not need to polish it out by hand at all (although you could still stand to have some PlastX on hand).
05-04-2009, 12:06 PM
#16
Senior Moderator
Regional Coordinator
(Mid-Atlantic)
Regional Coordinator
(Mid-Atlantic)
iTrader: (6)
Great job Todd, again, you make me want leatherique
05-04-2009, 01:00 PM
#18
2012 SH-AWD / Advanced
Thread Starter
05-04-2009, 03:10 PM
#19
The Detailer
iTrader: (1)
Join Date: Jul 2008
Location: Hollister / San Jose, CA
Age: 41
Posts: 1,090
Likes: 0
Received 0 Likes
on
0 Posts
Yeah, plus you can only do so much. I mean if the OEM coating can't stand the sun, it'd be hard to believe that anything else will besides a clear bra.
05-04-2009, 04:07 PM
#20
2012 SH-AWD / Advanced
Thread Starter
05-04-2009, 08:06 PM
#22
Todd, beautiful once again.
Were you able to bring the sheen back to the seating? What does the seating feel like after your particular products used? Im a believer that if they arent slick and slippery, they tend to deteriorate prematurely? Attrition is leathers worst enemy.....
Great job on the lights also!!
Were you able to bring the sheen back to the seating? What does the seating feel like after your particular products used? Im a believer that if they arent slick and slippery, they tend to deteriorate prematurely? Attrition is leathers worst enemy.....
Great job on the lights also!!
05-05-2009, 06:23 AM
#23
2012 SH-AWD / Advanced
Thread Starter
The Rejuvinator Oil IS the conditioner! Although for a 2006, you might just want to go with the Prestine Clean for cleaning, and then use a product like Optimum Protectant Plus afterwards. That's pretty much the setup I use on the black leather in my '07 TL-S.
05-05-2009, 01:47 PM
#24
Evil Mazda Driver
I dropped by Todd's place on my way through Columbus when he was working on this car. I can vouch for what he is saying when he says it was bad. The paint had absolutely no life to it at all.
Todd...looks great and thanks for letting me stop by.
Todd...looks great and thanks for letting me stop by.
05-05-2009, 02:26 PM
#25
2012 SH-AWD / Advanced
Thread Starter
That was very cool that you stopped by during your cross-country trip! I wish we would have had more time for sure.
Remember how badly oxidized the black parts of the door frame were (they were almost white!)? I got those cleaned up quite nicely and they looked black and shiny again thanks to Poliseal, PC, and an orange pad.
Enjoy the rest of your trip, and drive safe!
05-06-2009, 05:50 AM
#28
2012 SH-AWD / Advanced
Thread Starter


Thread
Thread Starter
Forum
Replies
Last Post
rp_guy
Member Cars for Sale
9
07-16-2017 07:33 AM
LogicWavelength
3G TL Photograph Gallery
33
11-01-2015 09:38 AM