Acura TL 2004-2008: How to Change Manual Transmission Fluid
Changing the manual transmission fluid is one of the easier DIY jobs that needs doing on the Acura TL, and you will be rewarded with slick shifts for thousands of miles afterwards.
This article applies to the Acura TL (2004-2008).
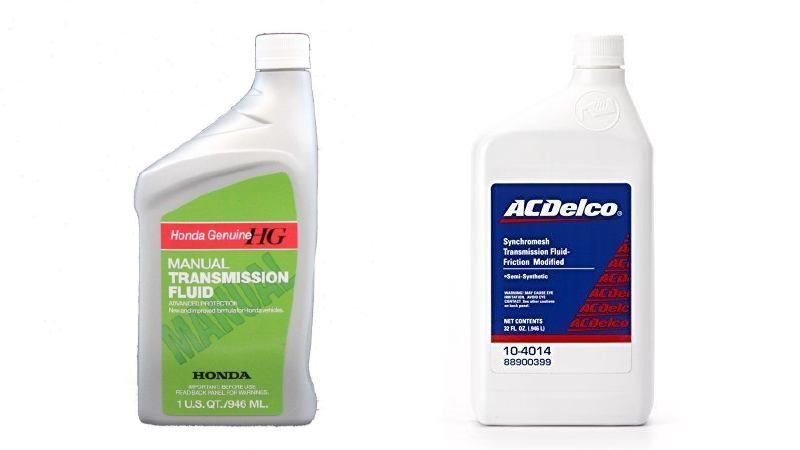
When it is time to change your manual transmission fluid (typically after 60k miles, then again every 30k miles afterwards), don't think you need to immediately call your favorite professional to do this simple task for you. The job is easy and will take less than an hour in the comfort of your own garage. You will need about three quarts of genuine Honda manual transmission fluid, or as many forum members suggest, GM (ACDelco) Friction Modified Synchromesh Manual Transmission Fluid. Save your hard earned cash, read on, and get this done to restore slick shifting.

Materials Needed
- Hydraulic floor jack
- Jack stands (2)
- Flat head screwdriver
- 3/8" drive ratchet with 10 to 12 inch extensions
- 3 quarts of Honda or GM fluid
- Funnel
Step 1 – Lift the front end and place on jack stands
Use your hydraulic floor jack to lift the front end and place on jack stands. Make sure that you are using the approved points on the chassis for lifting and setting the car in place. Never work under your car without using jack stands. In order to check that you have the proper amount of fluid in the transmission, you need to have the car level. But if you measure what came out,and refill with the same amount, you don't need to worry too much about it.

Pro Tip
Some folks choose to use ramps instead of floor jacks and jack stands. For oil and tranny fluid changes, this is an acceptable alternative.
Step 2 – Locate the drain, fill, and check bolts
Some DIYers prefer to remove the plastic splash shields, and some are comfortable working around it. You'll need to locate the 3/8" square indented fill plug, drain bolt, and the small 10mm fluid level check bolt, and remove the splash shield if need be. The fill hole for the manual transmission is located at the top, almost directly below the battery, but you should be able to get a long 3/8" extension down into it without removing anything. The drain plug is on the bottom of the transmission and also has a 3/8" square indentation in it.
If you need to, the splash shield can be moved out of the way by just popping out some plastic rivets. However, it is strongly recommended that you purchase some replacement plastic snap clips or rivets as the ones holding this plastic cover in place are very likely going to break on their way out. There is one inside the driver's side wheel well, and then a few more underneath the front end on the driver's side. Use a small flat head screwdriver to pop the center portion out and unlock it, then pull the rivet out.

Figure 2.1. Pop the center of the rivet out to unlock it 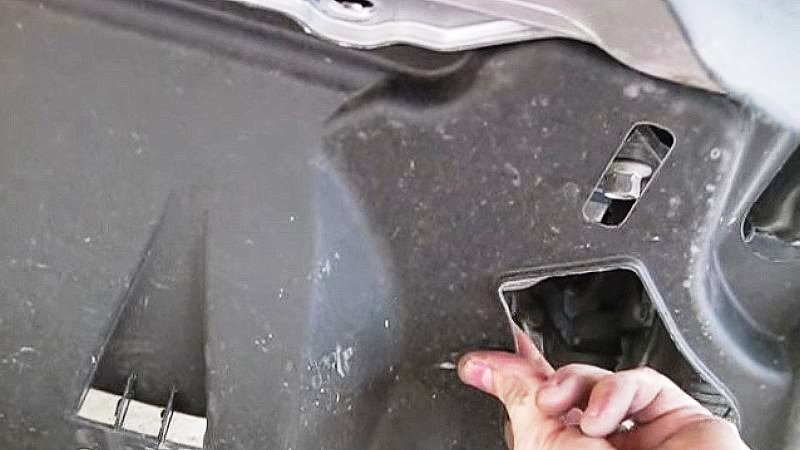
Figure 2.2. Bend the splash shield back and out of the way.
Step 3 – Drain transmission fluid
The drain and fill plugs are bolts with recessed 3/8" ports, perfect for fitting the drive end of your 3/8" ratchet with no sockets needed.
- The fill plug is located well below and just behind your battery (towards the firewall).
- The fill plug might be either a bluish color or have some kind of marking on it, but the recessed 3/8" square hole should be a dead giveaway.
- Remove the fill plug in order to break the vacuum and allow the fluid to flow faster.
- From underneath your car, find the drain plug and remove with your 3/8" ratchet.
- Make sure that your drain pan is in position.
- When your tranny is draining, inspect the magnetic end of the drain plug for any metal shavings or debris that can indicate internal problems.
- When it has completed draining, run a magnet through the spent oil in the drain pan to see if it picks up any metal shavings or debris as well.
- Wipe clean the drain plug and inspect the crush washer (replace this item if it is damaged).
- Replace the bolt and crush washer and torque to 33 foot pounds
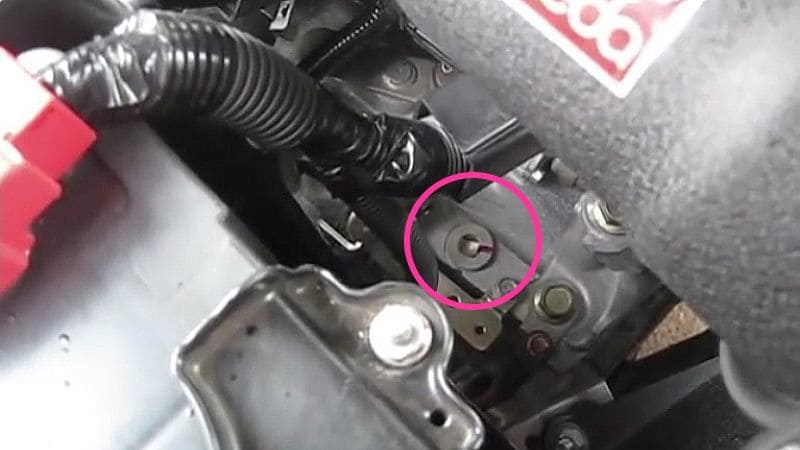
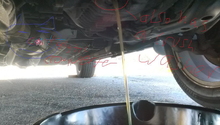
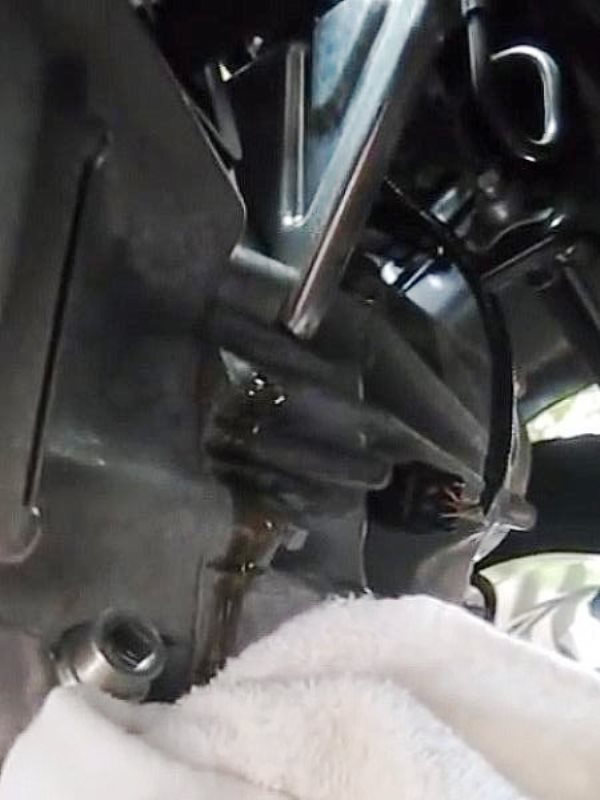
Figure 3.1. The transmission fill plug is just behind the battery near the bottom of the engine bay. 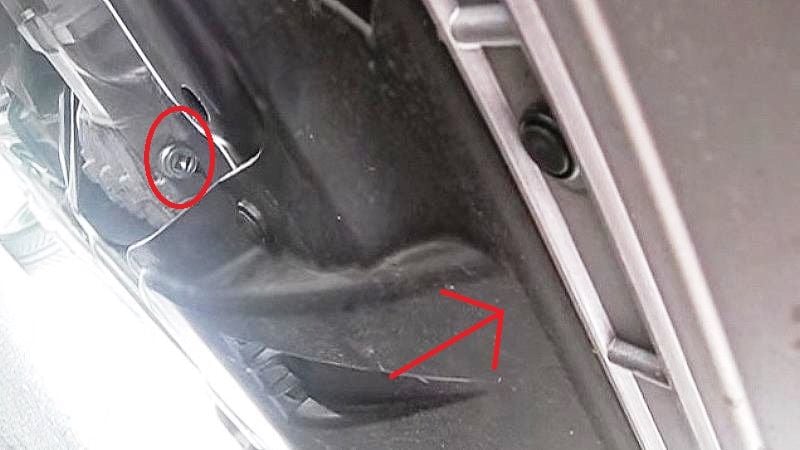
Figure 3.2. The arrow indicated upwards, as this is at an odd angle, and the circle is around the drain plug.
Step 4 – Refill the transmission with new fluid
There are many brands of fluid out there that you can choose. The Acura recommends Honda/Acura branded fluid, of course, but there has been much talk in regards to GM (ACDelco) Friction Modified Synchromesh Manual Transmission Fluid, an improvement if your shifting has become a little sticky or rough lately. Whatever you choose to use, you will need a funnel with a long hose to reach the fill hole. You can also get some aquarium tubing that matches the neck of your funnel to extend your reach down to the fill port. You should fill it with exactly as much fluid as you took out, then check with the 10mm bolt. You will need more than two quarts, but likely less than three.
Step 5 – Check the fluid level
You need to ultimately check the fluid level on a level car. You want to do this without dropping your car because you'll need to get under there again. Too much fluid is safer than not enough. You'll find just above the drain plug is a much smaller plug that is used to check for the correct amount of fluid. If you remove this plug and nothing comes out, you need to add more. If a bunch comes pouring out, then you need to let it drain until it is at barely a trickle. Once there, replace the check plug and you are done.
Step 6 – Replace the splash shield and drop the car
Once you have refilled the car with the appropriate amount of fluid, replace the splash shield by popping the plastic rivets back into place. You may find that some are too damaged to use again, so having some new replacements on hand is always a good idea. Drop the car and take her for a test drive. Make sure the car shifts well, and if no warning lights or any other concerns pop up, you are good to go.
Featured Video: Honda/Acura 6 Speed Manual Transmission Fluid Change
Related Discussions and Sites
- 6MT Manual transmission fluid change - AcuraZine.com
- 2004 TL 6 SP Manual, what kinds of fluids do you use - AcuraZine.com
- 6-speed manual transmission fluid change - v6performance.net
- Manual transmission fluid change - DriveAccord.net