Acura TL 2009-2014: Air Intake Reviews and How to Install
Installing a cold air intake kit in your Acura TL can increase its horsepower and decrease its fuel consumption. Read on to learn how to install one yourself and browse a few popular options.
This article applies to the Acura TL (2009-2014).
An air intake kit is designed to pull air from outside into your warm or hot engine, thus increasing its performance. This is considered to be one of the very first performance modifications that you should do for your Acura TL. Installing a cold air intake kit requires some work, since you have to remove the old air intake kit entirely. However, most brands create kits that are designed specifically for your car, and they claim that 90 minutes is all you need to get it installed. If you want to take your Acura TL to the next level, then read on to learn how you can do it yourself. We've even added a review of air intake kits to help you decide which is best for your TL.
Table of Contents
How to Install an Air Intake

Materials Needed
- Phillips screwdriver
- Flathead screwdriver
- Socket set
- Pliers
- Air intake kit
Step 1 – Remove the bumper
The bumper is held in place by a series of bolts and clips. Remove the bottom bolts and clips, then remove the top bolts and clips. When all the visible bolts and clips are removed, you will have to pull the bumper from one of the sides gently to pry it off of its hidden clips, then make your way to the other side. Finally, remove it, but before you take it away, make sure to disconnect the fog lights; you will just have to turn them half a turn counter-clockwise to free them.

Step 2 – Remove the battery
You will have to remove the battery and its cover to make some room for the removal of the old intake, and the installation of the new one. Remove the cover and the terminals, then pull the battery out.
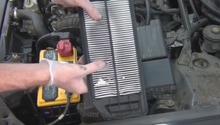
Step 3 – Remove the stock intake
The stock intake is held in place with three bolts. Remove the MAF sensor from it, then remove it out of the way.
Step 4 – Remove brake duct
The brake duct is held in place with two bolts, and with the front bumper off, you can't miss it. Remove the two bolts, then remove the brake duct.

Step 5 – Remove resonator
The resonator is also held in place by two bolts; simply remove the two bolts and remove the resonator out of the way.

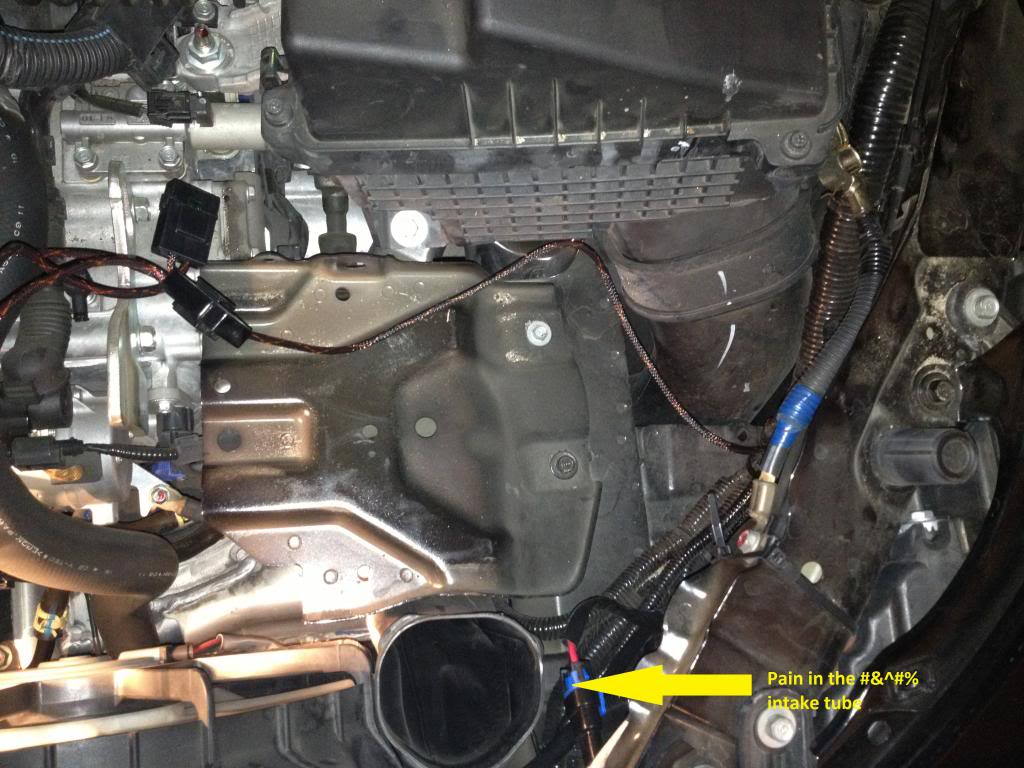
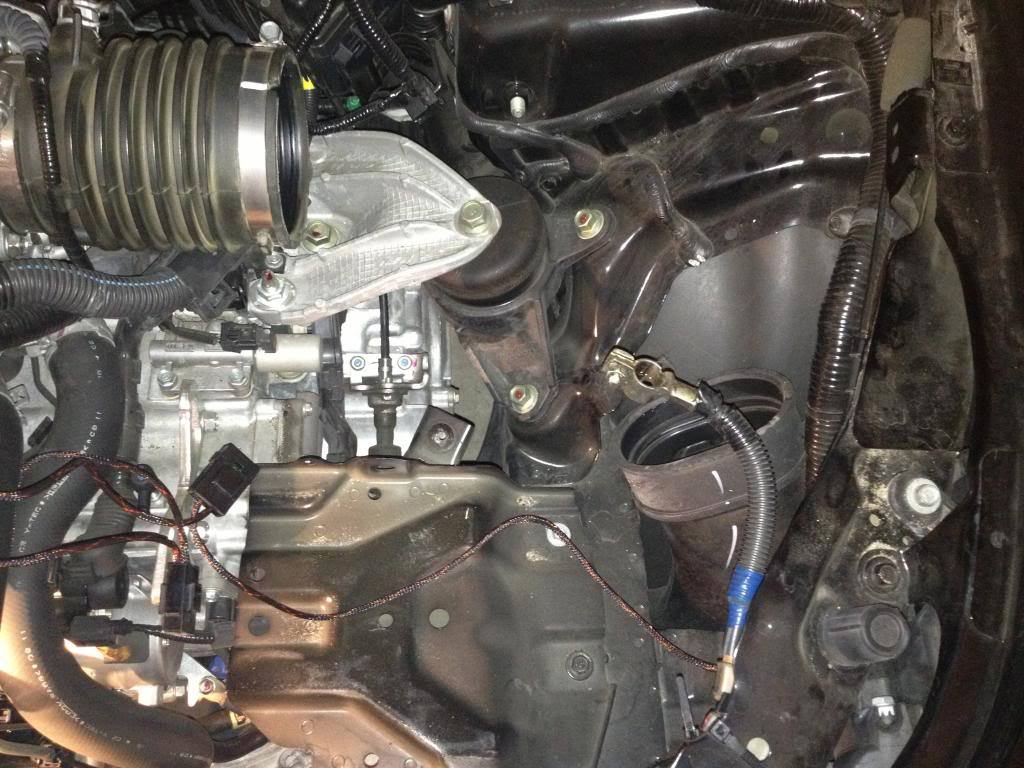
Step 6 – Remove intake tube
There is an intake tube connected to the battery tray. You can either remove the battery tray, or just reach the bolt that is under the tray, to disconnect the tube from it. It's much easier to remove the tube from the bottom, so push down on it, then try to remove it from the wheel well.

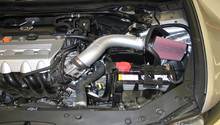
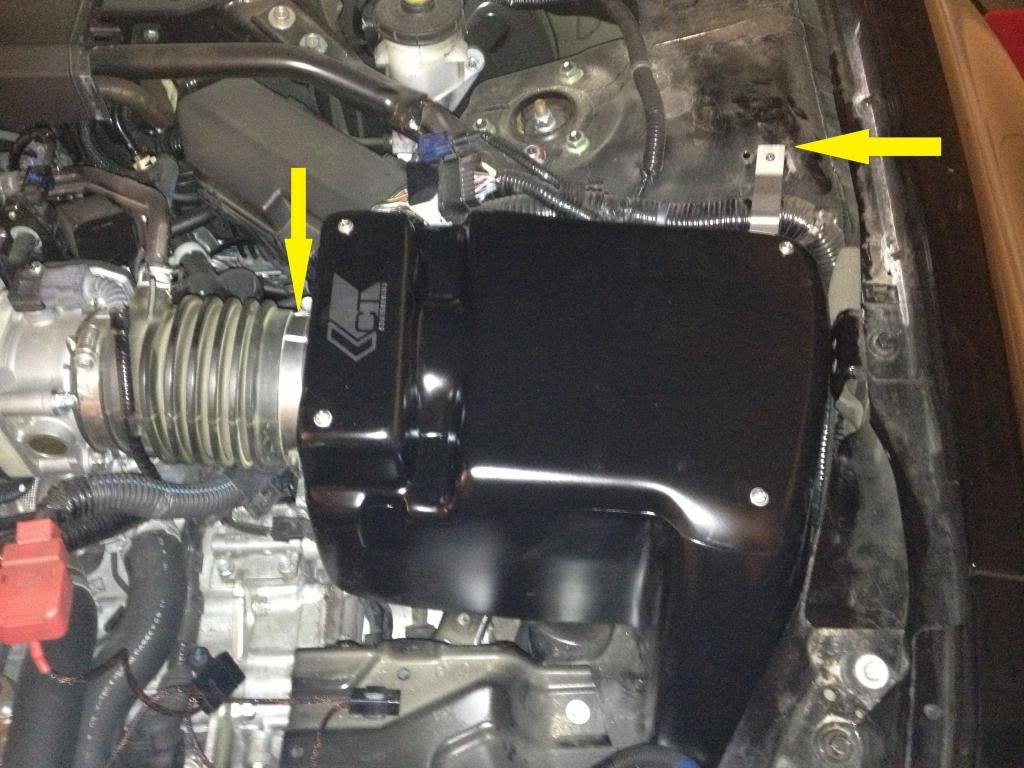
Step 7 – Install new air box housing
The new air box goes where the old one was. In this guide we are using a CT-E Icebox, but if you're using any kit, the installation manual that came with it should show you how to assemble it before installing it in the car. Connect the new assembly to the intake tube connected to the throttle body, then connect the bracket as shown in Figure 7.
Step 8 – Install brake duct
Use the new bracket to connect the brake duct in the same location the old one was in.

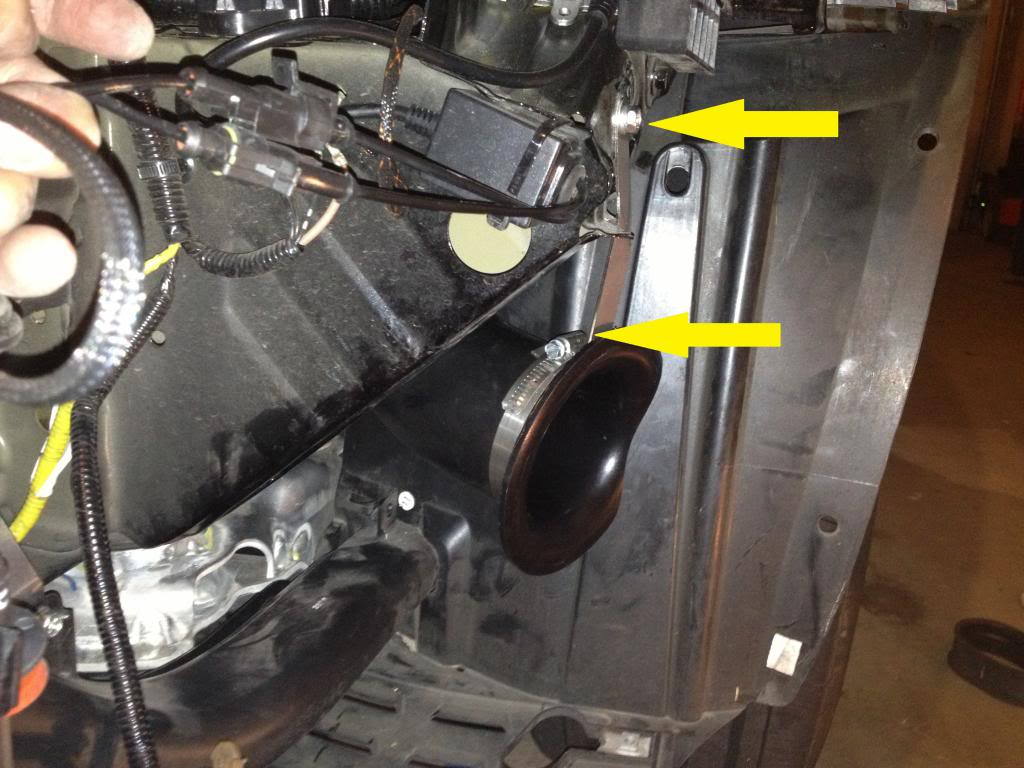
Step 9 – Install air horn
Install the air horn into the bottom of the air box housing, then feed it through the bottom and mount it to the frame with the supplied bracket.
Step 10 – Install battery and sensor
Install the MAF sensor back into the intake tube, then install the battery in place. Install the front bumper the opposite of how you removed it.

Air Intake Reviews
Installing an air intake kit can increase the performance of your Acura TL, as well as save you some money on gas. Most of the kits come specifically designed to fit your Acura's year and model, so you just have to follow some simple instructions to get it on. When you decide to modify your TL with a new air intake kit, you will be faced with numerous options. We gathered the most popular brands for your Acura TL and broke them down by specification. Read on to choose the best air intake kit for your needs and budget.
CT Engineering |
Takeda |
K&N | |
|---|---|---|---|
Price |
$538 | $275 | $284 |
Resuable Filter |
Yes | Yes | Yes |
Power Gains |
16 HP | 5-10 HP | 15 HP |
Construction |
Fiberglass | Aluminum | Aluminum |
Warranty |
2 Years | 2 Years | Million Mile |
Best Value: K&N
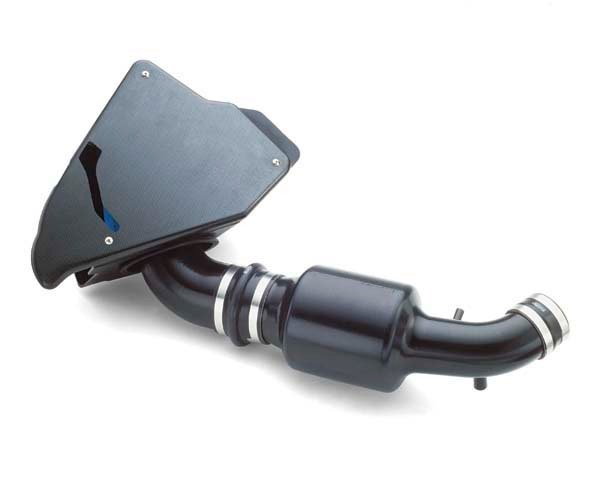
CT Engineering
Price – $538
Reusable Filter – Yes
Power Gains – 16 HP
Construction – Fiberglass
Warranty – 2 Years
The CT Engineering comes in a glossy black finish, which is designed from fiberglass material. Its unique design prevents any water from going into the engine, which is more than most competitors can say about their products. It comes with everything you need to get it into your engine compartment, including the same locations for your sensors and such. The intake tube on this kit has an integrated velocity stack, which increases the air flow going into the engine, thus increasing its performance. This kit comes with a tube, called the air horn. It mounts on the bottom, behind the front bumper, which brings in the coldest of air without any restrictions. Although it may look closed like the stock air box, it definitely gives your engine compartment an aftermarket look. The company claims you can get the whole procedure done in under two hours; however, no one agrees with them, as you have to remove the front bumper completely to mount some of the components. Recommended if you want to increase performance and you don't mind spending the money.
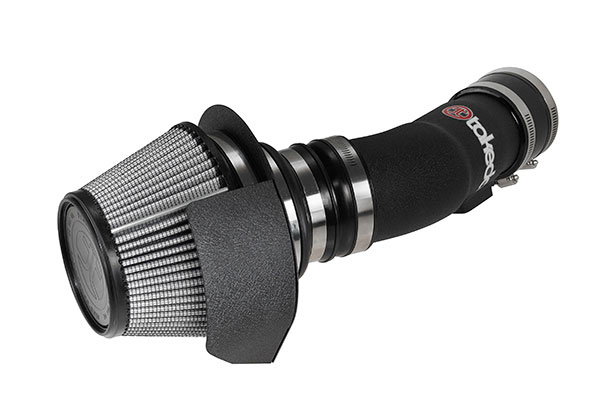
Takeda
Price – $275
Reusable Filter – Yes
Power Gains – 5-10 HP
Construction – Aluminum
Warranty – 2 Years
This kit comes custom designed to fit your exact TL, which means no hassle when it comes to installation. This aluminum-designed kit forces rich oxygen to go into your engine, giving you five to ten extra horsepower. Unlike most of the competitors, this kit features an oil-free filter, which means you don't have to do any re-oiling when you're maintaining the filter. Most customers claimed they experienced an instant power increase, without any tuning. If you think performance is all you get with this kit, you may want to think again, because everyone swears this can add the best tone to your Acura TL. Some customers complained about the installation, claiming it took longer than what was advertised. The warranty is the biggest issue that customers have with this kit. They all agree that if the company claims this can last a very long time, then why do they only offer a two year warranty? Recommended if you're looking for a performance increase, as well as a roaring sound.
K&N
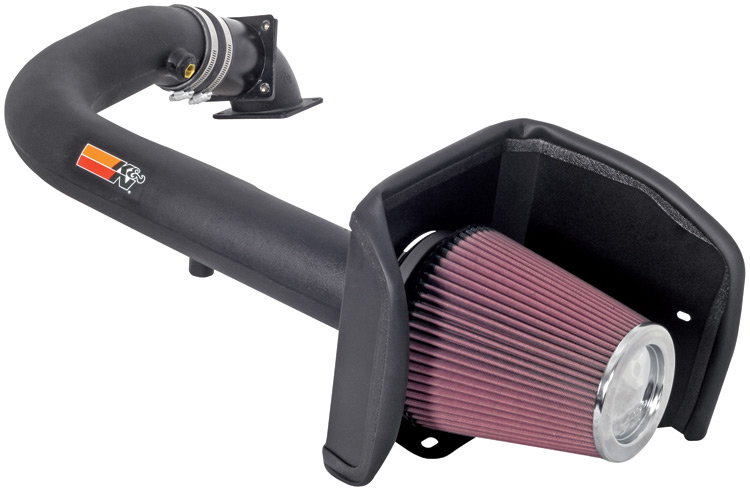
Price – $275
Reusable Filter – Yes
Power Gains – 15 HP
Construction – Aluminum
Warranty – Million Mile
The K&N air intake kit is considered to be one of the most reputable brands on the market today. The company is trusted by many, and their million mile warranty proves their loyalty to their customers. The K&N air intake kit comes in four options: powder coated blue, powder coated red, powder coated silver, or just straight polished. When compared to its competitors, no one else offers a variety in colors like this one, which is a big selling point to the enthusiasts who like to show off their engine compartment. This kit comes equipped with everything you need to install it, from the main bracket to the smallest nuts and bolts. The company claims this kit can be installed in just about 90 minutes or less, and a lot of customers can back this up. With this kit, you will be paying a great price, which is considered an investment when you consider that the filter is washable; this kit can last you for the life of the car. Recommended if you're looking for a reputable company with a great warranty.
Related Discussions
- Intake install - Acurazine.com
- Intake modification - Acurazine.com
- Intake replacement - Acurazine.com