Acura RDX: How to Replace Air Filter
For the best drive-ability and fuel economy, your engine needs a healthy supply of clean air for efficient operation. While a clean air filter element will adequately flow the required amount of air to feed the engine, a dirty or restricted filter will rob your car its precious power and diminish engine performance. Take a few moments to replace your air filter and ensure your car can breathe freely.
This article applies to the Acura RDX (2007-2015).
The air filter acts as a screen to catch any dirt and debris from entering the intake tract and subsequently the engine. Over time, the filter element will become increasingly contaminated with filth, and eventually restrict engine performance. Many RDX owners have experienced poor throttle response and a general lack of power, only to find out that a restricted air filter was the root of the problem. Considering its relatively inexpensive cost, it is generally recommended that you replace the air filter on an annual basis. Most dealers will charge an outrageous amount for this simple five minute job, so save yourself some money, as wrenching on your own car doesn't get much easier than this DIY project. This article will guide you through the process of replacing the air filter element on the 2007 to 2015 Acura RDX.

Materials Needed
- Phillips screwdriver
- 3/8 drive ratchet and extension
- 8mm socket
- New air filter element
Step 1 – Remove old air filter
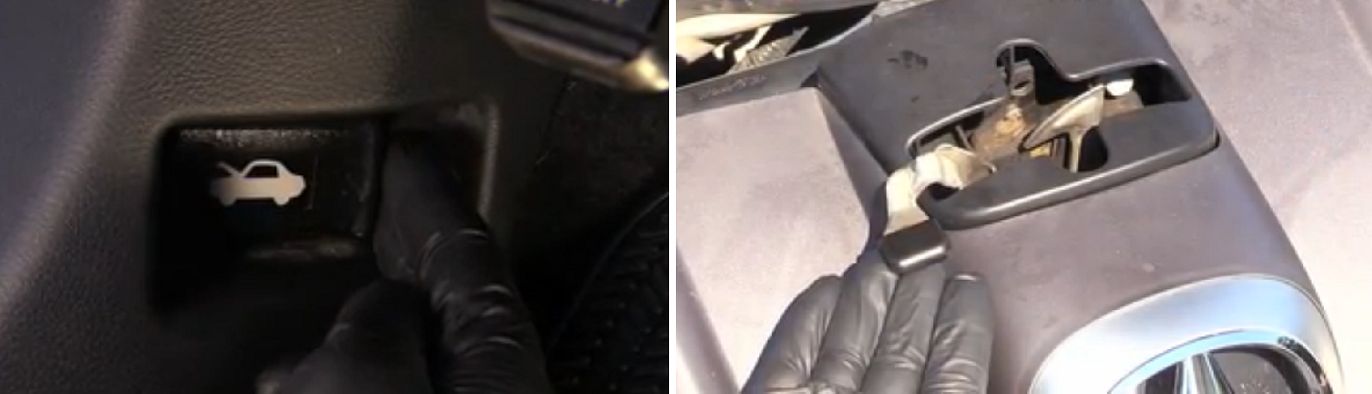
- Release the hood by pulling the hood release lever located on the left side of the driver foot well. Depress the hood safety latch and lift the hood, making sure to support it with the hood prop.
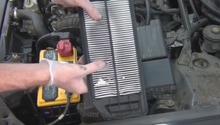
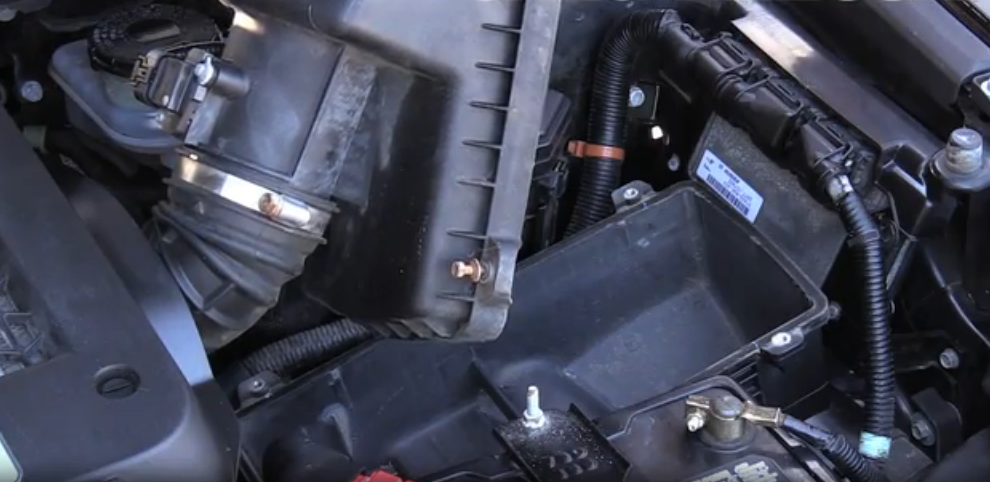
- Locate the airbox on the driver's side of the engine bay. For 2007 to 2012 models, loosen the (4) screws securing the airbox lid in place using either an 8mm socket and ratchet or a Phillips screwdriver. For 2013+ models, simply undo the (2) airbox lid hold down latches.
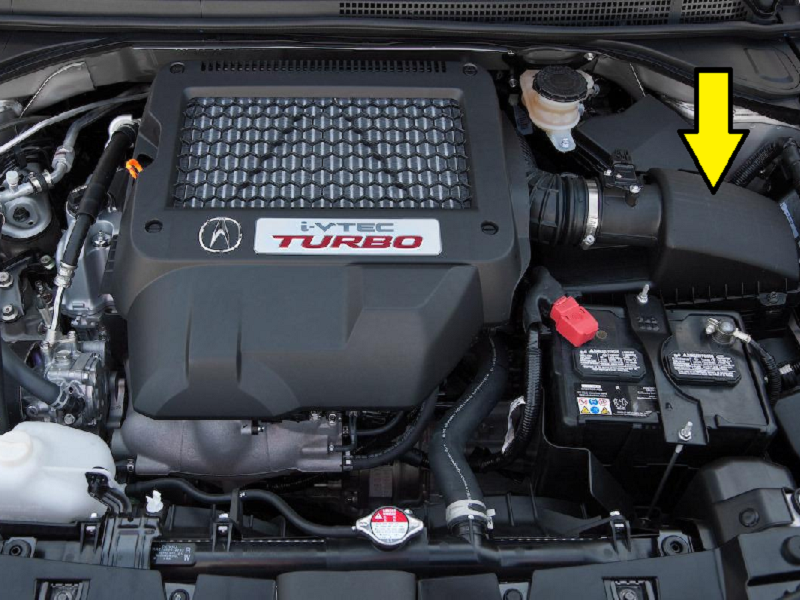
Figure 2. Airbox location. 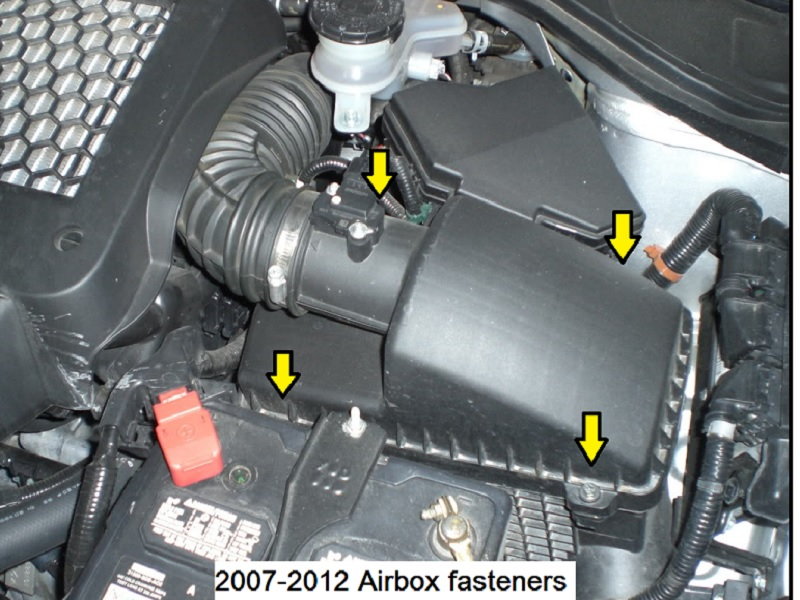
Figure 3. 2007-2012 RDX airbox fasteners. 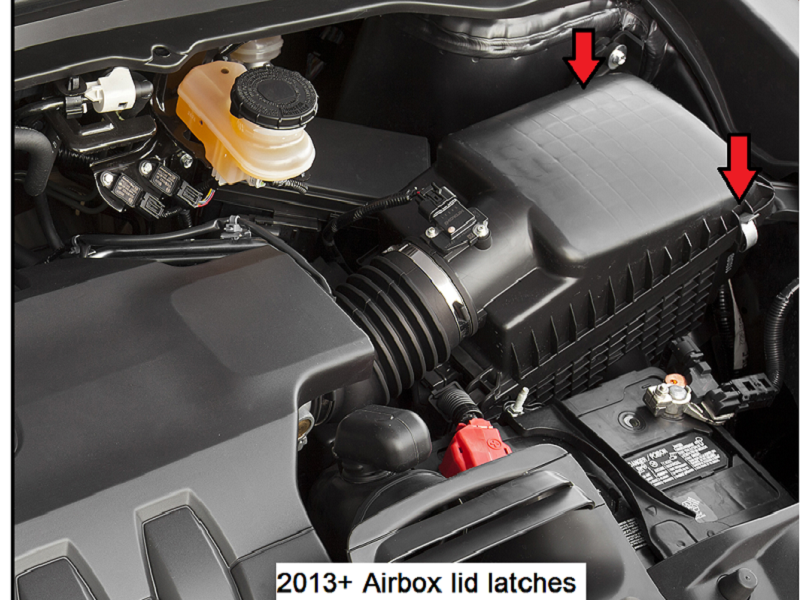
Figure 4. 2013+ RDX airbox fasteners.
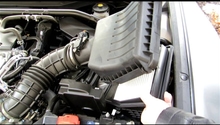
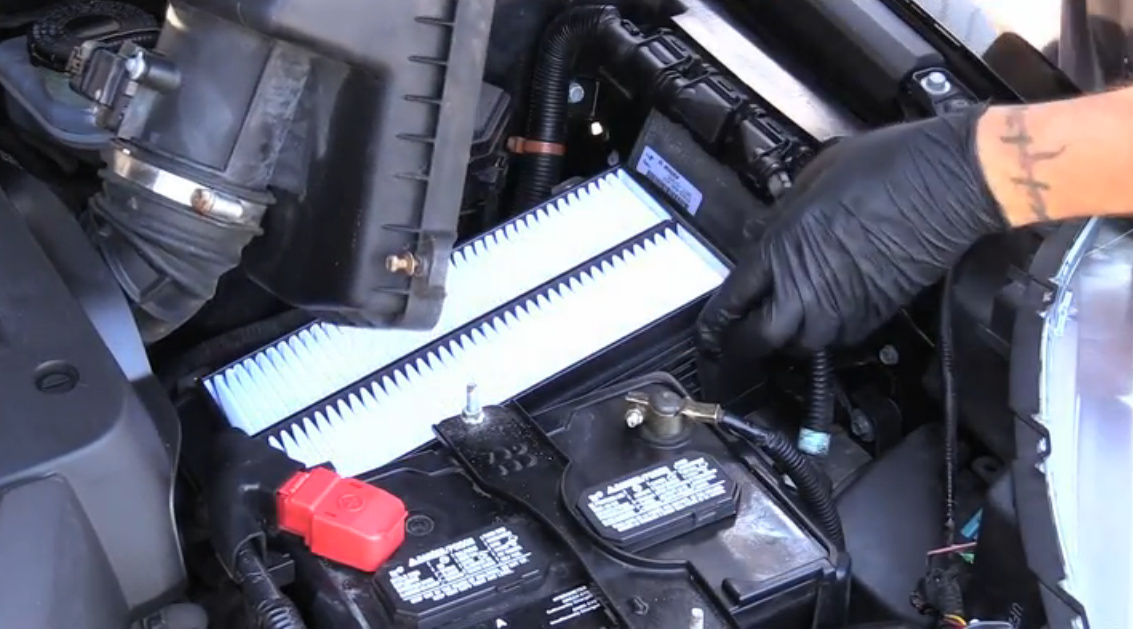
- With the screws removed or latches undone, lift up on the airbox lid to reveal the air filter element.
Pro Tip
It is not necessary to completely remove the screws from the airbox lid for 2007 to 2012 models to access the filter element. The screws can simply be loosened and the airbox lid lifted up and out of the way.
Step 2 – Replace air filter element
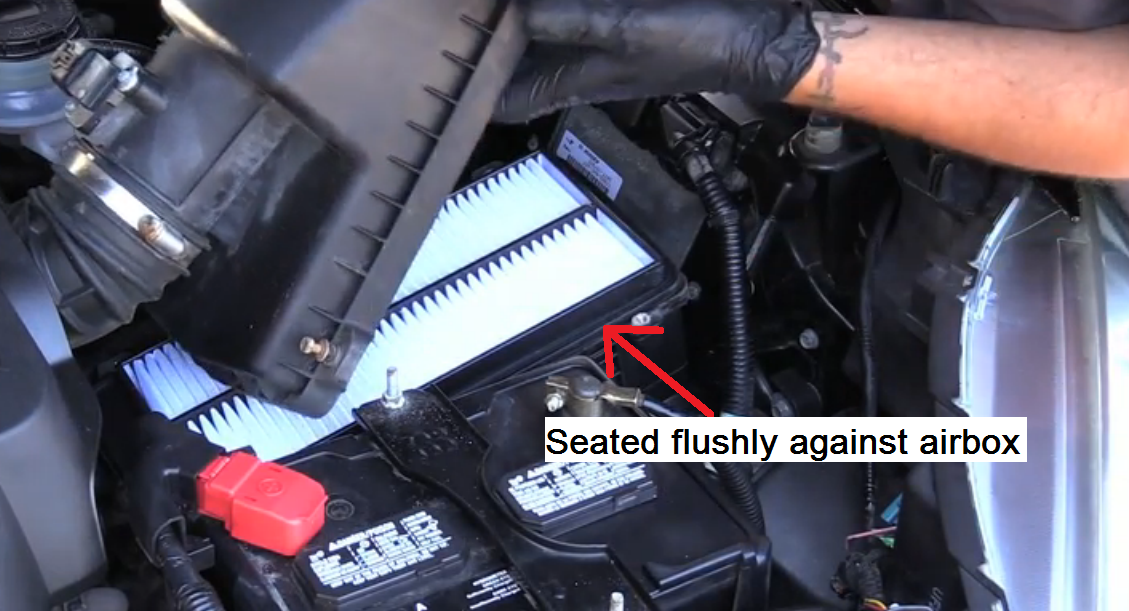
- Remove the air filter element from the airbox, paying close attention to its orientation, as it only fits in the airbox one way.
- Clean any accumulated debris (dirt, leaves, bugs) from the airbox before inserting the new filter element.
- With the filter element properly seated in the airbox, install the airbox lid. Be sure the lid is properly aligned to create an airtight seal before re-installing the (4) hold down screws or locking the hold down latches in place.
- Close the hood and you'e done.
Featured Video: Acura RDX Air Filter Replacement
Related Discussions
- Engine Air Filter - AcuraZine.com
- How to Replace Engine Air Filter - AcuraZine.com
- DIY for Air Filter - AcuraZine.com
- Broken Engine Air Filter Housing Help - AcuraZine.com