Acura TL 2004-2008: Air Intake Reviews and How to Install
A cold air intake kit can add a few more horses to your Acura TL, and let your J32 engine sing a sweet note.
This article applies to the Acura TL (2004-2008).
An aftermarket cold air intake replaces your TL's factory air box. The stock intake system on your TL is comprised of several plastic pieces assembled together, while most aftermarket intakes are singular metal tubes, designed to reduce tumble and turbulence as well as increase flow. Additionally, most aftermarket intakes angle the piping and filter far away from the engine, and low down. Keeping the filter further away from the hot engine reduces intake temperatures and heat soak. Also, in theory, scooping up air from down low in the engine bay is beneficial, as that area is a high pressure zone and offers greater air density, meaning a better charge as well as greater power. That all sounds great, but speaking of sound, the biggest perk of an aftermarket intake on your V6-powered TL is the awesome induction note that is generated. It gives a bassy, full sounding induction note down low, makes VTEC roar at the top end. If that sounds like something you're interested in, then read on to learn which intake is right for you, and how to install one.
Table of Contents
How to Install Your Air Intake

Materials Needed
- Flat head screwdriver
- Phillips screwsdriver
- Socket
- Pliers
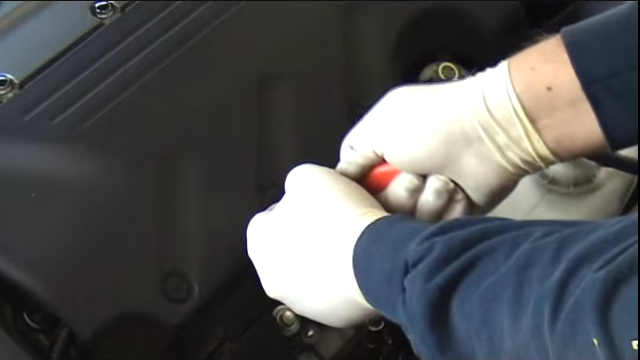
Step 1 – Remove engine cover
To remove the engine cover, use your flat head screwdriver to remove the three clips on top that are holding the cover in place.
Step 2 – Disconnect intake tube
Loosen the worm screw on the connection between the intake tube and the throttle body using your socket or flat head screwdriver. Disconnect the MAF sensor by pulling the plastic tab and pulling it out. Then disconnect the pipe connected to the side of the intake tube by squeezing its clamp then pulling it out. Remove the intake tube out of the way; you will have a spring on the side connecting to the air box, just pull it up and remove the tube.
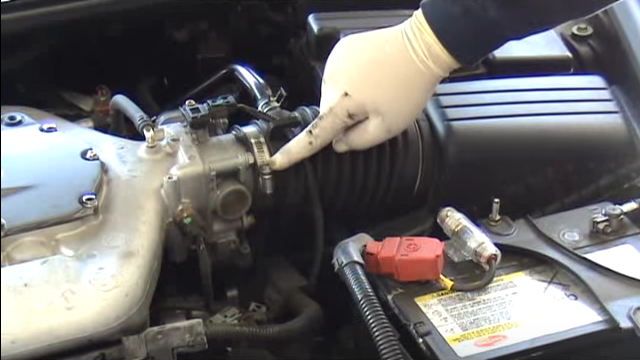
Figure 2. Loosen worm clamp. 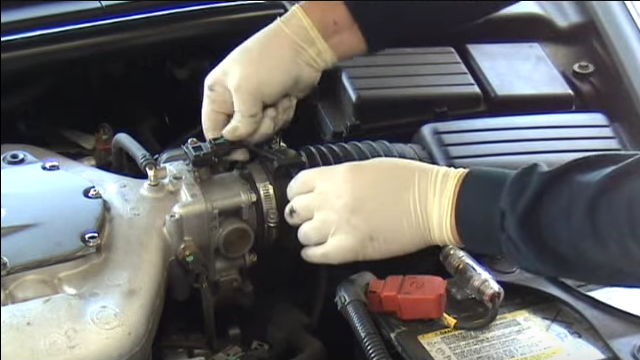
Figure 3. Disconnect MAF sensor. 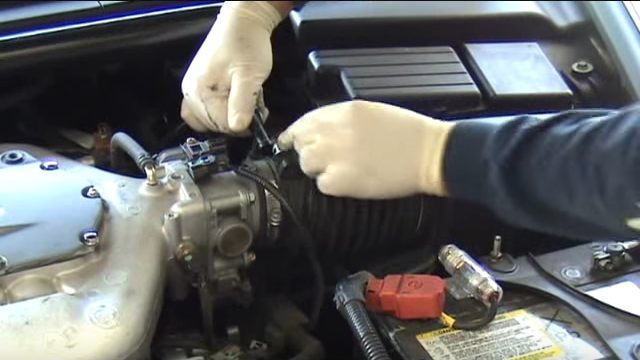
Figure 4. Disconnect pipe.
Step 3 – Remove air box cover
Remove the four Phillips screws holding the top of the air box in place. They are located around the air box. Pull the air box up to remove the top.
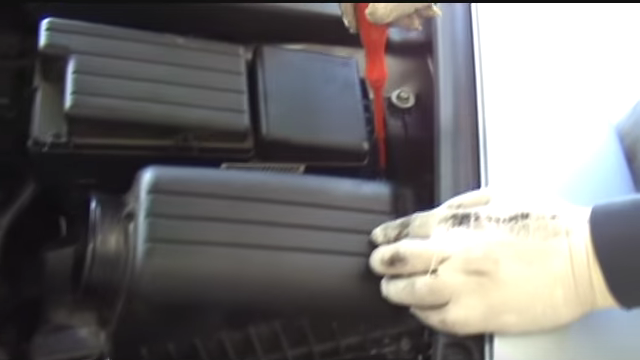
Step 4 – Remove air box
To remove the air box completely, you will need to remove three bolts. The first one is located on the side of the air box, next to the fuse box. The second one is located between the air box and the fuse box, and the third one is located on the other side of the air box. Pull the air box out of the engine compartment.
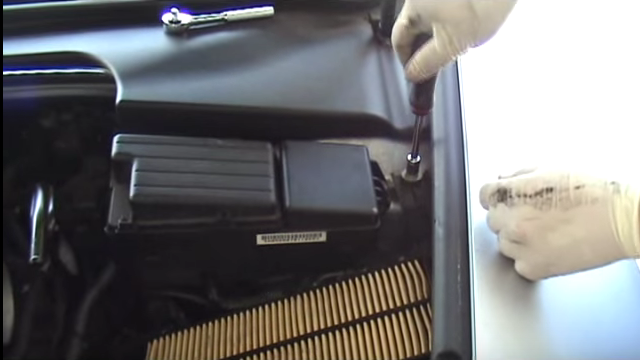
Figure 6. First bolt. 
Figure 7. Second bolt. 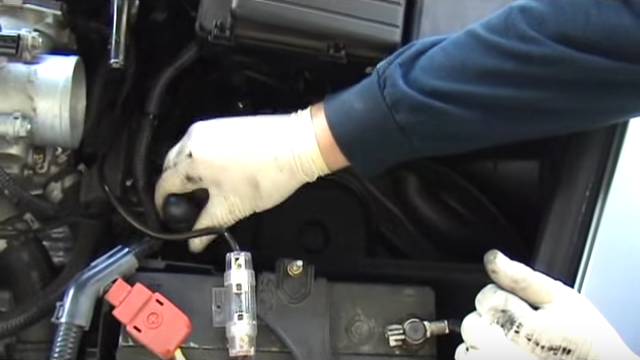
Figure 8. Third bolt.
Step 5 – Remove resonator box
Remove the bolts holding your bumper in place, then remove it. This will give you more room to remove the resonator box. Remove the resonator box bolt attaching it to the car, then remove the bolt attaching the box to the tube.
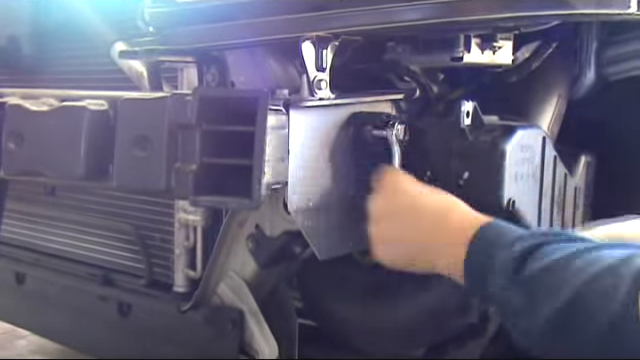
Figure 9. Remove resonator box bolt. 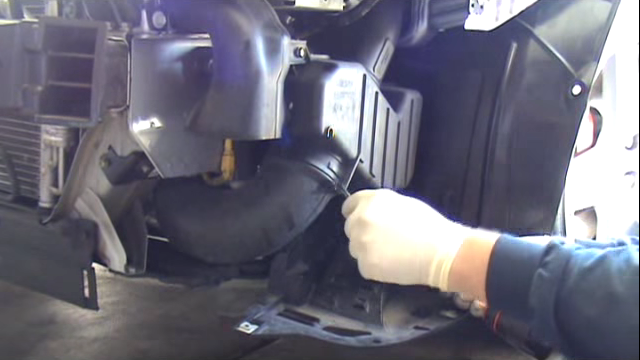
Figure 10. Remove two bolts to remove tube.
(Related Article: How to Replace Front Bumper - AcuraZine.com)
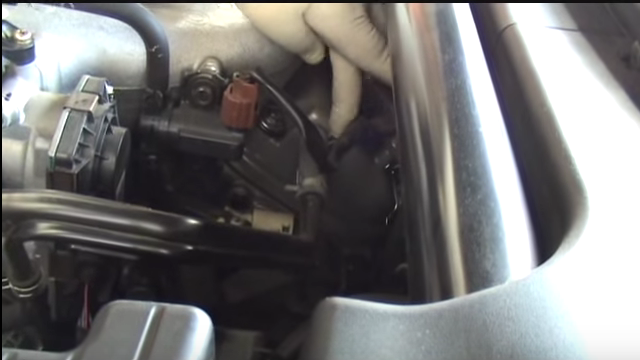
Step 6 – Remove hoses
Remove the hose in Figure 11, then set it aside; you will need it.
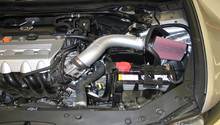
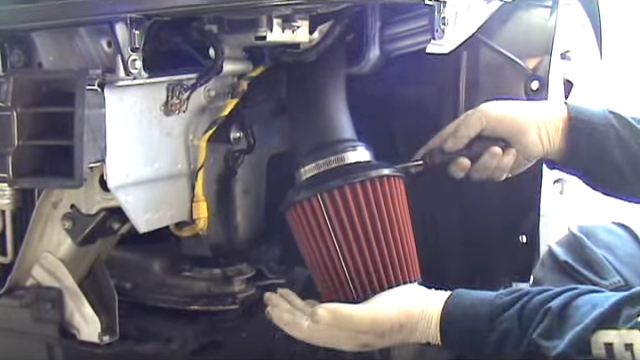
Step 7 – Install new intake
Feed the new intake tube from the bottom, where you removed the resonator, into the top. Connect the new tube to the throttle body, then tighten the worm clamps. Plug the hose you removed in Figure 11, then plug it into the side of the new intake tube. Finally, install the air filter onto the bottom of the new intake tube, then tighten its worm clamp. Connect the MAF sensor and anything else you may have removed. Finally install the bumper back on.
Featured Video: DIY Installing Cold Air Intake
Air Intake Review
Cold air intake kits can come in a variety of shapes, forms, and prices. They can all increase your Acura TL's performance, but choosing the right one for you and your budget is a task. We will shine some light on the most popular brands of cold air intakes. Below is a break down for you, so you can ensure you choose the best option for you. Whether you're looking for horsepower, sound, or affordability, read on to make your decision.
K&N |
Injen |
AEM V2 |
Takeda | |
|---|---|---|---|---|
Price |
$289 | $240 | $296 | $275 |
Reusable Filter |
Yes |
Yes |
Yes |
Yes |
Power Gains |
15 HP | 10-15 HP | 15 HP | 10-15 HP |
Construction |
Stainless Steel | Aluminum | Aluminum | Aluminum |
Warranty |
Million Mile | Lifetime | Lifetime | Two Year |
Best Value: Injen
K&N
Price – $289
Reusable Filter – Yes
Power Gains – 15 HP
Construction – Polished Aluminum with Plastic/Foam Filter Shield/Short Ram Intake
Warranty – Million Mile
The K&N unit is a short ram intake. This means a shorter intake charge, in theory, promotes more immediate response. The K&N intake offers their ubiquitous 1,000,000 mile warranty, which is a definite perk. Due to the short ram design, installation is a piece of cake, since the intake doesn't need to be routed into the fender well. K&N intakes utilize a shield for the filter, which in theory should aid intake charge temperatures by protecting the filter from the heat of the engine. Additionally, K&N is the gold standard of engine air filters, and this unit features their "rechargeable" oil filter. Recommended for someone who wants the combination of warranty offered by the K&N and safety from hydrolocking the engine afforded by the short ram design.
Related Video: Acura TL K&N Intake
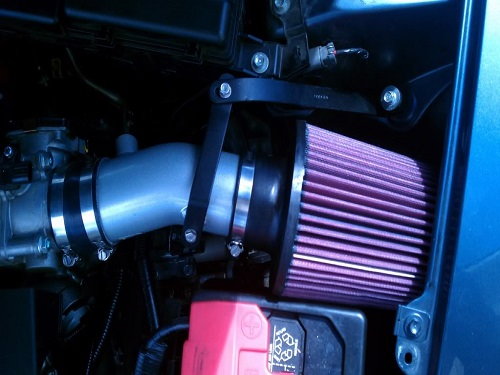
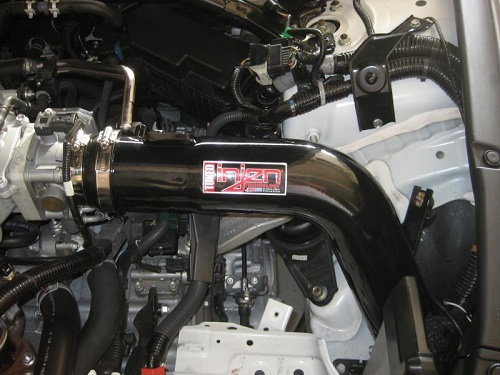
Injen
Price – $240
Reusable Filter – Yes
Power Gains – 10-15 HP
Construction – Aluminum/Cold Air Intake
Warranty – Lifetime
The Injen intake is a traditional cold air intake, with longer tubing that extends the filter to the lower part of the wheel well. This intake utilizes a constant diameter piping from the filter to the throttle body, and is known for having good fitment with general ease of installation. Compared to the other cold air intake in the review, the Injen unit is less expensive and less commonly used. Forum users rarely report issues with this intake, and it is commonly used on other platforms sharing the J-series engine. Recommended for people who want a cold air intake at a lower price point.
(Related Thread: Injen CAI vs. XLR8 and AEM Intakes - AcuraZine.com)
Related Video: Acura TL Injen Cold Air Intake
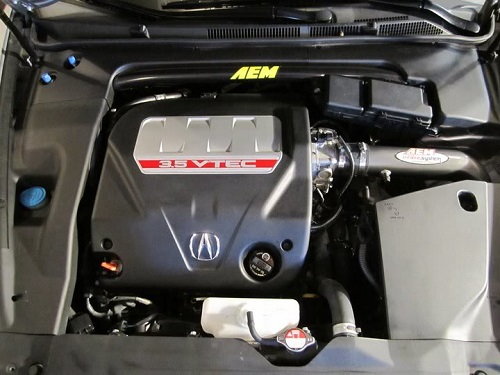
AEM V2
Price – $296
Reusable Filter – Yes
Power Gains – 15 HP
Construction – Aluminum/Cold Air Intake
Warranty – Lifetime
The AEM V2 intake is the most popular choice for J-powered Hondas and Acuras. The AEM intake is a long piping cold air unit, similar to the Injen intake. The two intakes do differ drastically in terms of design approach. The V2 unit does not offer a constant diameter piping from the filter to the throttle body. Instead, AEM has designed a bespoke system with a "tube inside of a tube" design. Basically, while the piping at the throttle body is approximately 3" in diameter, as you follow the piping towards the filter, the outside diameter drastically increases to over 4". Internally, the 3" piping continues for portion of the remaining pipe, creating an internal resonance chamber. In theory, this design increases intake resonance, making for a louder sound when on throttle. As previously stated, this design seems to be bespoke to this platform and brand, and is a very unique and cool idea. Additionally, this intake has been dyno proven to be superior to the other three in this test. The Injen is a VERY close second place finisher in this regard. Recommended for people who can afford the most expensive option and want the most acoustically tuned sound and performance.
(Related Thread: AEM Intake Makes Good Dyno Gains - AcuraZine.com)
Related Video: AEM V2 Intake - Acura TL
Takeda

Price – $275
Reusable Filter – Yes
Power Gains – 10-15 HP
Construction – Composite/Short Ram Intake
Warranty – Two Year
Takeda is a newer player in this field. This intake is also a short ram type, similar to the K&N intake, with a chief difference being the Takeda's lack of shielding for the filter and the composite design of the piping. Much like K&N, Takeda manufactures their filters in house. This intake offers the easiest installation of the four, as its design is the most simple. Due to the "short ram" design and fat filter element, the Takeda intake has a sweet induction note that comes on from down low in the powerband. Gains are a bit modest in this group, as issues such as heat soak can present themselves. Recommended for people who want a budget short ram intake solution.
Related Video: Takeda Cold Air Intake for 2004-2008 Acura TL
Related Discussions
- Intake Removal Instructions - AcuraZine.com
- Help with Cold Air Intake Install - AcuraZine.com
- Cold Air Intake Types - AcuraZine.com
- Adding CAI - AcuraZine.com
- Cold Air Intake Worth Installing - AcuraZine.com