Acura TSX 2004-2008: How to Change Automatic Transmission Fluid
Much like engine oil, transmissions have a serviceable fluid, that if left unchecked, can wreck havoc and end up with some seriously costly repairs.
This article applies to the Acura TSX (2004-2008).
Your automatic transmission transmits the power from the engine through the flywheel, and then through the torque converter, which spins the gears in the transmission, then sends the power through the differential and out of the axles to the drive wheels. Sounds complicated, but fortunately your Acura's transmission works largely issue-free for many thousands of miles. The least you can do is regularly change the fluid that circulates in your transmission to keep it well lubricated and happy. Honda/Acuras advises to do this once every two years or 30,000 miles, so if your ride is due, let's get it done.

Materials Needed
- 4L of Honda ATF-DW1 and filter (PN 25430-PLR-003)
- Jack and jack stands
- 3/8" ratcheting wrench and extension
- 10mm socket
- Pliers
- Flat head scrwewdriver
- Drain pan
Step 1 – Prep the car
To get started, we need to jack the front end of the car up for access. Use the front jack point on the crossmember and then set stands on either side of the car on the reinforced part of the pinch welds. Do not work under a car without stands supporting it. With the car lifted up, use your 10mm socket and remove the screws holding the undertray up. With the undertray off we should have full access to the transmission.

Figure 1. Front jack point. 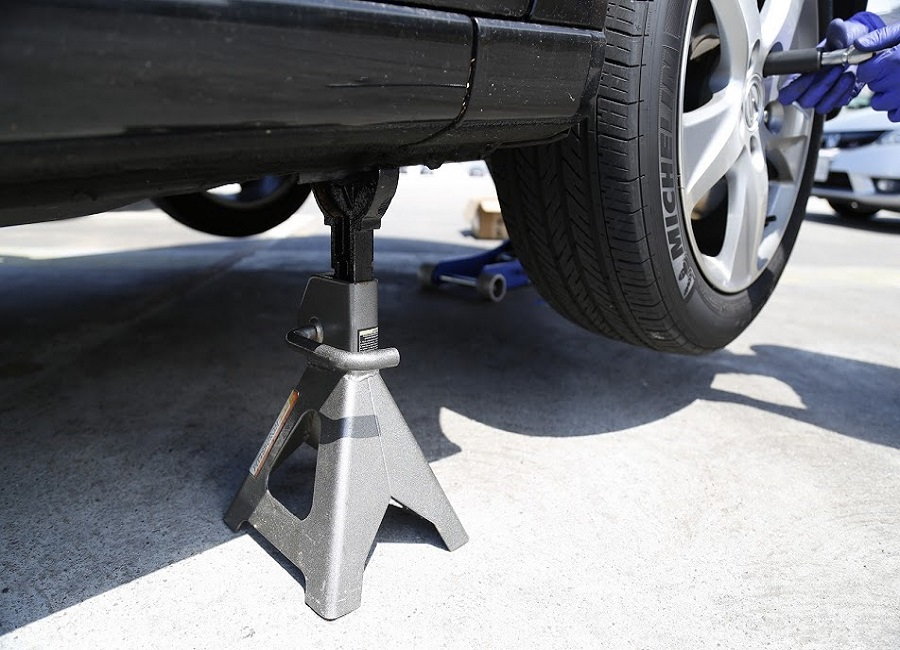
Figure 2. Set your stands on the pinch welds.
Step 2 – Drain transmission fluid
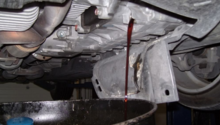
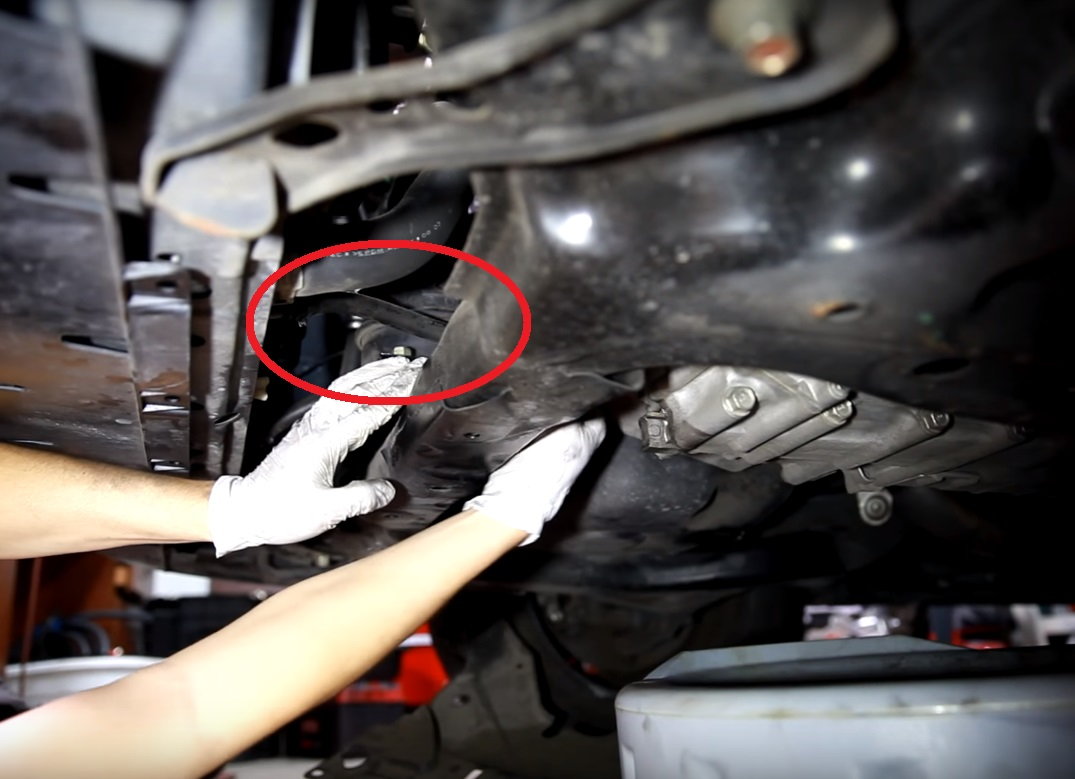
There are two angles of attack here. First up is the quick disconnect hose on the front of the transmission. This is the hose that runs from the heat exchanger paired with the radiator and the transmission itself. It has a heavy duty clamp on the heat exchanger side, so use your pliers and slide that clamp off. From there, you should be able to yank the hose off the heat exchanger and let the fluid drain from there. If the fluid is slow to drain, hop in the car and start it, and let it idle for a minute while keeping the transmission in park. Only do this for about a minute or so, just to help the fluid start to flow. After about a minute, shut the car off. Once the fluid flow has pretty much come to halt from that hose, refit it to the heat exchanger and slide the clamp back on it to keep it in place.
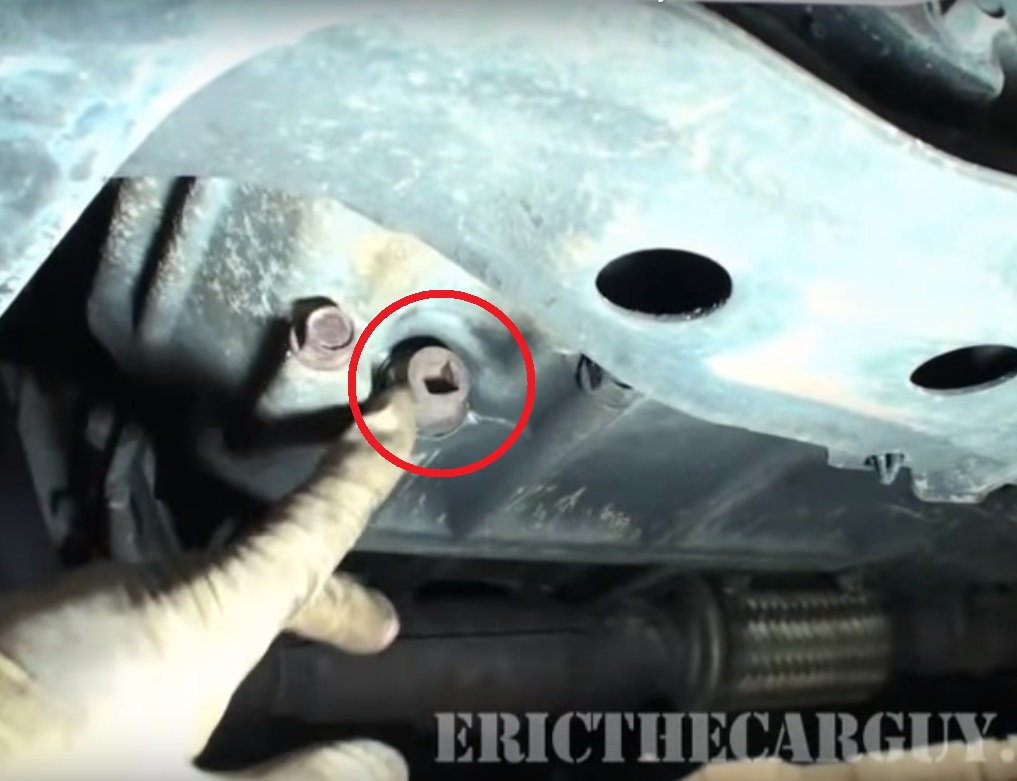
Our next angle of attack is the conventional drain plug in the side of the transmission. From the driver's side, look near the bottom of the transmission for a large bolt in the side of the transmission with a detent exactly the size of a 3/8" ratchet. Remove the plug and let it drain any last fluid from there. After it's done, refit the drain plug and tighten until snug (25 ft/lb).
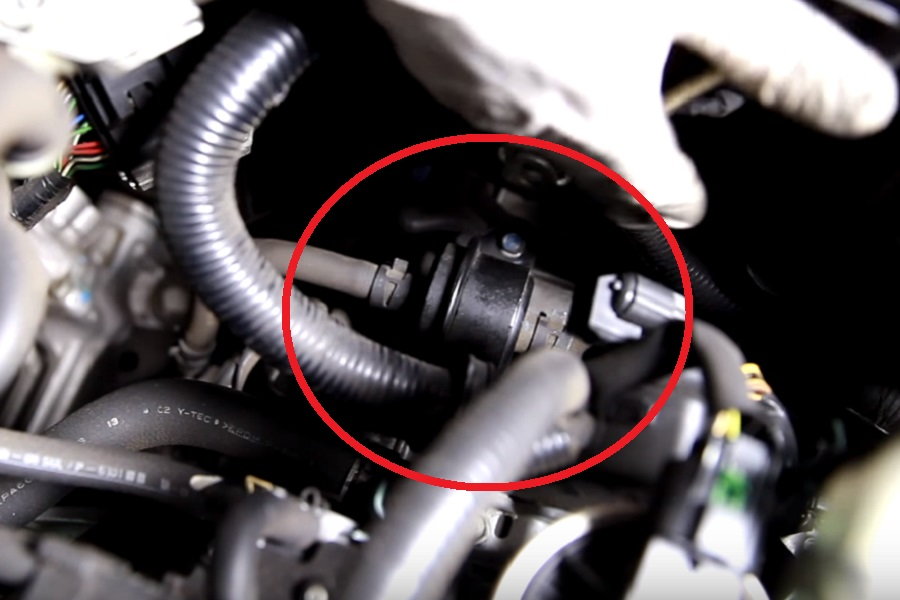
Step 3 – Replace transmission fluid filter (optional)
Your transmission has an in-line style filter, similar to an old school fuel filter, which is handy because it means we don't have to drop the pan to replace it! Located next to the engine, on top of the transmission, it is secured with two 10mm bolts and a bracket. Remove the clip and unclip the filter from the hoses to replace it.
Step 4 – Fill transmission fluid
Your Acura has an automatic transmission dipstick, which, for our purposes, also doubles as a place to fill the transmission. Pull out the dipstick, line up your funnel and pour in your ATF. Start with about two liters worth of fluid, check the level and keep filling as necessary. Depending on how much you were able to drain, this should end up around 3-4L of fluid.
Once the level is dead center, all that remains is to bolt back up the splash guard, and lower the car down from the jacks. Take a test drive and ensure the transmission seems to function right. If everything checks out, you're done!
Featured Videos: Acura TSX Automatic Transmission Fluid Service
-
TSX Transmission Flush
-
How to Change Honda/Acura Transmission Fluid
Related Discussions
- When to Change Transmission Fluid - AcuraZine.com
- Flushing Transmission Fluid - AcuraZine.com
- Transmission Fluid Filter - AcuraZine.com