Acura TSX: How to Replace Shocks and Review
Are the shocks in your TSX worn out and in need of replacement? This article will not only help you choose the right replacement shocks for your ride, but guide you through the process of installation, step by step.
This article applies to the Acura TSX (2004-2014).
Shocks take a ton of abuse, and when they eventually wear out, you will be taking the abuse as your shocks fail to absorb those potholes like they used to. Replacing shocks in the Acura TSX is a little more complicated than most cars, but it is still a job that can be completed by most anyone with a little time on their hands and some basic tools. Keep reading and we'll walk you through the process of replacement, plus review some of the most popular shock options on the market today.
Table of Contents
How to Replace Your Shocks

Materials Needed
- Floor jack and jack stands
- Ratchet and assorted common size sockets
- Impact gun or breaker bar (if needed)
- Spring compressor tool
- Hex key
Of course, if you are going to be working on the suspension of the car, you need to get it off the ground and remove the wheels. Loosen the lug nuts on all four wheels with the car on the ground to make your life easier. Jack up the front and put it on jack stands, then jack up the back. If all you have is a pair of jack stands, you can do one end at a time.
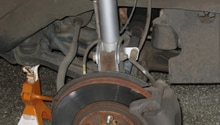
Step 1 – Remove the front shocks
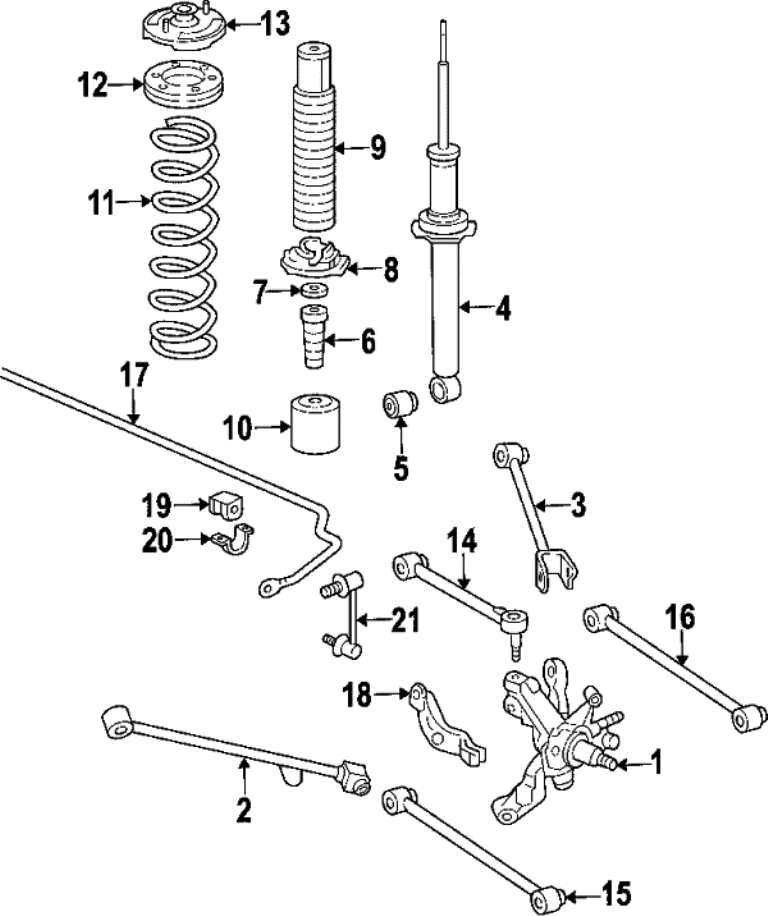
The TSX uses a double wishbone front suspension, with a non adjustable coil over, like many Acura and Honda models. Because they aren't MacPhersen struts, you won't affect the wheel alignment by removing the shocks, but many people still erroneously call them struts.
- Remove the pinch bolt from the fork at the bottom of each shock.
- Step down on the brake rotor and the shock should separate from the metal fork.
- Use the floor jack to lift the steering knuckle and increase the clearance between the top A-arm and shock.
- Remove the five bolts under the hood from the top of the shock tower.
- As you lower the shock, tilt the lower part toward the front of the car and move down until the spring clears the upper arm.
- Remove, spring side first, tilting toward the rear of the car.
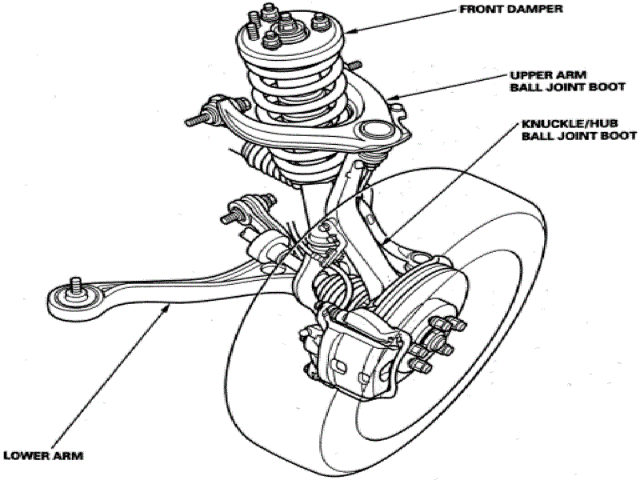
Figure 1. Front suspension of the TSX. 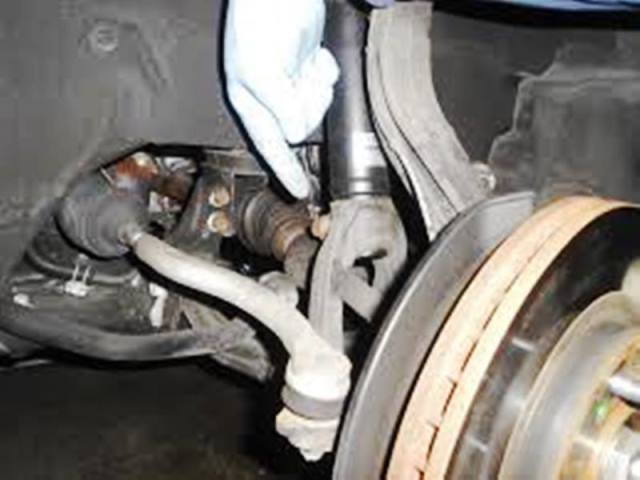
Figure 2. Lower shock pinch bolt. 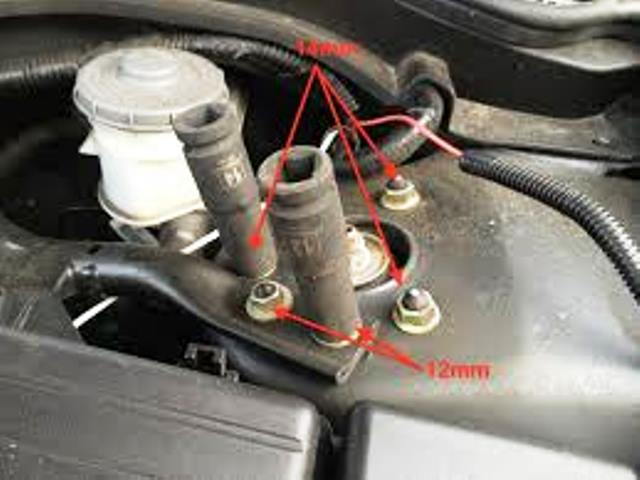
Figure 3. Five upper shock mount bolts.
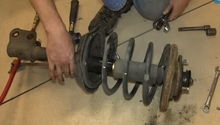
Step 2 – Install new front shocks
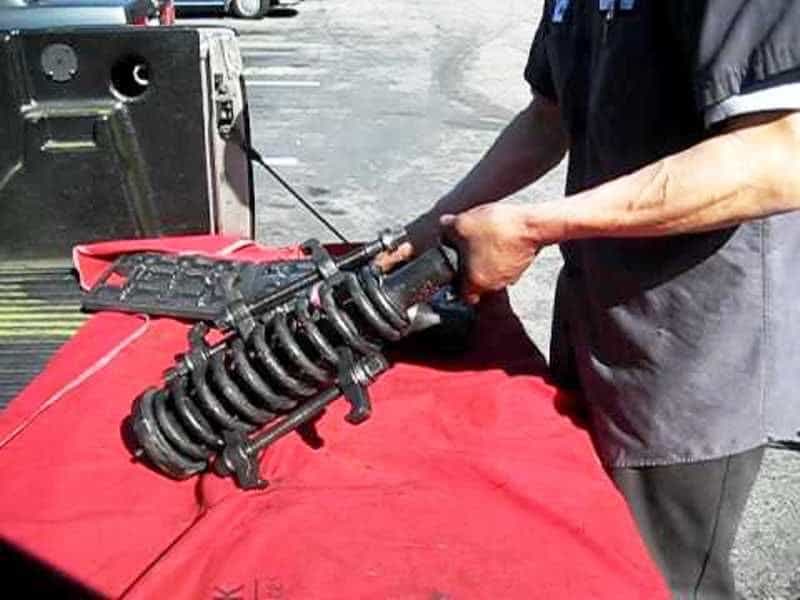
- Use a spring compressor tool to compress the springs just enough so that they aren't putting any pressure on the top bolts.
- Loosen the top nut with a hex key and wrench, or you may get lucky and be able to blast it off with the impact gun.
- Remove the top nut and washer, then remove the compressed spring from the shock.
- Disassemble the shock, retaining the pieces needed for your new shocks (this will vary based on which kind you buy).
- Install the needed hardware on the new shocks, then install the spring.
- Reinstall the top nut and washer.
- Guide the coil over back in the car and loosely tighten all the nuts.
- Once everything is back in place, use a jack under the lower arm to push the suspension up as it would be when sitting on the ground.
- Tighten all the bolts: the lower pinch bolt to 32 ft-lbs, the three larger top bolts to 37 ft-lbs, and the smaller ones to 16 ft-lbs.
Step 3 – Remove the rear shocks
The rear shocks are a little easier to change; though, you do have to get at the upper mounting nuts, which are hidden behind the rear.
- Pry forward the rear seat bolster and remove the 10mm bolt, then carefully slide off the plastic hooks holding it in place.
- Loosen the two nuts holding the top of the strut.
- Remove the upper rear trailing arm, which is secured by a 17mm bolt.
- Remove the upper end of the rear sway bar end link.
- Now wiggle the shock, and you should be able to drop it down and out of the car.

Figure 5. Carefully pry forward so you can reach the mounting bolt. 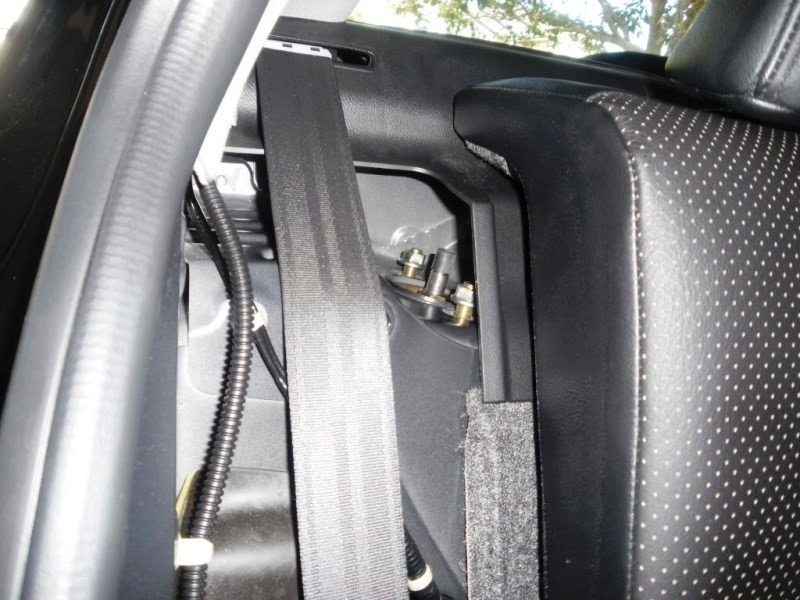
Figure 6. Now you can reach the upper shock mounting bolts. 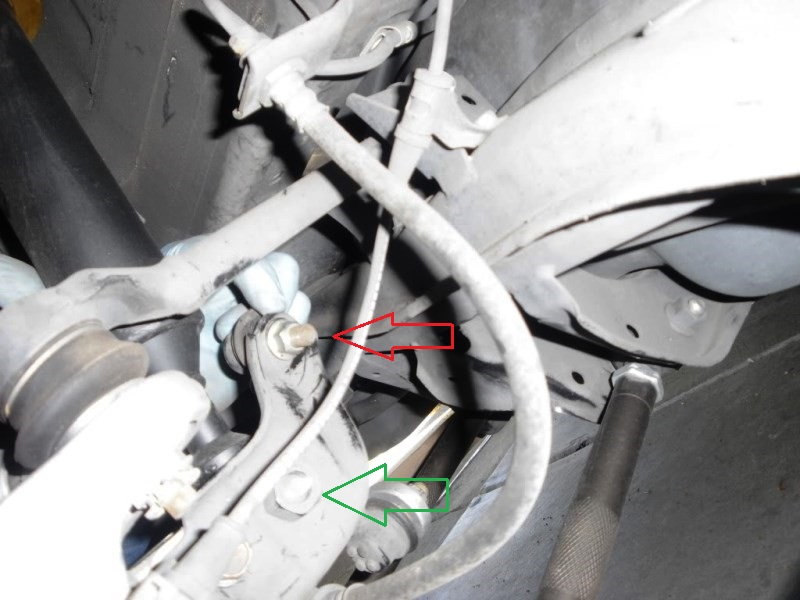
Figure 7. The sway bar end link (red arrow) and lower shock mount bolts (green arrow).
Step 4 – Install new rear shocks
- Compress the springs with the spring compressor tool, then remove the top nut and washer.
- Disassemble the rear shocks as needed, then reassemble parts on the new shocks.
- Insert the new shock into the spring and replace the top nut and washer.
- Decompress the spring and reinstall the coil over in the car, loosely tightening all the bolts.
- Place the rear suspension under load and tighten all the bolts.
- Reinstall the rear seat bolsters.
Featured Videos: Shock Removal
-
Acura TSX Shock Removal Tips
-
Acura TSX Shock Removal Part 2
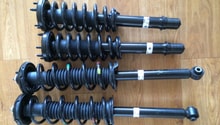
Shocks Review
Worn out shocks can be a real headache—literally. But there is no need to suffer that abuse, not when you have so many options available in the aftermarket. There are shocks out there for every budget and every need, from OEM style replacements to fully adjustable coil overs suitable for track and street duty. Here are some of the most popular options available today among TSX enthusiasts.
Koni Yellow Sport |
KYB-GR2 |
TEIN Street Advance | |
|---|---|---|---|
Price |
$560 for all 4 | $500 for all 4 | $650 for all 4 |
Type |
Stock Replacement | Stock Replacement | Race Style Coilover |
Ride Quality |
Stock to Sporty | Slightly Sporty | Racey |
Adjustable? |
Yes |
No |
Yes |
Warranty |
Limited Lifetime | 1 Year Limited | 1 Year Manufacturer Defect |
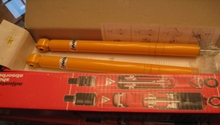
Best Value: Koni
Koni Sport
Price – $560 a set
Type – Stock Replacement
Ride Quality – Stock to Sporty
Adjustable – Yes
Warranty – Limited Lifetime
Regarded by most as the best all around, longest lasting shock for most Acuras, the Koni Sport is a tough competitor in a crowded market. They are fully adjustable via a knob at the top, meaning that they will work with virtually any spring on the market. You can set them for a ride just a little stiffer than stock, or full sports car mode. Koni Sports are also capable of lowering your car up to 35mm with the matching Koni springs, and still feature excellent ride quality to go with the improved handling performance they provide. Recommended for anyone looking for an upgrade over OEM and doesn't mind paying a premium to do so.
KYB-GR2

Price – $500 a set
Type – Stock Replacement
Ride Quality – Slightly Sporty
Adjustable – No
Warranty – 1 Year Limited
For those who don't care about adjustability and just want a suitable, high quality OEM replacement shock, it's hard to go wrong with the KYB-GR2. The KYB's provide a slight improvement in handling, and a slightly sportier ride over stock, and work with your stock springs. Quality also exceed OEM a bit, meaning that they should last longer than those other cheaper OEM style shocks out there. Recommended if you are seeking a high quality OEM replacement for an affordable price.
TEIN Street Advance
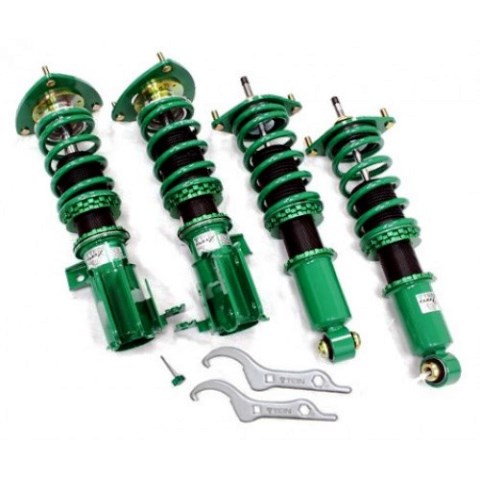
Price – $650 a set
Type – Race Style Coilover
Ride Quality – Racey
Adjustable – Yes
Warranty – 1 Year Manufacturer Defect
Coming in at about $100 more than the Koni Sport, TEIN Street Advance shocks offer better even more adjustability and high quality internal parts, but only a one year warranty covering only manufacturer defects. Still, those who have installed TEIN shocks on their TSX's have nothing but rave reviews for their performance on the street and track. TEIN SA's are designed to be more on the sporty, aggressive side, but don't give up too much in the way of ride quality. Recommended for those who want lots of adjustability at a reasonable price.
Related Discussions and Site
- DIY Suspension Install - TSXClub.com
- My Koni Shocks and Springs Install - AcuraZine.com
- How to Access Rear Shocks - AcuraZine.com
- TEIN SS Coilover Install - AcuraZine.com