Acura: How to Check Tire Tread and Pressure
Find out what the factory, and enthusiasts, recommend when it comes to tire pressure and tread wear to make this routine, but important bit of maintenance more transparent.
This article applies to the Acura MDX, RDX, TL, and TSX.
Your tires are one of the most important parts of your car, because they are the only component which is in constant contact with the road, and they play a larger part in your driving experience than any other. While it is easy to get in your car, drive down the road, and never give a thought to your tires unless you get a flat, it is important to make sure that they are well cared for. The proper pressure in your tires can mean the difference between having them last 25,000 miles or 50,000 miles, and change the ride and handling dramatically. In this article we will take a look at how to check your tires' tread depth and make sure the pressure is correct.

Materials Needed
- Tire pressure gauge
- Various coins (quarter, penny)
- Torque wrench
Step 1 – Check factory recommendations
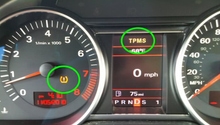
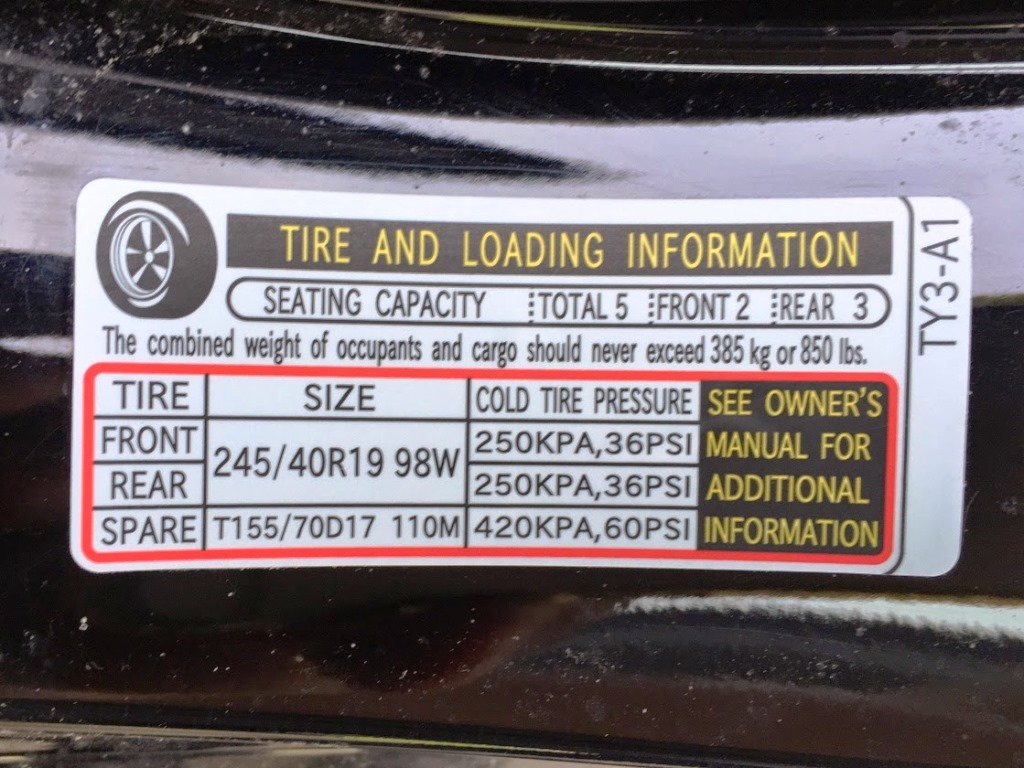
Before you can make sure the pressure is correct, you will need to know what the correct recommended pressure is for your car or SUV. This is extremely important, since overinflation and underinflation can really affect the handling and seriously lessen your tire's tread life and your everyday fuel economy. This information is easy to find as there is typically a sticker with the recommended tire pressure right on the door jamb your driver's door. Or, if you have the owner's manual handy, check the relevant page in there. Often times, if there were optional size tires available, it will list all of them.
Pro Tip
Your tires will have a PSI rating on them as well, but this is the maximum PSI that the tire can hold for load-carrying purposes. Never exceed this number, but don't use it as a recommendation either.
Step 2 – Check the tires' individual air pressure
Unscrew the valve stem cap, and press your tire pressure gauge to the valve stem. On the pencil type tire pressure gauge, a rod will extend out from the gauge. Check the numbered markings on the stick where they meet the gauge and you'll know what your tire pressure is. If the pressure reads higher than the recommendation on the tire information sticker, press the tire valve with the back of the tire gauge to release air and measure again. Repeat this process until the pressure is at the recommended level. If the pressure is low, you'll have to add more air to the tire with a compressor or your local service station air machine and check again, repeating until the pressure is at the proper level.

Pro Tip
Tire pressure should always be checked when cold, meaning before you have driven your car more than a mile. Gas expends with temperature, which is also why as the weather gets cooler you will need to add air to the tires.
Step 3 – Check the tread depth of your tires
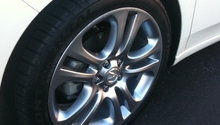
The amount of tread you have on your car's tires is a good gauge of how much life they have left in them. In most states your tires are considered worn out and unsafe when they have reached a tread depth of 2/32." You can check this by placing a penny, head's side facing you and upside down, into several grooves of the tire. If part of Lincoln's head is covered, then you have more than 2/32" of tread remaining. With a quarter, if part of Washington's head is covered, then you have at least 4/32" of tread remaining. Using the back side of a penny, if Lincoln Monument is covered, then you have 6/32" remaining on your tires. For winter driving, 6/32" is considered a minimum for snow travel. In general, 4/32" is getting to the limit for wet weather, and tires worn to 2/32" should be replaced no matter what.
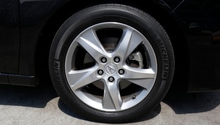
All tires these days are also molded with wear bars in the tread. When your tires tread wears down to the point that the wear bars are even with the tread, you need to replace them.
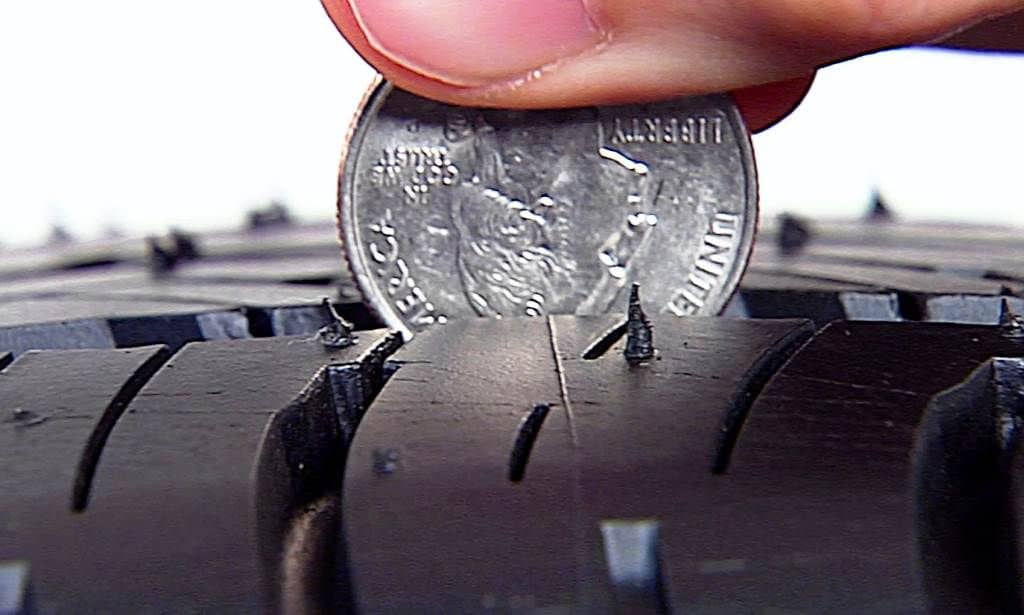
Figure 3. This tire shows plenty of tread left on it and does not need to be replaced. 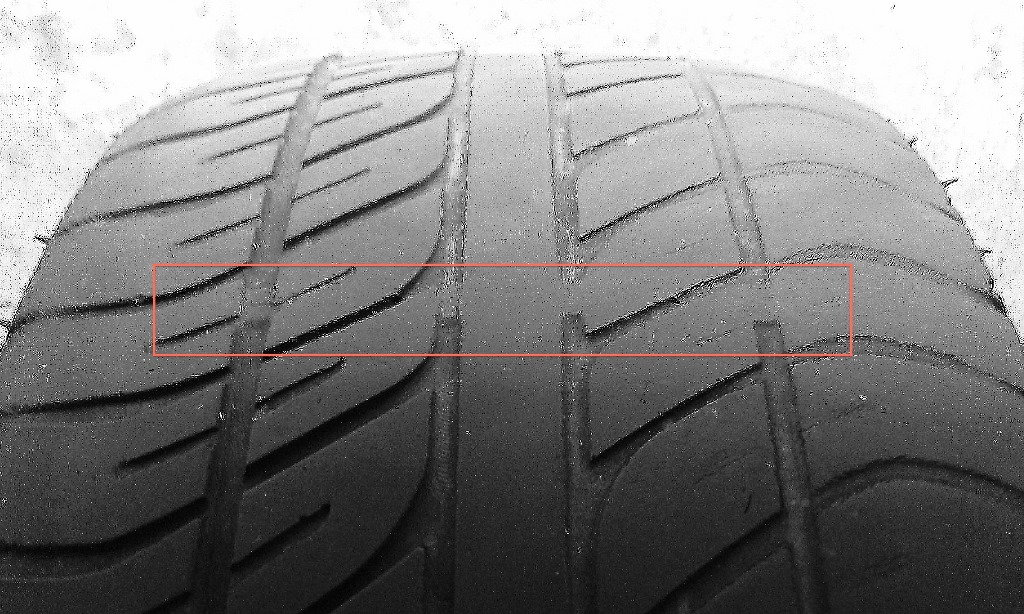
Figure 4. The uneven wear bars show this car likely needs an alignment, as the right side is worn out.
Pro Tip
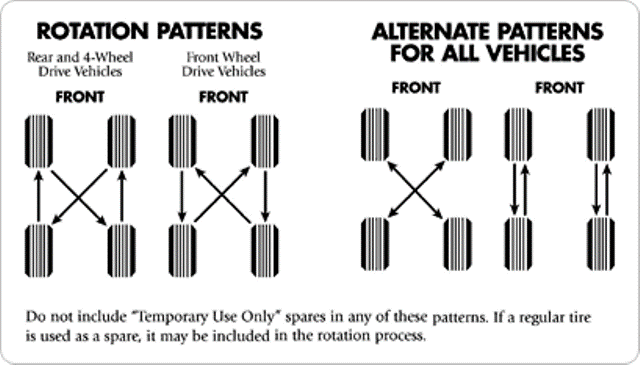
If the rear tires are substantially more worn than the front or vice versa, it is time to rotate your tires. Unless your tires are directional, a crisscross pattern is the best pattern to follow.
Related Discussions and Site
- Tires with longest life span - Acurazine.com
- Tread life - Acurazine.com
- OEM tire replacement tread life - Acurazine.com
- Measuring tread depth - Tirerack.com