Acura TL 2009-2014: How to Change Cabin Air Filter
Never pay to have your cabin air filter changed again. Learn the step-by-step instructions that will save you money and time.
This article applies to the 4th Gen Acura TL (2009-2014).
The cabin air filter is a component that you may never think about, but it actually performs an essential job: keeping the air within the cabin of your TL free of external debris and irritants. There's no reason to take your car into a shop for this quick and simple job, unless you want to overpay for a service that you can complete, well, just about anywhere–so long as you have a new filter handy. Here's how to replace the cabin air filter in your 4th generation Acura TL.

Material Needed
- New cabin air filter
Visit your local auto parts store for the correct replacement air filter.
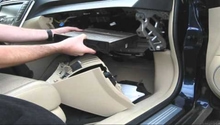
Step 1 – Open glove box and remove plastic shelf
Begin by opening the glove box and removing everything from the compartment. Once cleared, you'll see a plastic shelf shrouding the air filter housing. Pull this plastic shelf straight out with your hands.
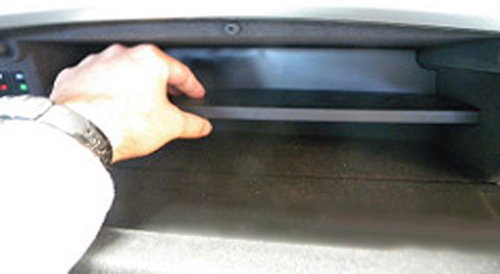
Figure 1. Grab hold of the plastic shelf. 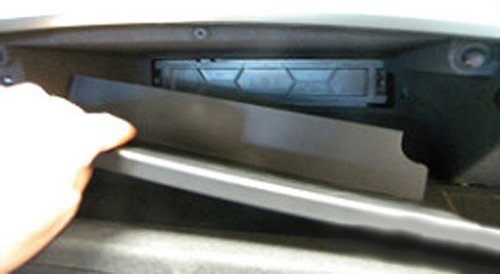
Figure 2. Removing the plastic shelf.
Step 2 – Remove the cabin air filter assembly
With the plastic shelf removed, you'll now be able to see the assembly that houses the cabin air filter. There are tabs on the sides of the assembly; press the two tabs inward (as shown in Figure 3) and remove the assembly altogether.
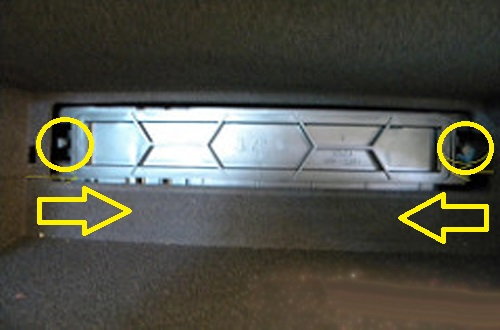
Figure 3. Press the tabs inward. 
Figure 4. Pull the assembly out.
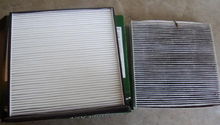
Step 3 – Replace the cabin air filter
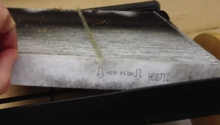
With the assembly removed, you can now take out the old air filter and replace it with the new one you purchased. Dispose of the old filter. Be sure to take note of the arrows on the new filter indicating the direction of the air flow when reinstalling.
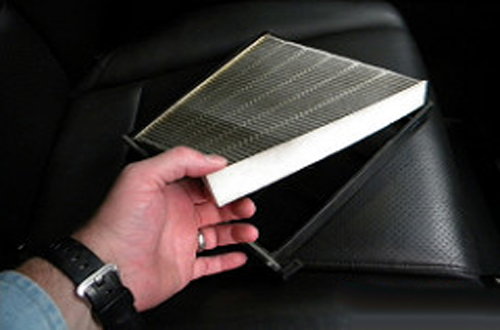
Figure 5. Removing the old filter. 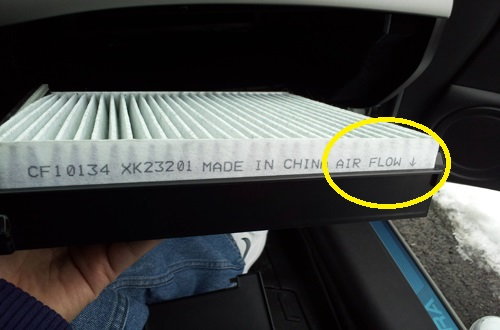
Figure 6. Note the direction of the air flow arrows when reinstalling.
Step 4 – Re-install the assembly and plastic shelf
Now that you've replaced the filter, all that's left to do is re-insert the assembly into the housing and replace the plastic shelf. Both should snap into place. You'll likely notice the improved quality of air circulating within your Acura TL right away, especially if the old filter was noticeably filthy!

Figure 7. Re-install the assembly. 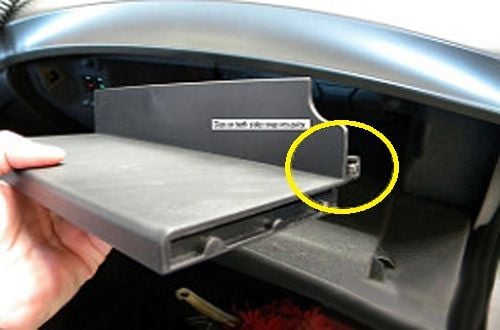
Figure 8. The shelf will click back into place with these tabs.
Related Discussions
- 4th Gen Acura TL Cabin Air Filter Replacement - AcuraZine.com
- Why Use a Carbon Cabin Air Filter? - AcuraZine.com