Acura TL 2009-2014 and MDX 2007-2013: Why Won't My Car Start?
Modern cars are complex, but when they won't start, there are not that many common causes. Read along and we'll help you go over them and get it running again.
This article applies to the Acura TL (2009-2014) and MDX (2007-2013).
When your car doesn't start it can be panic inducing, but don't sweat about it. There's actually not that many things that can make a car not start and most are easy to address. Follow the steps below to diagnose and solve the most typical issues.
Materials Needed
Multimeter
A partner
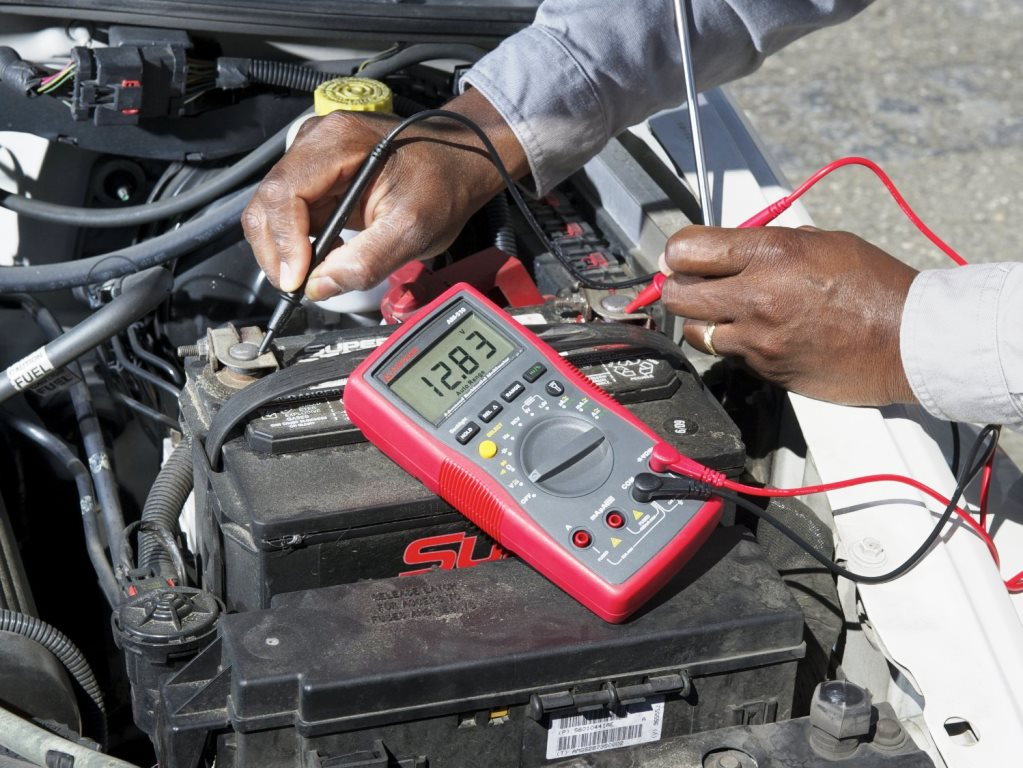
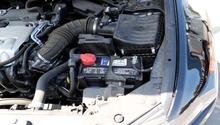
Step 1 – Check the battery
Nine times out of ten it's the battery. Batteries aren't made to last forever and you'll be lucky to get more than five years out of a single battery.
You can do a quick test of your battery with a multimeter. Set the multimeter to measure volts and touch the negative probe to the negative terminal and the positive probe to the positive terminal on the battery. You should be getting over 12 volts when the car is not running. When you try to start the car, you'll see the voltage drop. If it drops below 10 volts when starting the car or has below 12 volts when the car is not running, then your battery may need to be replaced. You local auto parts store can do a load test on it, usually for free, to confirm it is bad before you buy a new one. Even a battery that tests good with a multimeter may be bad under the severe load that the starter needs to crank the motor.
Figure 1. Check the battery.
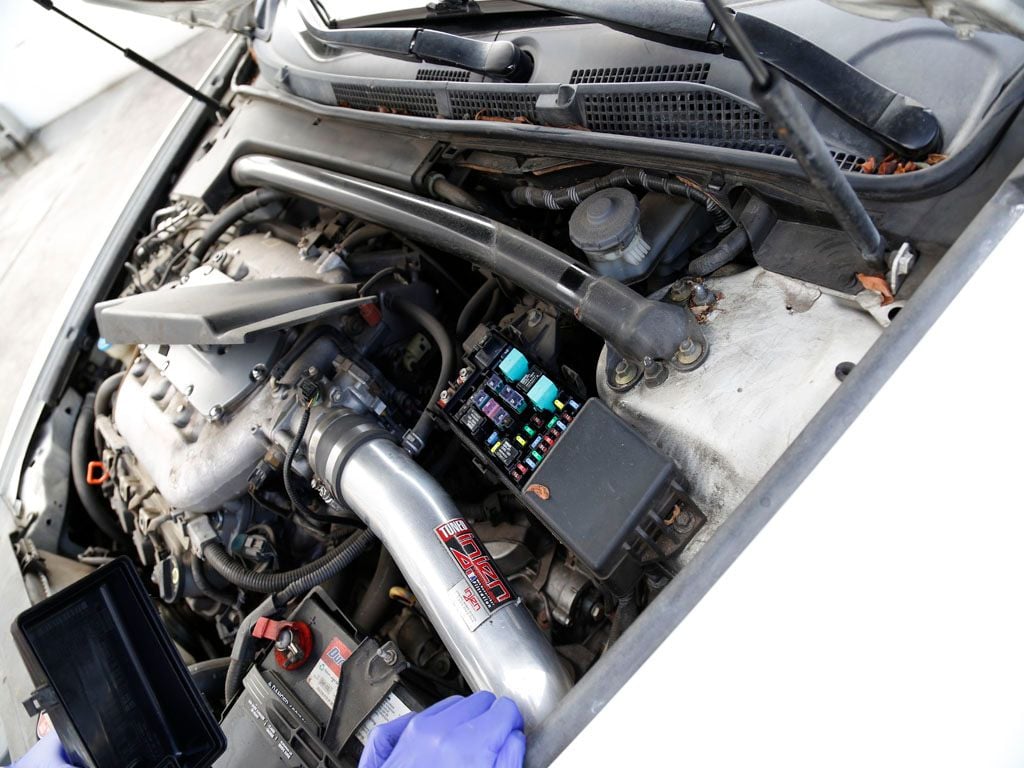
Step 2 – Is there a burned fuse?
Sometimes a burned out ignition or battery fuse can cause a car not starting.
Find the fuse box in your engine compartment and use the diagram on the back of the cover to find the ignition and battery fuses. Check each fuse with your multimeter. Set the multimeter to measure ohms. There should be only a small amount of resistance (ohms) in the fuse. If it shows one or the display shows nothing, then it's seeing total resistance, which means the fuse is burned and needs to be replaced.
Figure 2. Check the fuse box in the engine compartment.
Pro Tip
You can also check fuses using a test light, or with the multimeter set to test continuity.
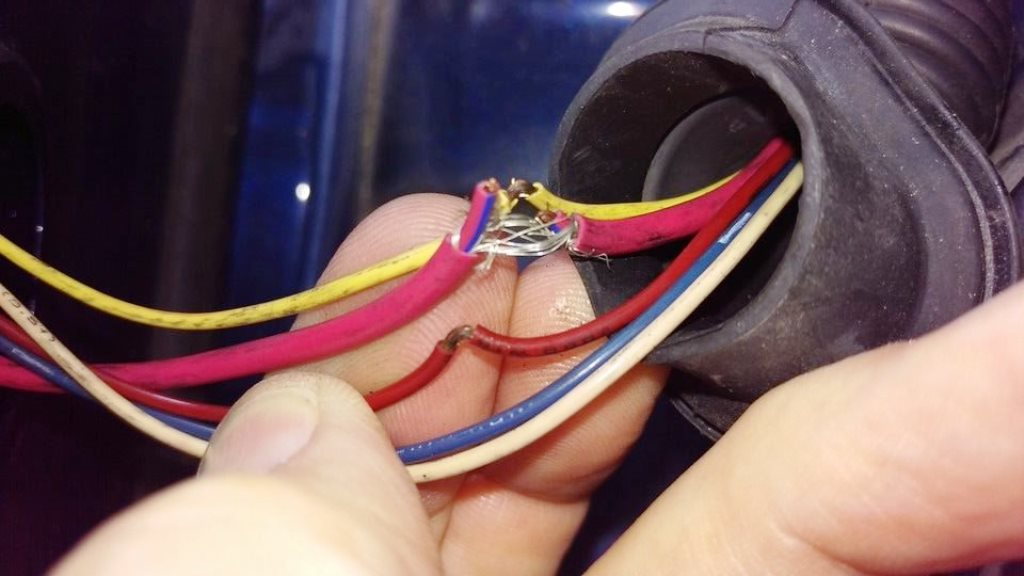
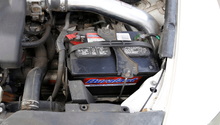
Step 3 – Is there something draining the battery?
Sometimes a good battery can get drained by accessories or a short in the car.
This can be the case if you install an aftermarket part. There have also been reports where the Bluetooth unit in some models failed and caused an unnecessary drain on the battery. There have also been cases where the backup camera/liftgate wiring harness got torn from use and also caused an unnecessary drain. On the liftgate, check that the wires in the flexible rubber tube haven't been pinched or cut by the door closing. These aren't common, but are still worth checking out if your car battery is still being drained.
Figure 3. Check the backup camera and liftgate wire harness for damage.
Pro Tip
Don't replace the MDX liftgate wiring harness unless you have to. They can cost up to $530 to have the dealer replace. If it's damaged, try splicing the damaged section with solder and electrical tape.
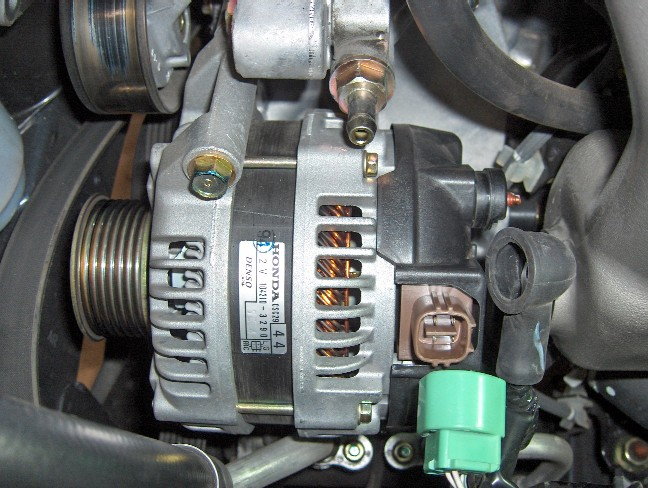
Step 4 – Is it the alternator?
Sometimes a bad or weak alternator can be mistaken for a bad battery, and over time will cause the battery to be unable to start the car.
The alternator is supposed to charge the battery when the car is running, but if it can't do that, then eventually the battery will get drained and won't be able to start the car. To test the alternator, you set up the same test you did for the battery. Connect your multimeter probes to the battery posts, start the car and watch the voltage. Normally, a running car with the alternator charging the battery would have between 13.8 and 14.8 volts running through it. If the voltage is below that, then it's probable the alternator isn't charging the battery. Additionally, you should put a load on the battery by turning on the lights. If there's a significant change in voltage, that could also indicate something is wrong with the alternator.
Figure 4. A typical Acura/Honda alternator.
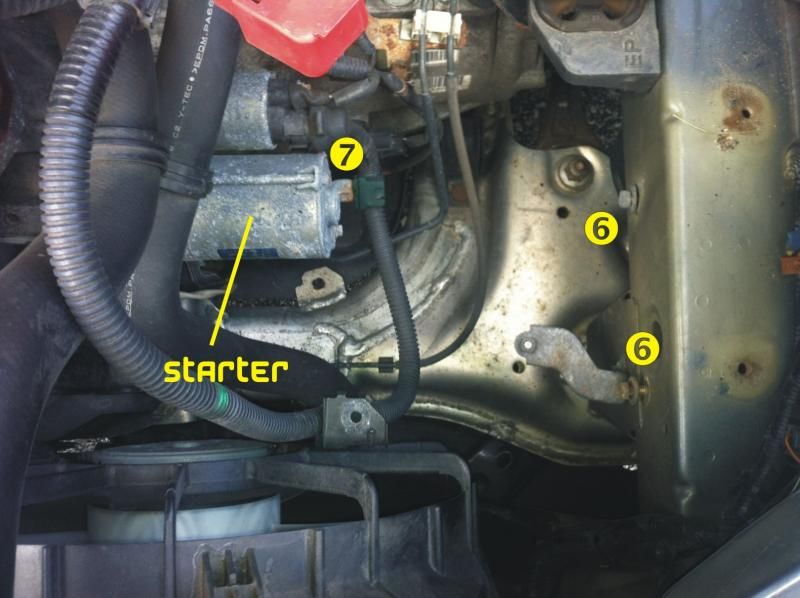
Step 5 – Is it the starter or starter wires?
There is a possibility that it could be a bad starter or starter wires if you don't hear the starter crank at all, or it cranks very slowly when trying to start the car.
There are a few different tests with the multimeter you can do to diagnose a starter, so long as you have an assistant who can watch the multimeter or turn the key, with you watching the multimeter.
Have your multimeter set to volts and the black probe on the negative terminal. Touch the red probe to the ignition wire on the starter solenoid and have someone turn the key. If you don't see an increase in voltage, then there is a problem with the starter getting power. There could be an issue with the ignition switch, or it could be the wire to the starter itself. Use the multi-tester and follow the wire testing for voltage until you find it.
Next, use the multimeter to test the power at the positive battery post (like Step 1) and the stud the battery cable connects to on the starter. They should read the same. If when the ignition is turned there is much lower voltage at the starter, then there is something wrong with the battery cable.
Next, do the same test with the negative terminal and the body of the starter. Use the multimeter probes to test the negative battery post and the metal surface of the starter. Have your partner turn the key once more. If there is a large drop in voltage, then there is something wrong with the starter, the ground, or the negative battery cable.
Acura TSX 2004-2014 Car Won't Start
Why Won't My Car Start?
With this guide you won't have to worry about your TSX not starting again.
This article applies to the Acura TSX (2004-2014).
It can be frustrating ...
Acura TSX 2004-2014 Battery Not Charging
Why is My Battery Not Charging?
Are your headlight dim? Does your motor crank over very slowly? You may have a charging problem.
This article applies to the Acura TSX ...
Acura TL 2004-2008 Car Won't Start
Why Won't My Car Start?
Is your car leaving you stranded?
This article applies to the Acura TL (2004-2008).
A non-starting Acura TL is an inconvenient situation to face. The ...
Acura TL 2009-2014 and MDX Battery Not Charging
Why is My Battery Not Charging?
Hold up, the real cause of your battery problem may not be what you think.
This article applies to the Acura TL and MDX ...
Acura TL 2004-2008 Battery Not Charging
Why is My Battery Not Charging?
All I hear are clicks when I turn the key... the battery again?
This article applies to the Acura TL (2004-2008).
The battery is one of ...
Acura Why Does the Battery Light Appear and Disappear
Why Does the Battery Light Appear and Disappear?
Does your battery light come on intermittently, only to disappear for a while and come back on later?
This ...