Acura TSX: Why is My Battery Not Charging?
If your charging system is not up to the task, you may have a hard time getting to your destination, if you can get your car started at all. This diagnostic will help you sort out any charging issues you may have.
This article applies to the Acura TSX (2004-2014).
If your battery checks out fine, but you're having dim lights, weak starting, and other electrical issues, then you most likely have a charging problem. Checking for charging problems is fairly easy and all it requires is a multimeter as well as some time.

Materials Needed
- Multimeter
- Wrenches
- Wire brush
- Contact cleaner
Step 1 – Check the alternator output
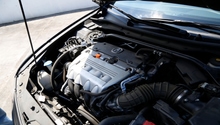
The prime suspect when you're having charging problems should be the alternator, as this is what generates the electricity to charge your battery.
To test the alternator output, set your multimeter to 20 volts DC and touch the red lead to the positive battery terminal, and the black lead to negative. With the car not running, you should have at least 12 volts at the battery. Now turn on the engine, and you should get a reading somewhere between 14.2 and 14.8 volts as the car idles. Turn on the headlights, the radio, the heater fan, and anything else that could put a serious draw on the battery. The voltage will fluctuate a bit, but it should still settle somewhere above 13.2 volts. If you get a reading lower than that, your alternator is not putting out enough power.

Pro Tip
Before you replace your alternator, try taking it to a dealership or automotive store. They can perform a more thorough test on the alternator and can pinpoint where it failed.
Step 2 – Check the wires and cables
A loose connection or corrosion could interfere with your alternator charging the battery.
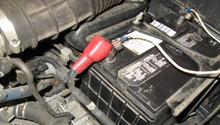
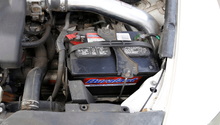
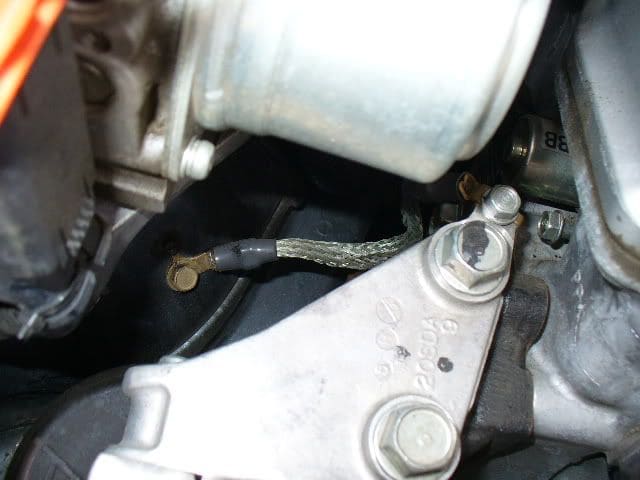
Start with the battery terminals, as these are the most prone to corrosion. Loosen the bolt that holds them tight to the battery. Clean off any corrosion you find with a wire brush, and then spray with contact cleaner. Inspect the battery cables to make sure they are in good condition and not deteriorating internally from weather or road salt. Reconnect and make certain they are tight on both ends. Follow the negative battery cable to the ground point to make sure that the ground is not loose, or connected to a dirty or rusty piece of metal. Clean if needed, then reattach.
Check the wires going to the alternator plug. Most of the wire will be covered and wrapped to protect it, but make sure nothing is pinched, or broken at the connectors or along the length to the starter, the battery, and the fuse box. Inspect these wires all along their length to make sure they are not damaged. Most often issues will crop up around the connectors at the ends of the wires. So make sure the connectors are not broken or corroded.
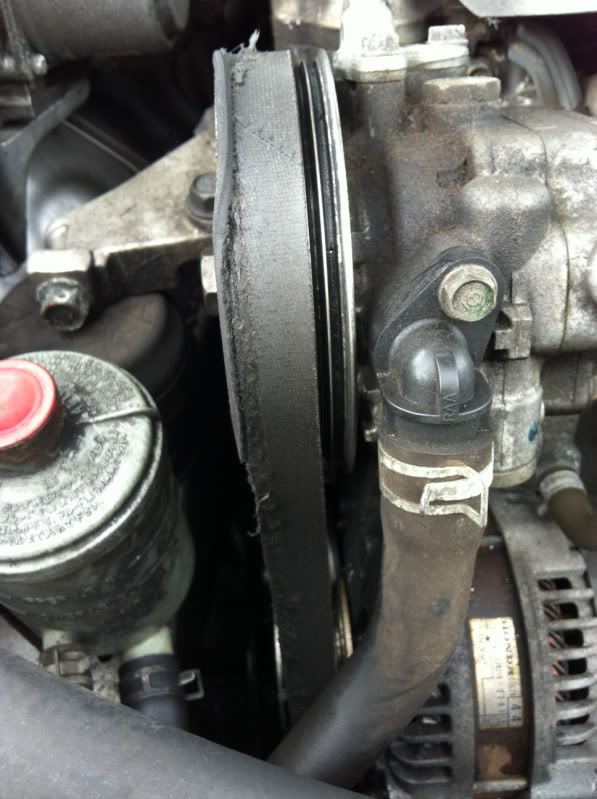
Step 3 – Check the serpentine belt
A loose or broken serpentine belt will not generate enough torque to power the alternator.
Inspect your serpentine belt for any visual signs of wear. Tug on it to make sure it's not slack and slipping. Lastly, start the car and watch the serpentine belt—careful to not touch any moving parts—to make sure that it's spinning the alternator. If it fails any of these tests, you should replace it.
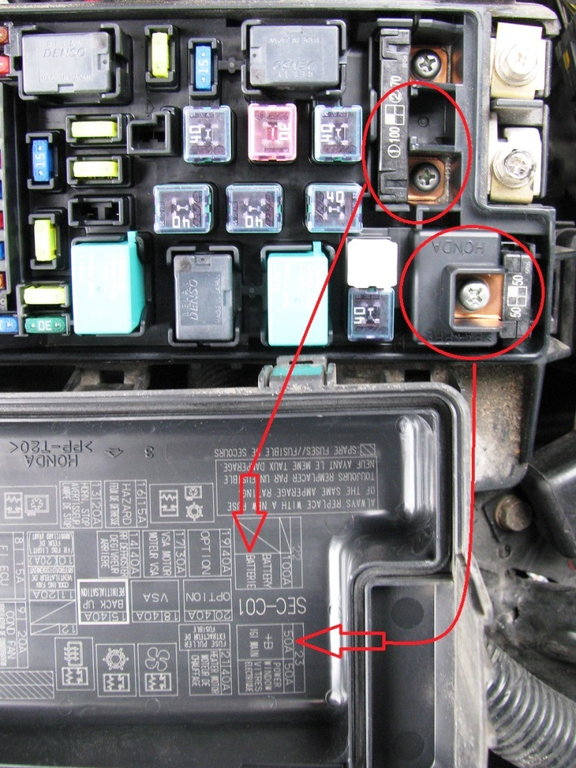
Step 4 – Check the fuse
A bad fuse can create resistance in a circuit.
The charging system and battery are fused in the Acura to keep the electronics from damage should anything short out. Open the fuse box and pull out the large 100 amp battery fuse. Set the multimeter to Ohms and the leads together, which should give you a reading of 0.0 Ohms, or very low. Test the resistance of the fuse with a lead touched to each of the two screws that holds it in place. The reading should be almost, if not exactly, what you got when touching the leads to each other.
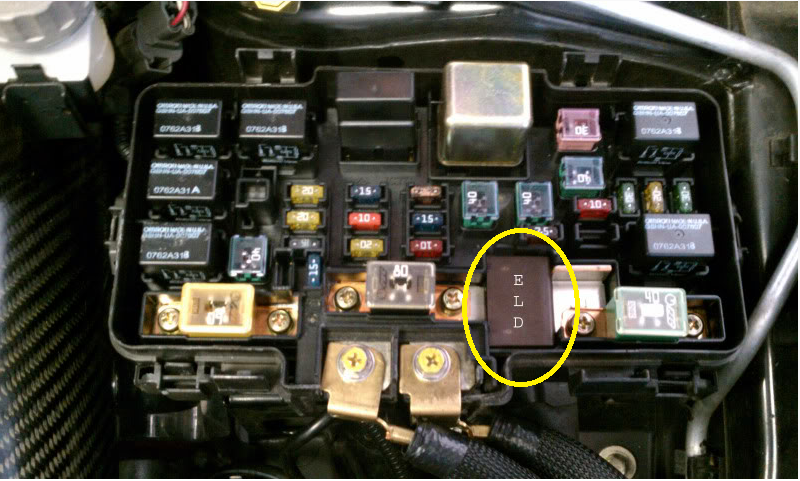
Step 5 – Check the Electrical Load Detector (ELD)
The ELD sometimes goes bad and limits the alternator output.
The ELD is responsible for detecting the current demands in your TSX, and then regulate the alternator output. It's a part unique to Honda's and Acura's charging system. If the ELD were to go bad, it can regulate the alternator so that it doesn't put out enough power to charge your battery. If something does go wrong with the ELD, it will set off a trouble code (P1298), and a warning light on the dash. If that happens, simply replace the ELD, which is located in your under-the-hood fuse box.
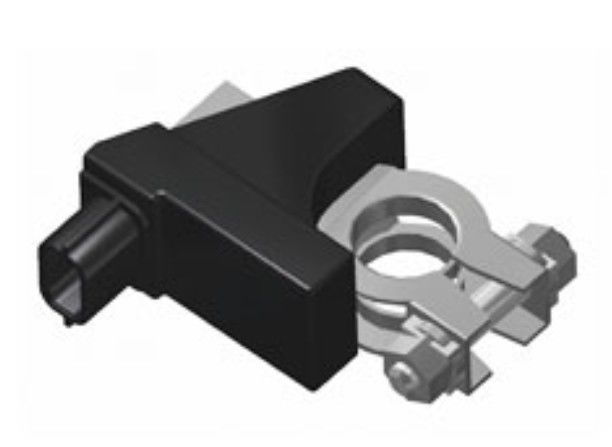
Step 6 – Check the battery current sensor
If you have a "Check Charging System" light on the dash, but the charging system seems to check out, check the current sensor.
This is only if you have a "Check Charging System" message on your dash, but the charging system tests okay, and nothing else seems to have worked at clearing it. The battery current sensor measures the output of your battery. Whenever it detects a problem it will trigger the "Check Charging System" message. You'll find the battery current sensor attached to the positive battery cable. Try disconnecting the plug for the sensor and then reconnecting it to see if that clears the message. If not, and you've already exhausted all other possibilities, then try replacing the sensor.
Related Discussions
- 2004 Acura TSX Charging Issue - AcuraZine.com
- Check Charging System But Battery Tests as Good - AcuraZine.com
- Check Charging System - AcuraZine.com
- 04 TSX Randomly Won't Start - AcuraZine.com