Acura TL 2009-2014: How to Change Manual Transmission Fluid
Unlike engine oil, manual transmission gear oil doesn't have to deal with extreme heat, acids, and combustion gasses, but it still needs to be changed occasionally to keep that gearbox shifting smoothly.
This article applies to the Acura TL (2009-2014).
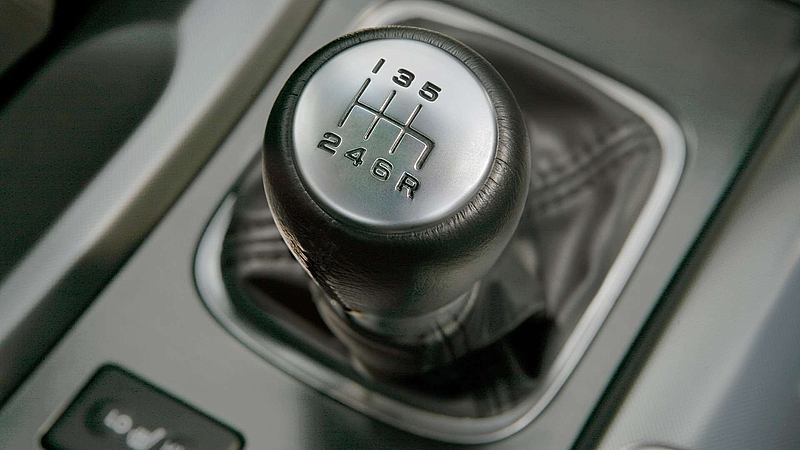
Nothing makes a driver feel more connected, and in control, than shifting the manual transmission yourself. Even after driving in those ubiquitous long stretches of urban road with lights timed to stop you at virtually every intersection, the advantages when you do get out on a twisty canyon are worth it. In 2007, Acura dropped the availability of a manual transmission from the base TL model, with a 6-speed manual only offered on the Type-S.

Materials Needed
- 3/8-inch ratchet with extensions
- 3/8-inch torque wrench
- Sockets
- 10mm box wrench
- Long funnel
- Spare crush washers
- 3 quarts of manual transmission fluid
- Drain pan, ideally with measuring markings on side
- Floor jack, jack stands and wheel chocks
Step 1 – Raise the front of the vehicle
With the emergency brake on, open the hood and leave it open. Then, with a floor jack raise the front of the vehicle, and place the two floor jacks under the marked front jack locations on either side of the vehicle. Raise the back of the car and place jack stands under it as well. In order to check that you have the proper amount of fluid in the transmission, you need to have the car level. But if you measure what came out and refill with the same amount, you don't need to worry too much about it.

Step 2 – Locate the drain, fill and weep bolts
Things are tightly packed in modern cars. The fill hole for the manual transmission is located at the top, and almost directly below the battery, but you should have enough room to get a long 3/8" extension down into it without removing anything. The drain plug is naturally on the bottom of the transmission and also has a 3/8" square indentation in it. You may want to pop out the plastic rivets holding the splash pan in place under the car in order to get better access to it, but they can easily be removed with a small flat screwdriver blade. Just above the drain plug is a small 10mm bolt, which is used to check that the fluid is fill to the proper level, called the "weep" bolt.

Figure 3. These plastic rivets pop our easily enough once you pull the center button out. 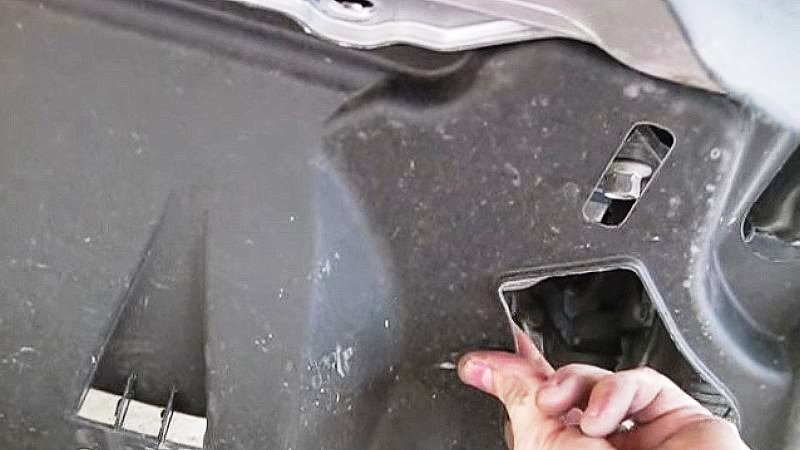
Figure 4. You may want to pop the rivets out and move the splash pan.
Step 3 – Remove the fill and drain bolts
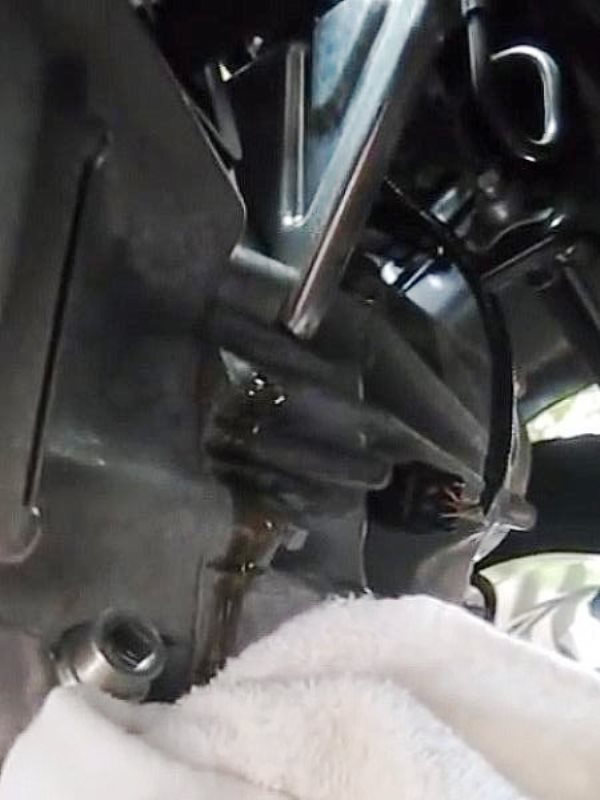
Just behind and well below the battery, the top of the fill bolt/plug can be seen. It is removed at this point to vent the draining of the transmission fluid. It may be marked in red, and there is a square 3/8” indent in it. If you need more space or your wrench extensions aren’t long enough to access it, removing the battery may help. But if you can’t get the fill bolt/plug loose, you will want to postpone changing the transmission fluid until is is removed, as you need it out to refill your transmission.
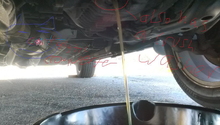
On the bottom of the transmission is the drain plug. If you have taken the clips out, make sure the splash panel is held out of the way so you don't get fluid all over it. Place a drain pan beneath the drain plug and remove it so the fluid drains. Drain pans with side markings can be helpful to see how much fluid actually comes out. When the draining reduces to a small dribble, check the condition of the crush washer before reusing it, then clean the drain bolt/plug and put the drain bolt/plug back in place. Make sure the check bolt/plug is loosened.
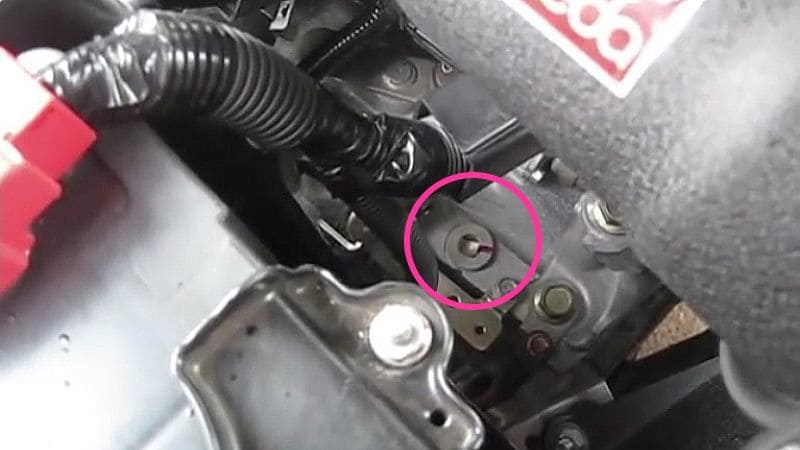
Figure 5. Location of Fill bolt/plug. 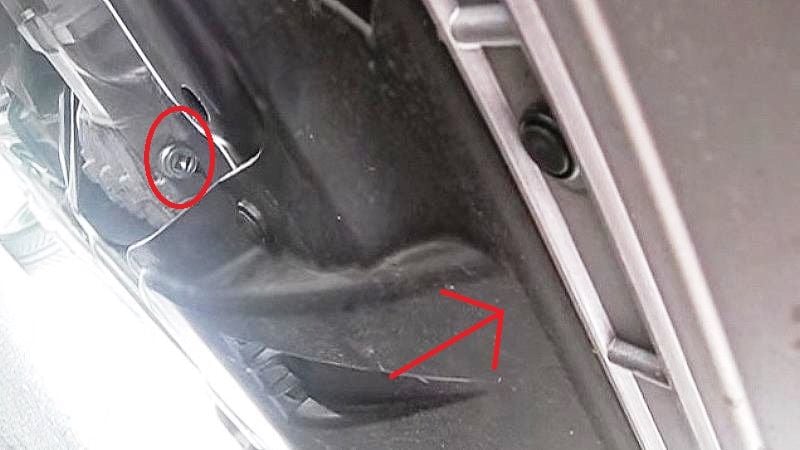
Figure 6. The arrow indicated upwards, as this is at an odd angle, and the circle is around the drain plug.
Step 4 – Refill the transmission with fluid
Tighten the drain plug to 29 lb-ft (39 Nm). Feed the end of a funnel with a long tube down to the fill hole and fill the transmission back up with fluid. A drain and fill should take 2.3 quarts of new transmission fluid, or just add slightly more than the drain pan indicates came out. If the car is level, you can remove the 10mm "weep" bolt once it is full and a small dribble of fluid should come out. If nothing comes out, continue to add fluid to the top until it does. Wipe up any fluid from the check bolt, and replace the crush washer if needed. Replace the 10mm bolt and don't over-tighten, the spec is just 8.7 lb-ft (11.7 Nm). Replace the fill bolt (and washer if needed) and torque to to 33 lb-ft (44Nm).
Choosing Your Manual Transmission Fluid
Previous generations of Acura and some Hondas had an issue with a notch or grinding between 2nd and 3rd gear. A popular fix has been to use a GM fluid instead of the original Honda spec fluid. Was the 2010 version of TL manual transmission really the same as the 2008 version? With such performance-based improvements as higher torque capacities, an extremely short shift throw, and improved clutching action, there definitely were improvements made, but what about the 2nd to 3rd shift?
Because of this history, many Acura owners still prefer the GM (AC Delco) Synchromesh Friction Modified Manual Transmission Fluid (part 88900399) for their manual 6-speed, instead of the Honda (Acura) Fluid 08798-9031(A). If you own a 2010 or later model, and it is still under warranty, you may want to keep using Honda fluid, but on older model TLs the general opinion is to go with the GM fluid. Being a DIYer, you’ll have to decide this for yourself.
Featured Video: Manual Transmission Oil Change
Related Discussions
- Manual Transmission Fluid Change - AcuraZine.com
- GM's Fluid vs Acura's Fluid - AcuraZine.com