Acura MDX: How to Repair and Replace Parking Brake
You may never use your parking brake, but when you do want to use it, you want to know it will work. Read along and we'll help you get it back in tip-top shape.
This article applies to the Acura MDX (2001-2013).
The parking brake is one of those components that many owners rarely use, but when the time comes that it is needed, you want to be sure it is fully functional. The last thing anyone wants when parking on a steep incline, is for their beloved car to roll a mile backwards down a hill, into a canyon, never to be seen again. Most parking brake issues are resolved with a simple adjustment; however, swapping in a new set of parking brake shoes is a job that many owners can comfortably complete at home if needed. This article will outline the process of restoring parking brake functionality on the Acura MDX.
The parking brakes on the Acura MDX utilize small drum brake shoes, integrated into the rear brake rotor hats. When the parking brake is applied, the brake shoes press against the drum (rotor hat) and prevent the wheels from moving. Unfortunately, improper adjustment of the parking brake cables and shoes, or deterioration of the parking brake shoe linings will hinder proper functionality.

Materials Needed
- Metric wrench set
- Tire iron
- Floor jack and jack stands
- Impact driver/Phillips screwdriver
- Screwdriver or drum brake adjusting tool
- Brake spring tool or pliers
- Torque wrench
- C-clamp
- Bungee chord
- Medium strength threadlocker (blue)
Step 1 – Check parking brake cable adjustment
Before diving too deep into replacing parking brake components, the parking brake should be inspected for proper adjustment. More often than not, owners find that a simple adjustment of the parking brake cable is all that is needed to restore functionality.
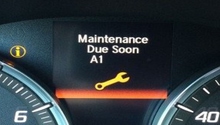
- Slowly apply the parking brake and count the number or detent clicks made by the lever. A properly adjusted parking brake will make 6-8 clicks, whereas 9+ clicks are an indication that an adjustment is needed. Release the parking brake before proceeding with any adjustments.
- A common problem affecting parking brake operation is cable stretch. While the parking brake shoes may be close to the proper adjustment, slack in the cable will not allow for the shoes to fully engage the drum. Locate the threaded cable adjuster on the side of the parking brake lever. Using the appropriate sized wrench, tighten the adjusting nut to tension the cable before once again counting the detent clicks when applying the parking brake. There is only a limited amount of adjustment here, so if the proper adjustment cannot be achieved, further adjustments will need to be made at the parking brake shoes.
- Look under the car and you should be able to follow the cable until it splits into two and goes to the two rear wheels. Check for excessive play in these, as that may be an indication that one side is stuck, or broken.
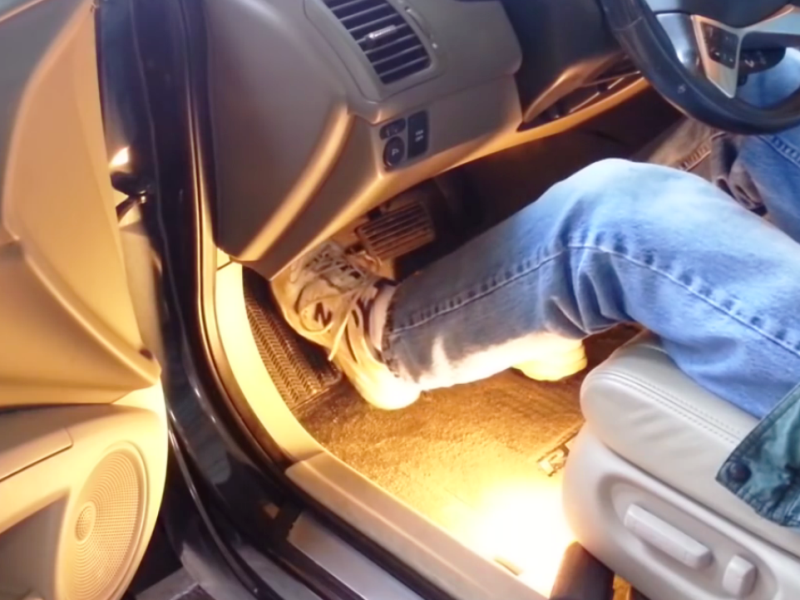
Figure 1. Checking parking brake level travel. 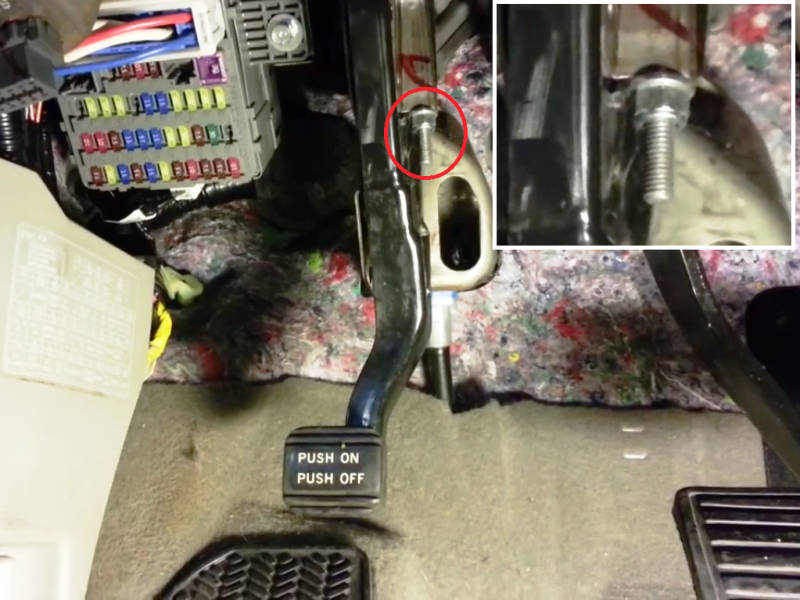
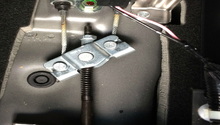
Figure 2. Threaded cable adjuster. 
Figure 3. Parking brake cable diagram.
Step 2 – Adjust parking brake shoes
- To gain access to the rear parking brake shoes, lift and support the vehicle and remove the rear wheels. For additional information on lifting the vehicle, see How to Jack Up Your MDX.
- Before beginning adjustment at each parking brake, it is recommended that the threaded cable adjuster at the parking brake pedal be loosened several turns to allow for future adjustment as needed. (See Figure 2.)
- Remove the rubber access plug from the brake rotor/drum. Rotate the rotor until the access hole is aligned with the star wheel adjuster.
- Using a screwdriver, rotate the star wheel adjuster until the brake rotor locks and will not move. At this point, rotate the star wheel adjuster backwards eight clicks to achieve the proper adjustment. Repeat for other side.
- Once again, check the detent clicks at the parking brake lever. Any minor adjustments (1-3 clicks) can be achieved by loosing or tightening the threaded adjuster nut.
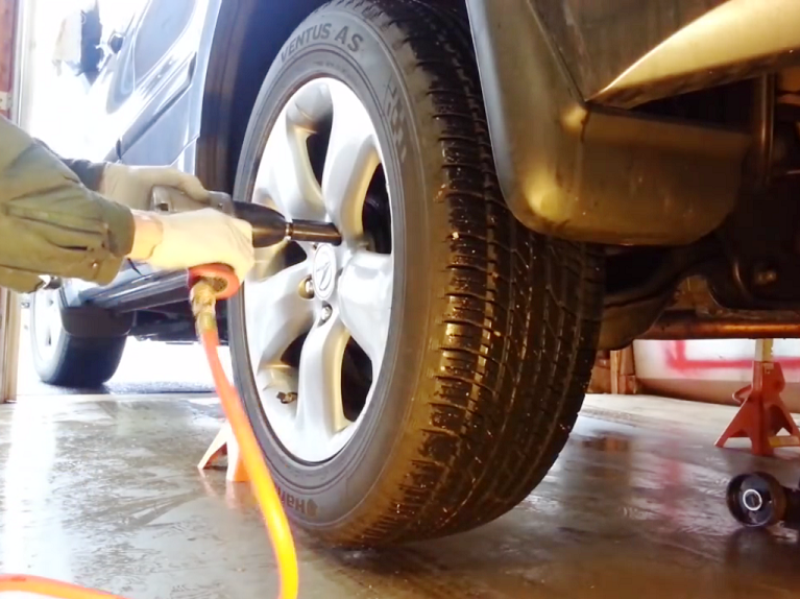
Figure 4. Removing rear wheel to access star wheel adjusters. 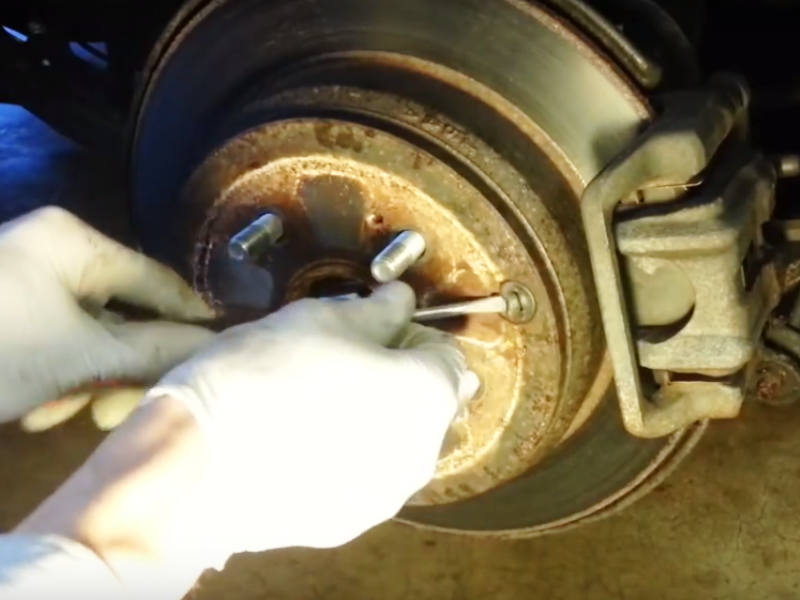
Figure 5. Rubber access plug removal. 
Figure 6. Rotate star wheel adjust brake shoes.
Step 3 – Parking brake shoe replacement
If your attempted parking brake adjustments have failed, or your parking brake still does not seem to be properly holding the car in place, it is likely that the parking brake shoes will need replacing. With proper adjustments, the parking brake shoes can last the life of the vehicle. That being said, accidentally driving for very long with the parking brake set or with shoe adjustments too tight can ruin the shoes in a hurry.
- With the wheel(s) removed, remove the rear brake caliper by removing the (2) bracket bolts and sliding it off the brake rotor.
- Support the caliper with a bungee chord to prevent it from hanging from the rubber brake hose.
- Remove the rotor retaining screws with an impact driver or similar tool, and slide the rotor off of the hub. (Don't worry if these screws are missing.)
- With the rotor removed, the parking brake shoes are now visible.
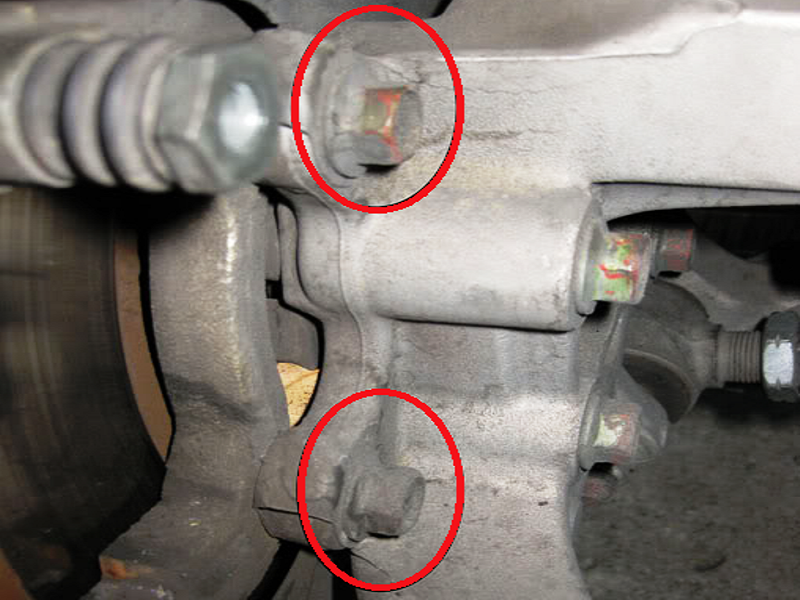
Figure 7. Caliper bracket bolts (inboard side of brake rotor). 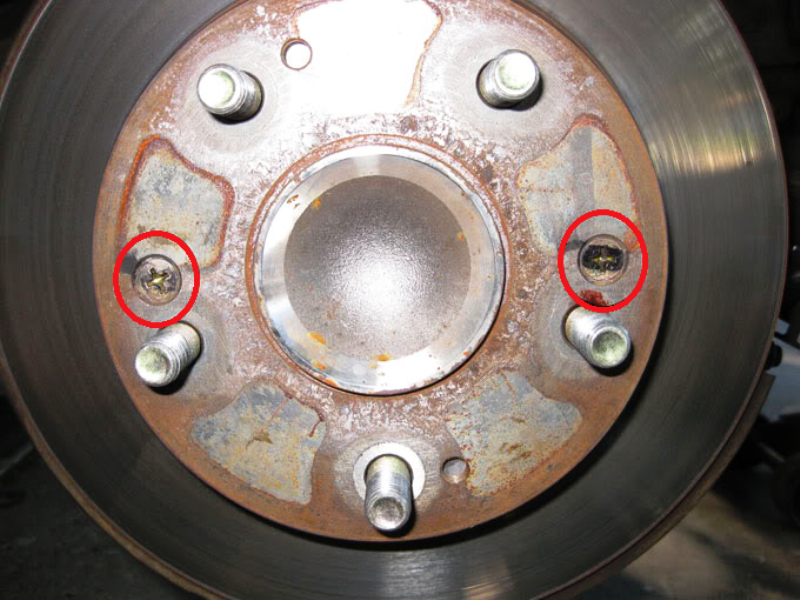
Figure 8. Rotor retaining screws. 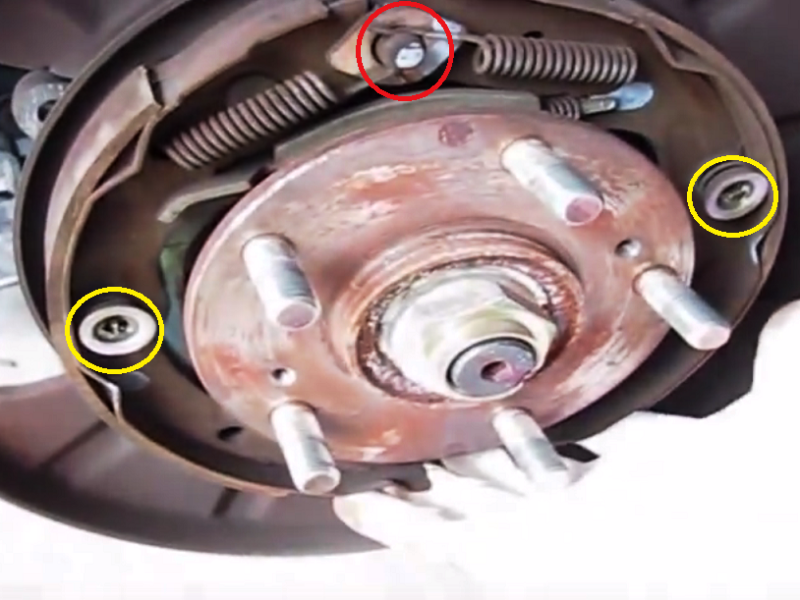
Figure 9. Retracting springs (red) and shoe hold down springs (yellow).
- Using pair of pliers or a drum brake spring tool, disconnect the retracting springs from the anchor pin. Also, remove the hold-down springs securing each shoe to the backing plate.
- Now the shoes can be spread apart and removed from the backing plate; though, the trailing shoe will still be connected to the parking brake cable.
- Remove the small circlip and separate the cable arm assembly from the brake shoe.
- Attach the cable arm to the new shoe and install the circlip.
- Adjust the star wheel adjuster to its smallest setting and install it as well as the adjusting spring to the new shoes.
- Place new shoes onto backing plate and install the retracting springs (blue) and retaining springs (yellow), making sure that the strut/strut spring (red) is properly seated between the shoes and the ears of the shoes are correctly seated against the anchor pin (green).
- Install the brake rotor, making sure to align the retaining screw holes in the hub with the corresponding holes in the rotor. Install retaining screws.
- Install caliper assembly over the brake rotor. With blue Threadlocker applied to the threads of the caliper bracket bolts, torque the bolts to approximately 45-50 ft/lbs.
- Adjust parking brake as outline previously.
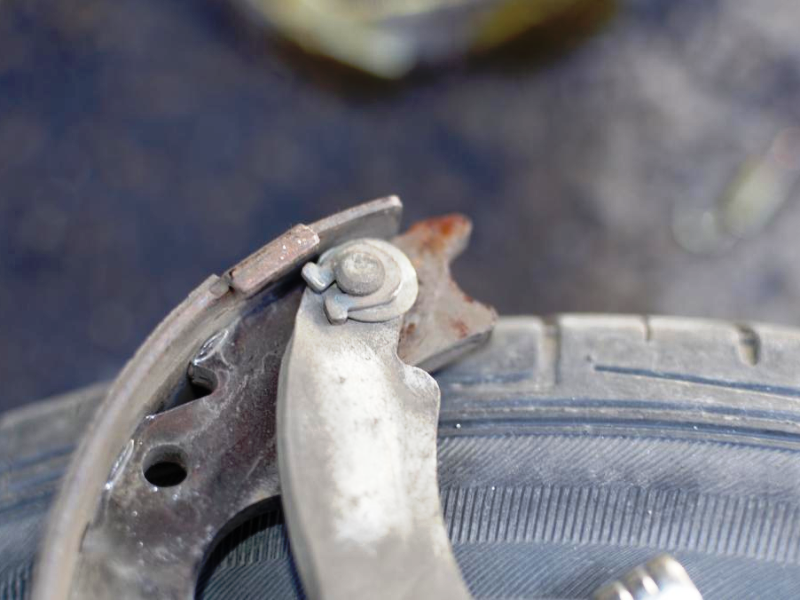
Figure 10. Circlip securing brake cable arm to brake shoe. 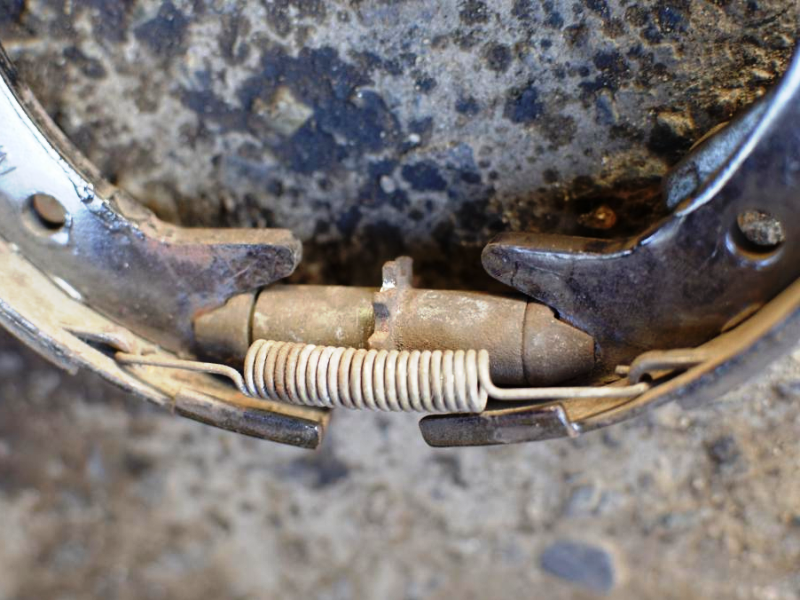
Figure 11. Star wheel adjuster and adjusting spring between lower shoe ears. 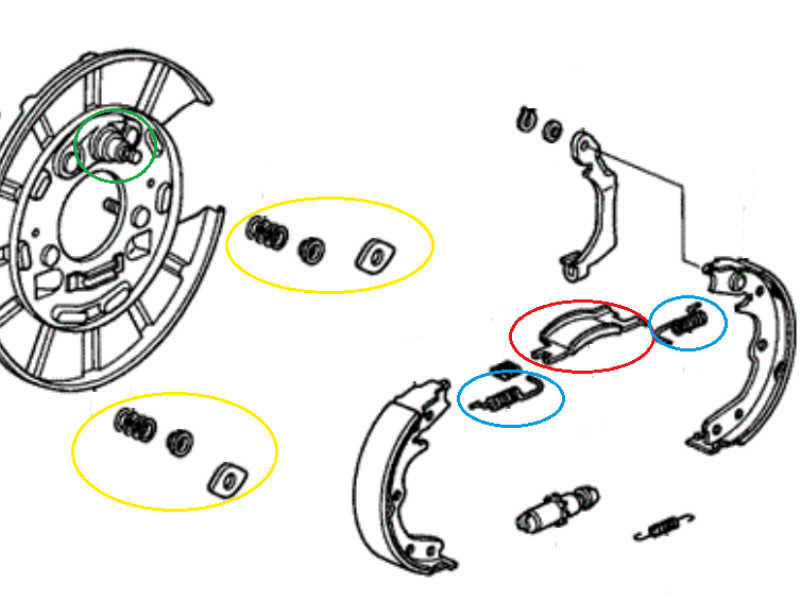
Figure 12. Exploded view of parking brake assembly.
Related Discussions
- Stuck Brake - AcuraZine.com
- Is There A DIY For Adjusting Emergency Brake? - AcuraZine.com