Acura RDX and MDX: How to Replace Brake Pads/Calipers/Rotors
Brake system maintenance is of utmost importance when it comes to vehicle safety. A car can have a number of quirks that can often be overlooked without inhibiting operation, but for the safety of yourself and other drivers on the road, any fault in the brake system should be repaired immediately.
This article applies to the Acura RDX and MDX (2007-2015).
While brake pads are expected to have a finite lifespan, brake rotors and brake calipers are also service items that RDX/MDX owners should be aware of. Brake pads are expected to last anywhere between 30,000 to 60,000 miles, depending on the area in which the vehicle is driven and the driving habits of the driver. On the other hand, brake rotors will typically last for several brake pad changes; however, neglected brake pad maintenance can damage rotors in a hurry and require immediate replacement. With regular brake fluid flushes, calipers will often last the life of the vehicle, but neglected maintenance or a case of overheating brakes can damage sensitive caliper seals and require a rebuild or installation of a new caliper unit.
If you are experiencing a shudder, pedal pulsation, pull to one side, or a hideous growling noise while braking, it is imperative that the brake system be inspected and the necessary parts replaced to maintain safe vehicle operation. This article will outline the procedure for replacing brake pads, brake rotors, and brake calipers on the Acura RDX/MDX.

Materials Needed
- Floor jack and jack stands
- Metric socket set
- Metric wrench set
- Impact driver
- Phillips screwdriver
- Ratchet, breaker bar, and extension
- Torque wrench
- Silicone grease
- Wire brush
- Brake parts cleaner or acetone
- Penetrating oil (WD-40)
- Bungee cord or rubber snubber
- Rubber mallet or dead blow hammer
- Medium strength Threadlocker (blue)
- C-clamp or caliper piston compressor
- Shope rags
- Syringe or turkey baster
Step 1 – Lift vehicle and remove wheels
The first step in replacing any brake component is to support the vehicle and remove the wheel(s). For additional information on lifting your RDX, see How to Jack Up Your Car or How to Jack Up Your MDX.
- Using a floor jack, lift the vehicle at the specified jacking points and support the car with jack stands.
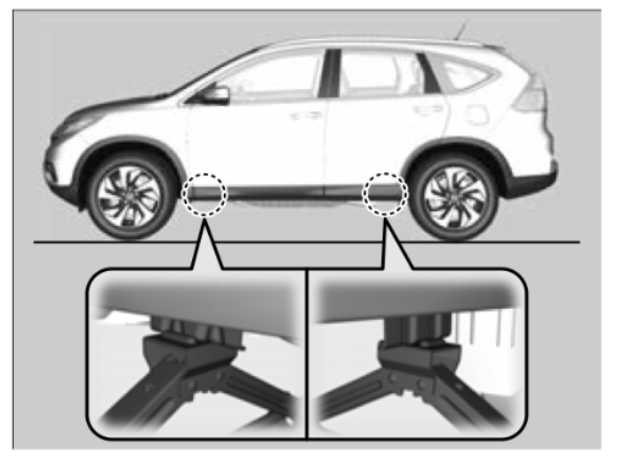
- Using a tire iron, remove the necessary wheels to gain access to the brakes in which you will be servicing.
Step 2 – Remove brake caliper(s)
The brake calipers house the brake pads and fit over the brake rotors, so regardless of which brake component(s) you are servicing, the brake calipers must first be removed.
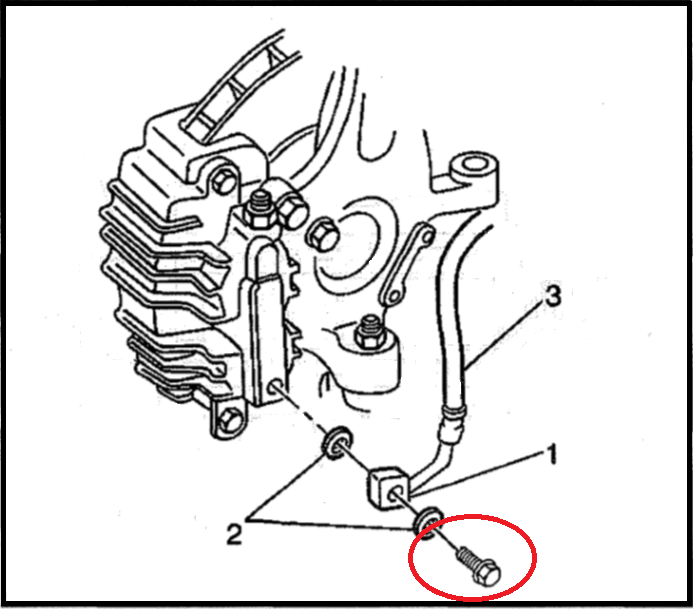
- If you intend to replace the entire brake caliper, first loosen the brake line banjo bolt.
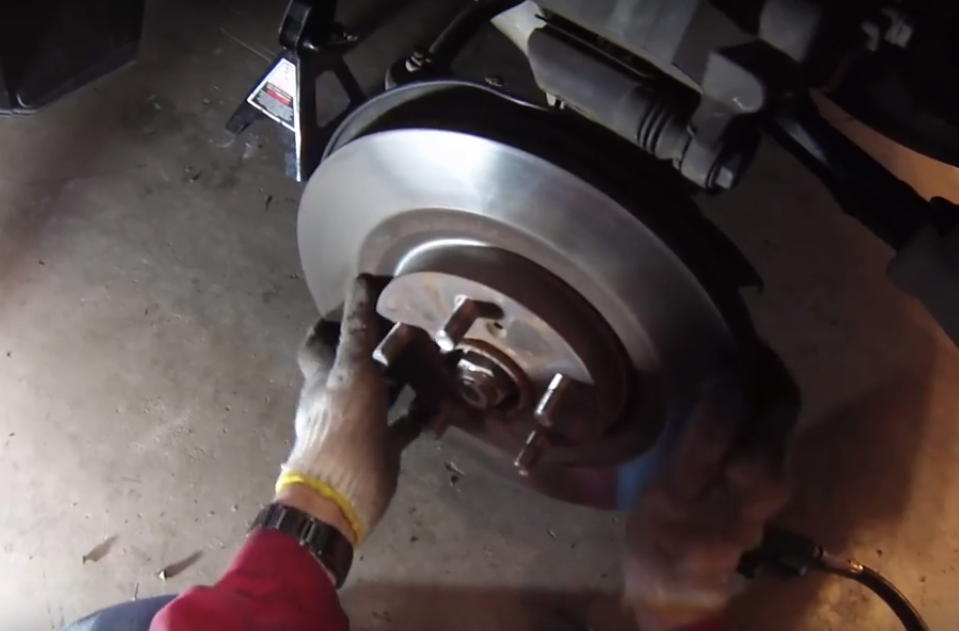
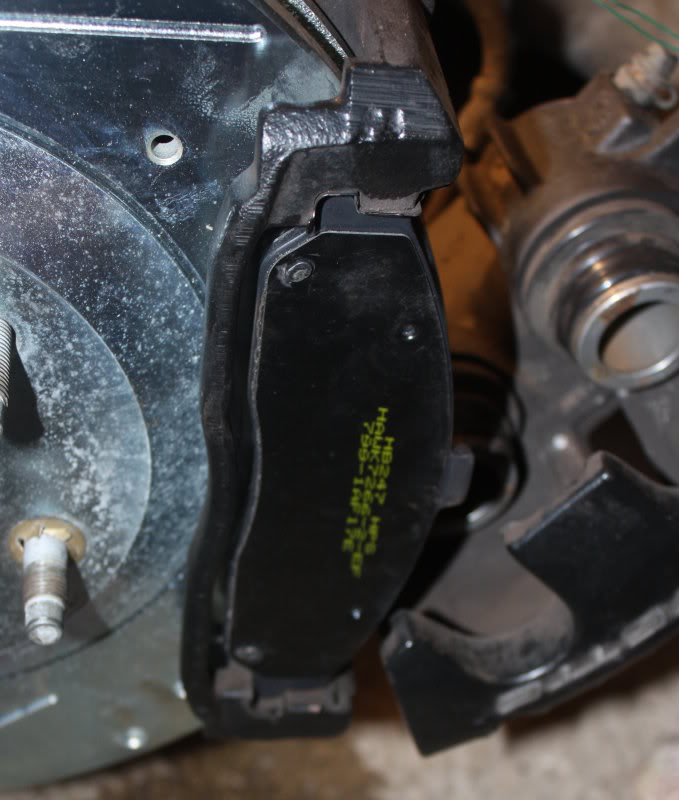
- The brake caliper is attached to the caliper bracket via (2) caliper guide pin bolts. Remove each guide pin bolt while countering with a wrench on the guide pin itself to prevent the pin from spinning.
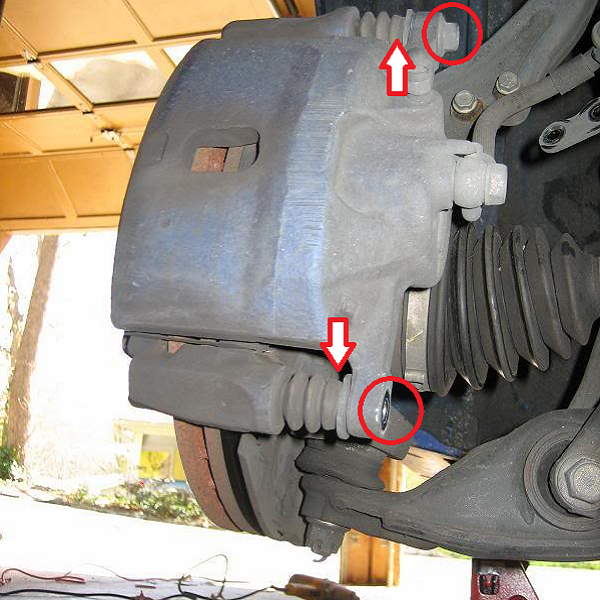
Figure 4. Guide pin bolt removal. 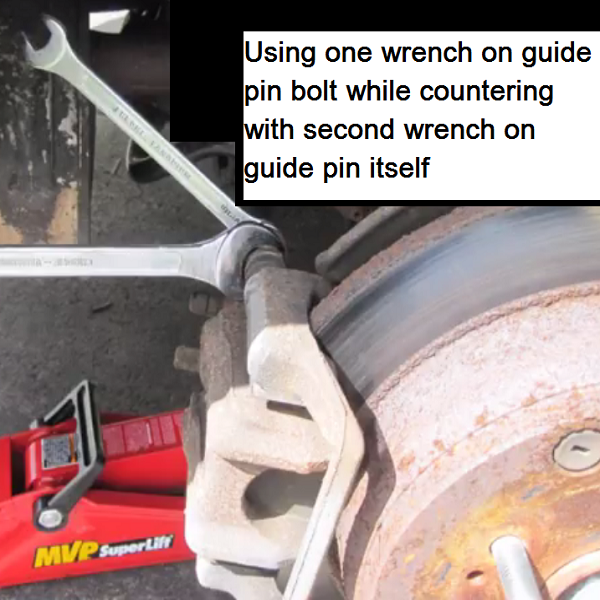
Figure 5. Using two wrenches to remove guide pin bolt.
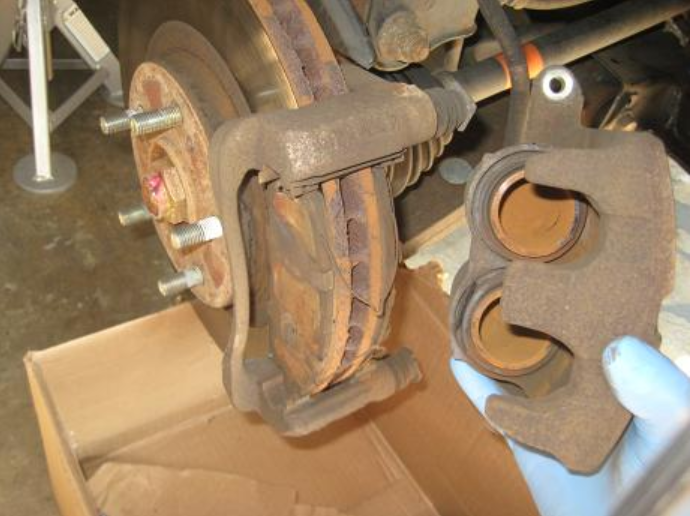
- After removing the caliper guide pin bolts, slide the caliper off of the caliper bracket and brake rotor, and remove the pads from the caliper bracket. If you intend to replace the caliper, detach the brake hose and set the old caliper aside, making sure to either cap off the end of the brake hose or wrap it in a shop rag to catch any corrosive brake fluid. If you plan to reuse the caliper, support it with a snubber or bungee chord to prevent it from hanging from the brake hose.
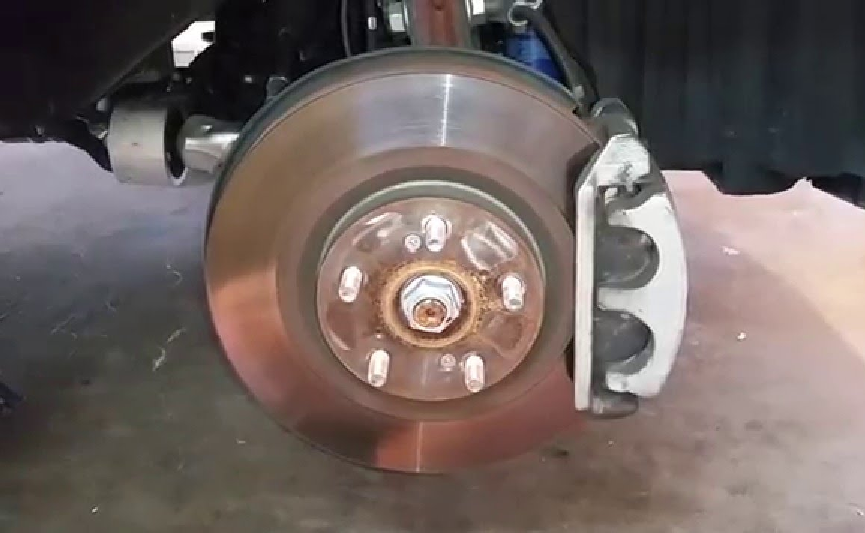
Step 3 – Remove brake rotor(s)
If replacing the brake rotor(s), the brake caliper bracket must first be removed.
- Using a breaker bar, remove the (2) caliper bracket bolts. Set the bracket aside.
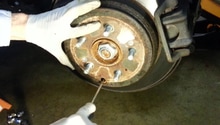
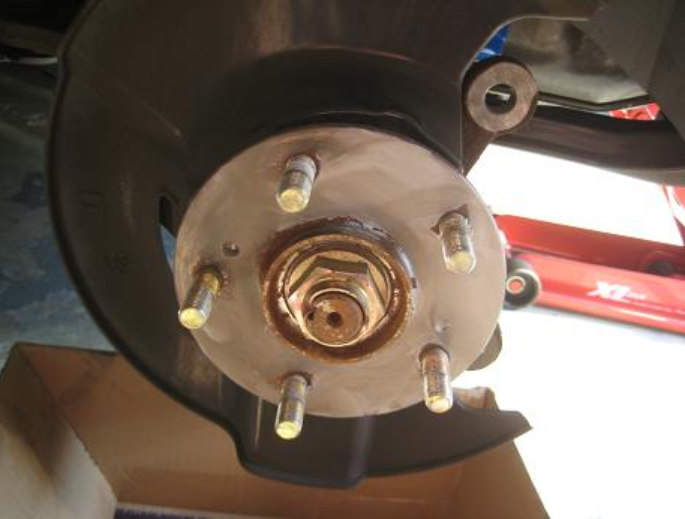
- Using a Phillips screwdriver or impact driver, loosen and remove the rotor retaining screws. These are often corroded and tightly held in place, so a small application of penetrating oil and slight tap with a hammer will greatly aid in removal.
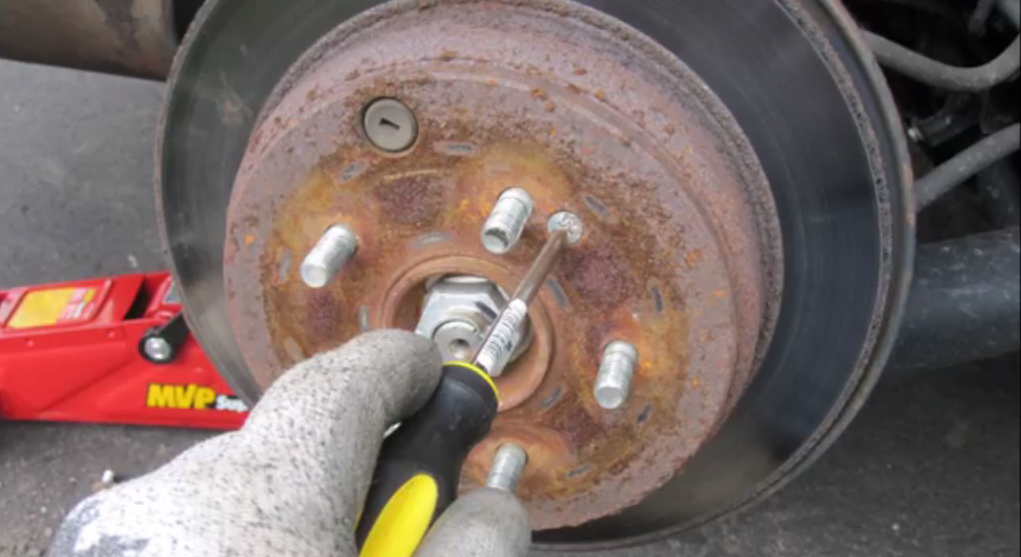
- With the retaining screws removed, the rotor will slide off of the hub. If the rotor is stuck in place, a slight tap with a hammer will free it.
Step 4 – New brake component installation
Rotor Installation
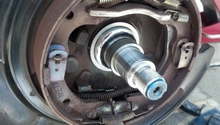
- Before installing your new brake rotor(s), clean each hub of any rust or dirt to ensure the rotor hat sits flush against the hub mating surface. A small amount of anti-seize paste can also be applied to the hub surface if desired. Also, clean the brake rotors with mineral spirits such as acetone or brake parts cleaner to remove any corrosion inhibitors that were applied to the rotor at the factory.
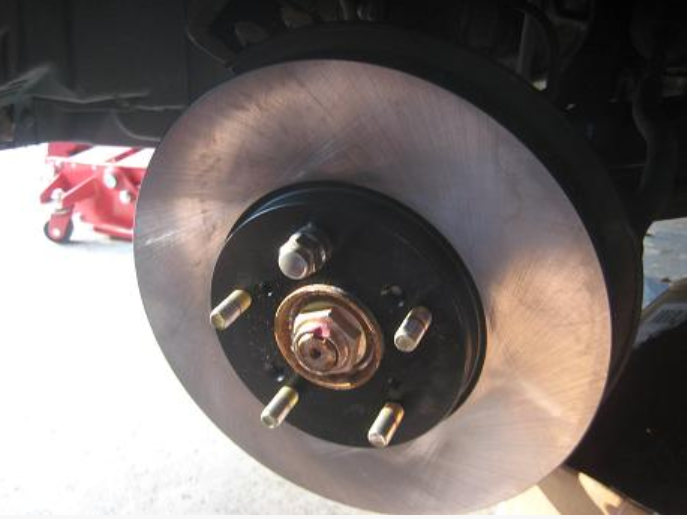
- Slide the new rotor onto the hub. Be sure the retaining screw holes of the rotor properly align with the holes in the hub. Install and tighten the retaining screws to approximately 6-7 ft/lbs.
- Install the brake caliper bracket using a medium strength Threadlocker (blue) on the threads of the mounting bolts. For the front brakes, torque the mounting bracket bolts to approximately 90-100 ft/lbs, and the rear bracket bolts to approximately 60-65 ft/lbs.
Brake Pad and Caliper Installation
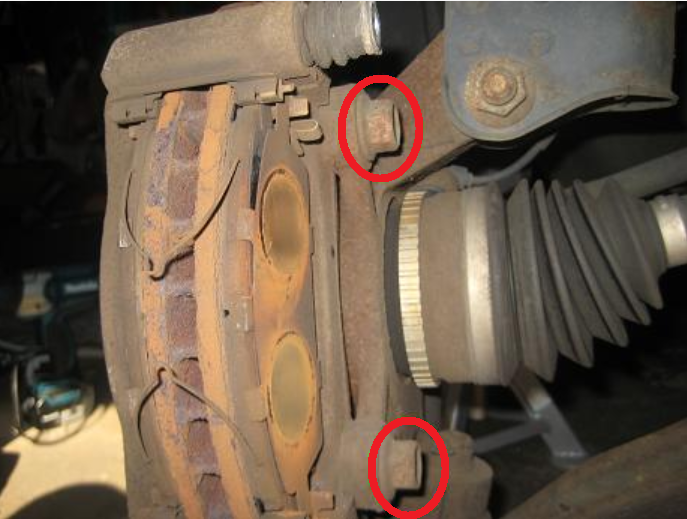
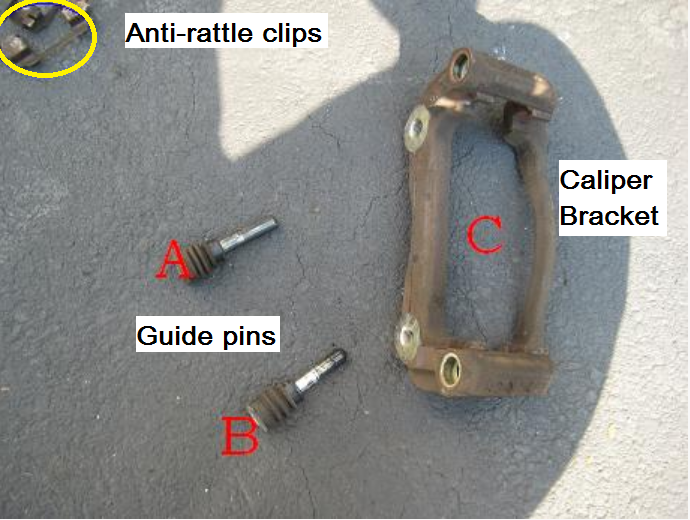
- Whether installing a new brake caliper or using the old one, first slide the anti-rattle clips into the caliper bracket before installing the new brake pads into caliper bracket. Be sure the ears of the brake pads are properly positioned in the caliper bracket and anti-rattle clips.
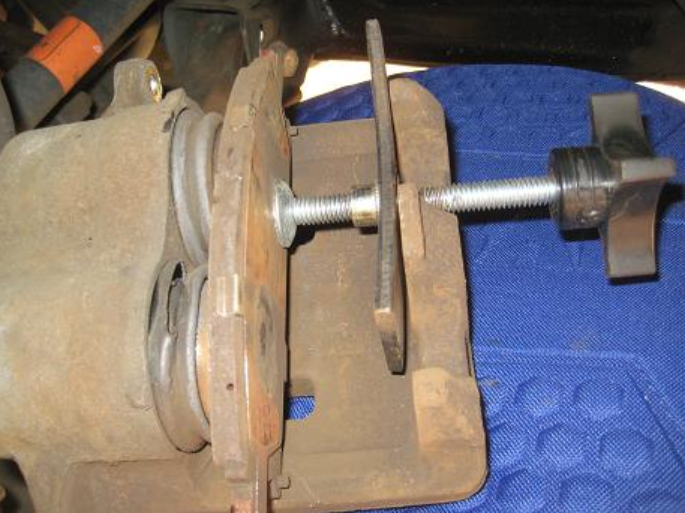
- If re-using the old brake caliper, siphon a portion of brake fluid from the master cylinder reservoir before compressing the caliper pistons using an old brake pad and caliper piston compressor or large C-clamp.
- Grease the caliper slide pins with a silicone-based grease. Slide the caliper over the brake pads and onto the caliper bracket before installing the guide pin bolts. Using a wrench to counter the guide pin, torque the caliper guide pin bolts to approximately 50-55 ft/lbs (front) or 25-30 ft/lbs (rear).
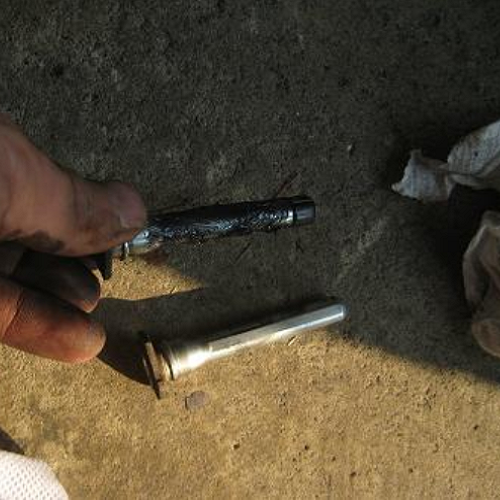
Figure 15. High temp silicone grease applied to guide pins. 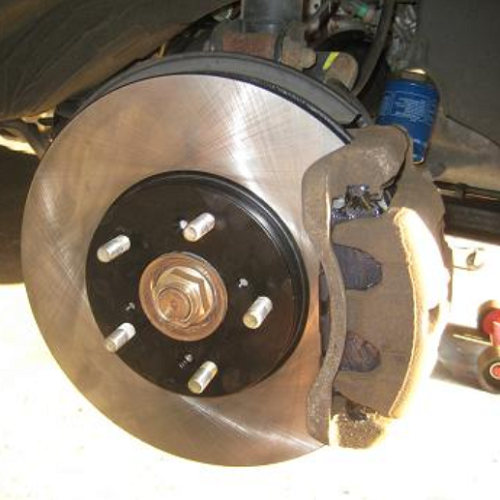
Figure 16. Rotor, caliper, and pads installed.
- If a new caliper was installed, attach the brake hose to the caliper using new crush washers and torque to approximately 28-34 ft/lbs (refer to Figure 3).
Pro Tip
A set of brake pads will include a new set of anti-rattle clips and pad shims. While the old clips and shims can typically be re-used, there is no harm in replacing them while you are in there.
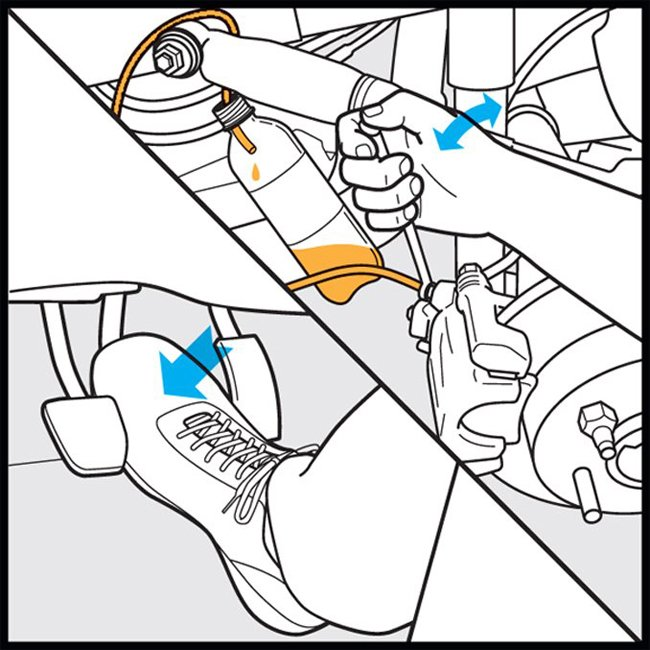
Step 5 – Bleed brakes
If a new brake caliper has been installed, the brake system must be bled of all residual air to ensure consistent braking performance. While not required, it is highly recommended that you flush the brake fluid whenever performing brake system maintenance. For additional information on bleed/flushing the brake system, see How to Replace Brake Fluid.
- Once you have successfully bled the brake system, proceed with installing the wheels and letting the vehicle down off of jack stands.
Notice!
New brake pads and brake rotors are required to properly bed in before maximum braking efficiency is achieved. Most manufacturers suggest moderate usage of the brakes for a 200-400 mile period; however, this process can instead be quickly accomplished with 6-10 hard stops from 60 to 30 mph and letting the brakes cool slightly between stops.
Related Discussions
- Brake Pad Replacement on RDX - AcuraZine.com
- Best Aftermarket Rotors for RDX - AcuraZine.com
- Replaced Brake Pads - AcuraZine.com