Acura TL 2009-2014: How to Install HID Fog Light Kit
HID fog lights can dramatically improve your vision in foggy conditions. Here's how to install them on your 4th Gen Acura TL.
This article applies to the 4th Gen Acura TL (2009-2014).
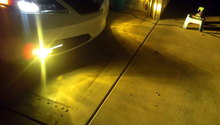
If you live in an area that sees a lot of fog, you know how dangerous it can be. Fog greatly diminishes how far you can see while driving, which means that you may not be able to react to a potential problem before it's too late. Upgrading your halogen fog lights to HIDs can help solve that problem by sharply increasing light output and visibility. On top of that, it's a pretty quick and easy job to complete. If you want to make your foggy early morning commute to work easier and safer, keep reading and we'll walk you through the process.

Materials Needed
- Small flat head screwdriver
- Ratchet
- 10mm socket
- Drop light
- Jack and jack stands
- Small socket extension
- Snips
- HID Extra H11 6k HID kit
Step 1 – Remove the splash guard
Lift the front of the car up and place it on jack stands. In front of the wheels you will see the splash guard, which is held in place by 10 snap connectors and 10mm bolts. Remove the ones pointed in green in Figure 1 only. To remove the snap connectors, place a flat head screwdriver in between the inside and outside pieces, then twist and pry the center section out until it releases. Pry the splash guard back and to the right to access the fog lights.
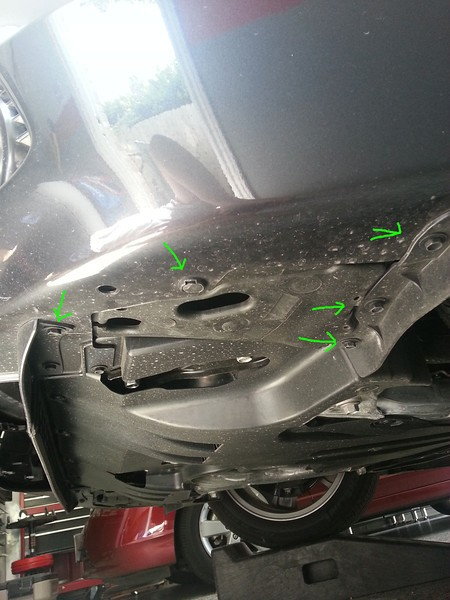
Figure 1. Remove the 10mm bolts and snap connectors shown. 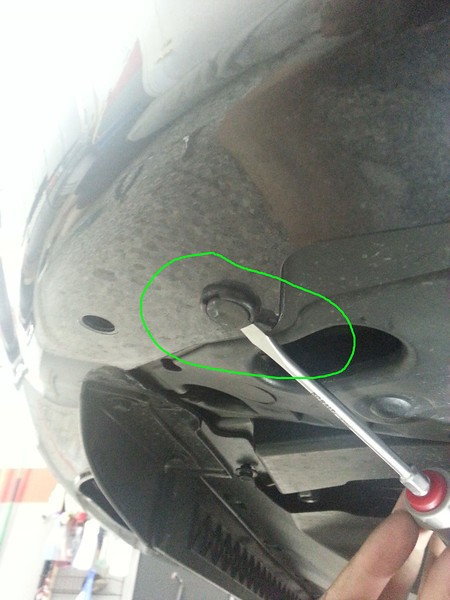
Figure 2. Pry the center section of the snap connectors out using a small flat head screwdriver. 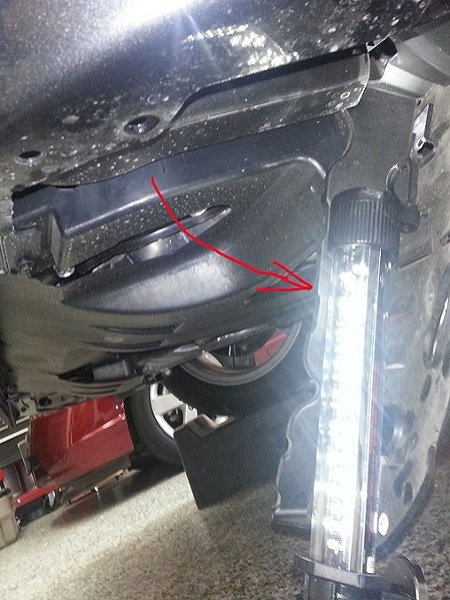
Figure 3. Pull the splash guard to the right to access the fog lights.
Step 2 – Replace fog light bulbs
Look inside the hole using your light and locate the connector circled in red in Figure 4. Push in on the snap on the back of the connector and pull it down while pressing in to remove it. Twist the bulb out of the socket to remove it, then install the HID bulb by pushing it in and twisting it to lock it into place.
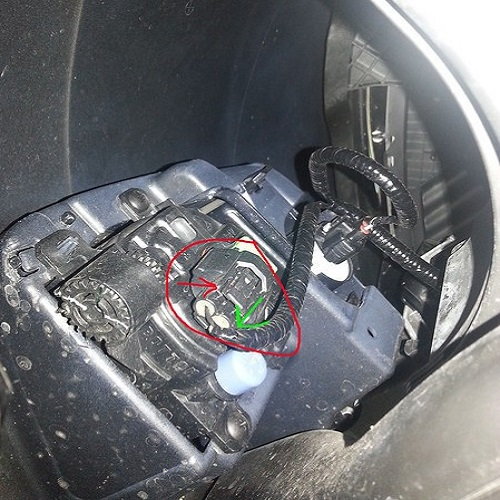
Figure 4. Remove the connector. 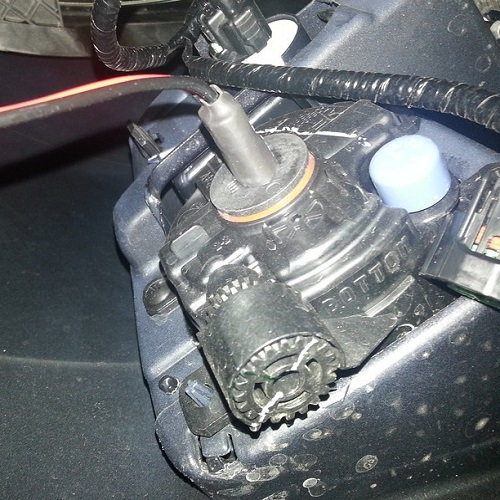
Figure 5. Twist the bulb out and replace it with the HID bulb.
Step 3 – Install HID ballast
Connect the factory harness into the HID connector. Connect the HID ballast to the factory wiring by pushing the wiring into the slots as shown in Figure 7. Test the lights to make sure they work. Install the HID ballast on top of the blinker housing where there is a flat surface with the supplied double-sided tape. Cleaning the surface with a little Windex or cleaner will help it stick better. Run the wires from the ballast up the left side and use some zip ties to secure them if needed. Reinstall the splash guard and lower the car from the jack stands.
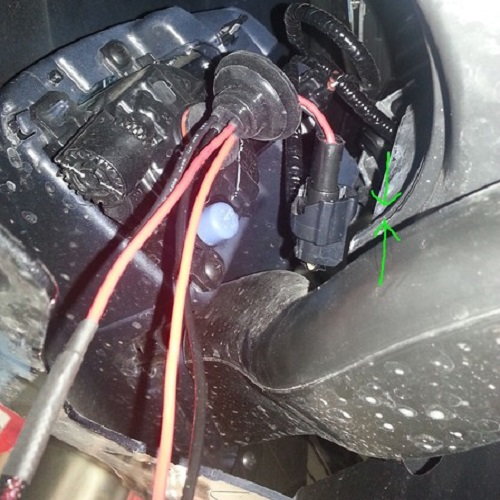
Figure 6. Connect the factory harness into the HID connector. 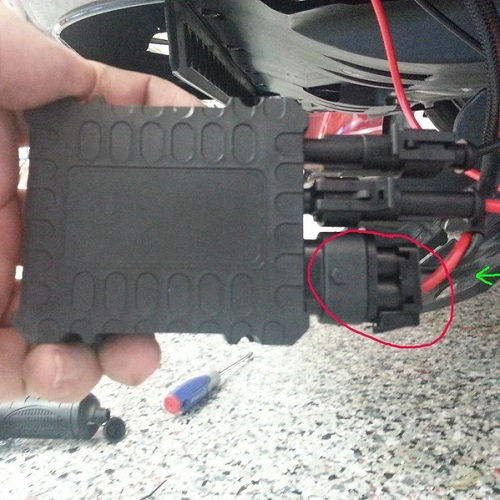
Figure 7. Connect the wiring to the HID ballast. 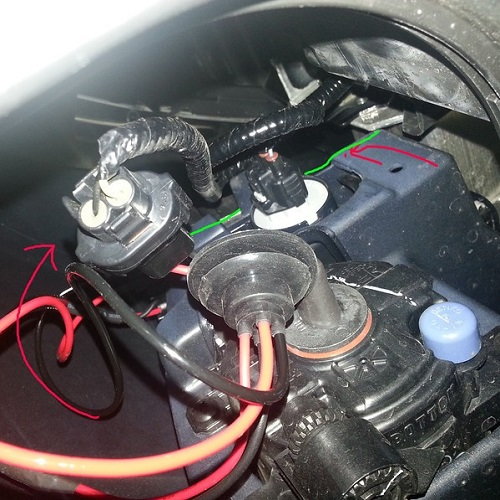
Figure 8. Install the ballast.
Related Discussions
- How to Install HID Fog Light Kit on 4th Gen TL - AcuraZine.com
- Upgrade to HID Bulbs - AcuraZine.com
- HID Fog Light Conversion - AcuraZine.com