Acura MDX: How to Lower Using Honda Odyssey Springs
Lowering your MDX is not as hard as you may think, thanks to the vast assortment of Honda/Acura models using nearly the same platform. Check out this cheap alternative to custom springs.
This article applies to the Acura MDX (2007-2013).
The Acura MDX is an on-road focused, sporty driving SUV, so why not lower it for an even sportier experience? It is not a popular thing to do, but there are a select few that enjoy the overall look and increased street handling ability a lowering kit provides. There are no ready made aftermarket lowering kits that work for the Acura MDX, so people who prefer this look have been forced to go with full coilovers, and often fabricate some of their own parts. However, those of you with a second generation can use lowering springs from H & R or other companies made for the 2007 Honda Odyssey minivan and get a nice drop of nearly 1.5". The installation is very simple to do as listed below.

Materials Needed
- Ratchet and socket set up to 22mm
- Jack
- Jack stands
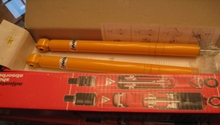
- Honda Odyssey aftermarket lowering springs
- Spring compressor
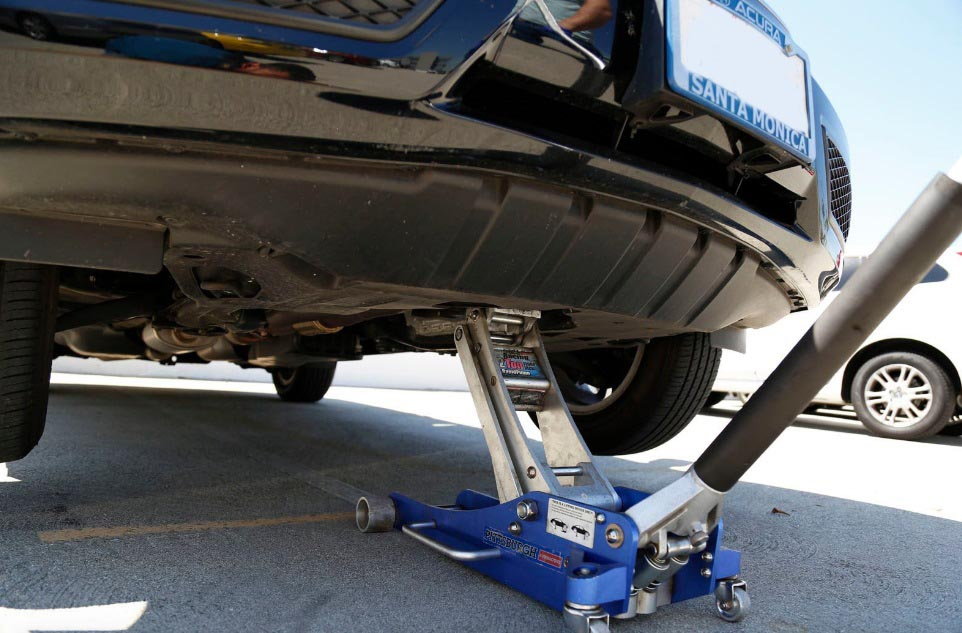
Step 1 – Raise and support the chassis
Loosen the lug nuts on all four wheels, then jack up the MDX and support it with jack stands. You have to do this to both ends of the car, but if you only have a pair of jack stands, you can do one end at a time. Once the chassis is off the ground, remove the wheels and begin loosening the strut mounts.
Step 2 – Replace the rear springs
The rears are very simple to do, since the shock itself is separate from the actual coil. All you have to do is remove everything holding the lower control arm from dropping completely.
- Remove the rear sway bar end link.
- Remove the the bottom shock bolt.
- Place the jack under the lower control arm.
- Remove the bolt that connects the lower control arm to the hub.
- Lower the jack and pull out the coil spring.
Make sure you are careful as you remove the last bolt, because there may be some tension left on the coil. Once the coil platform is loosened, replace the spring with the Odyssey unit. Use the jack under the control arm to lift it until you can reconnect all the bolts. Once the coils are finished, reinstall each bolt, reinstall the wheels, and do the front.

Figure 2. Shows the location of the rear coil. 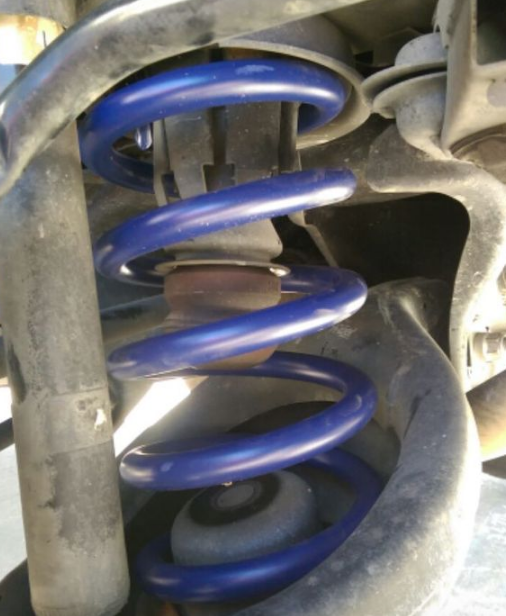
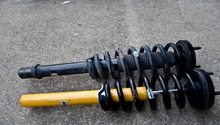
Figure 3. Rear lowering spring installed.
Step 3 – Access the struts
The front coils are little more in-depth when it comes to removing them. However, the process is still very simple to do. First you have to remove the top plastic trim piece, known as the windshield cowl. It's simply held in place by a few clips, and removing it makes the upper strut mounting bolts much easier to access.
- Next, unbolt the brake line bracket, held in place by a 10mm bolt to the lower part of the strut.
- Undo the long sway bar end link, held in place by a 17mm bolt attached just below the spring seat on the strut.
- Be careful of the speed/ABS sensor and its wire, which is attached to the rear of the wheel hub at the steering knuckle. You don't have to remove it, but don't yank the wire and break it.
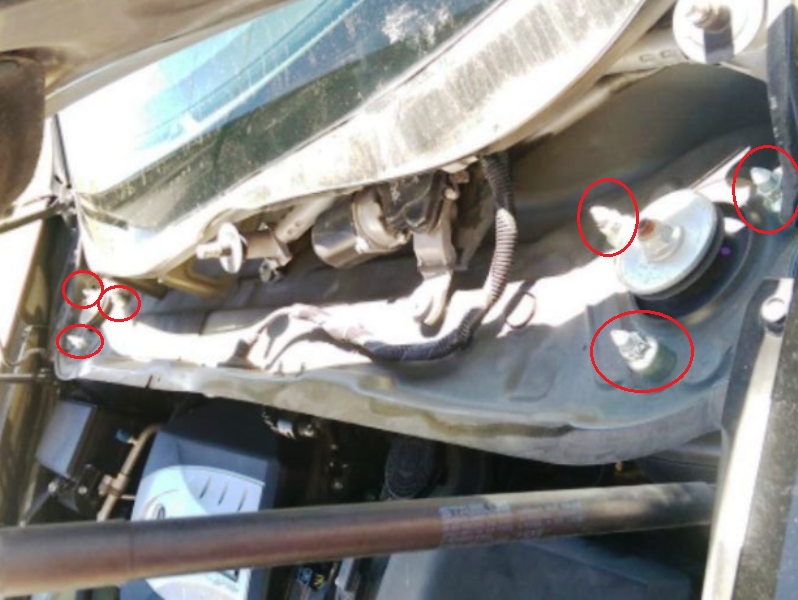
Figure 4. Remove the front cowl to access the six upper strut bolts. 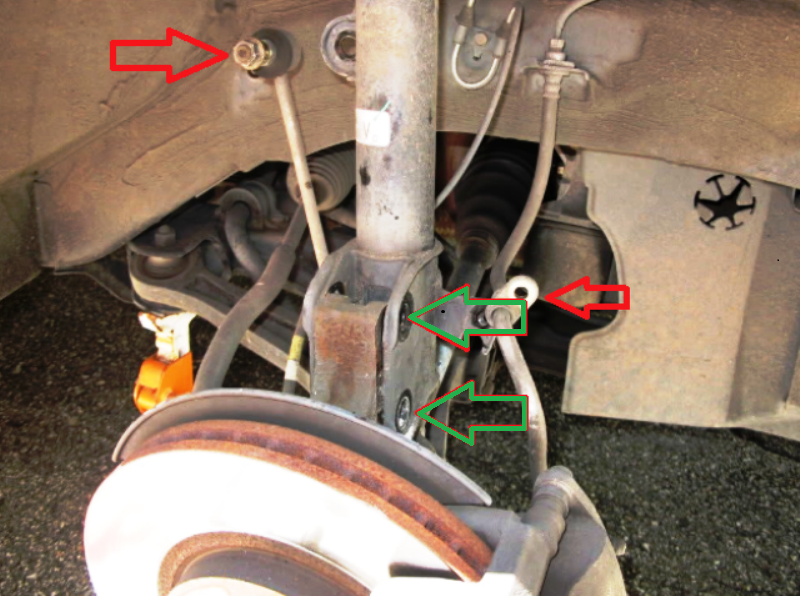
Figure 5. Remove the sway bar end link and brake line bracket (red arrows).
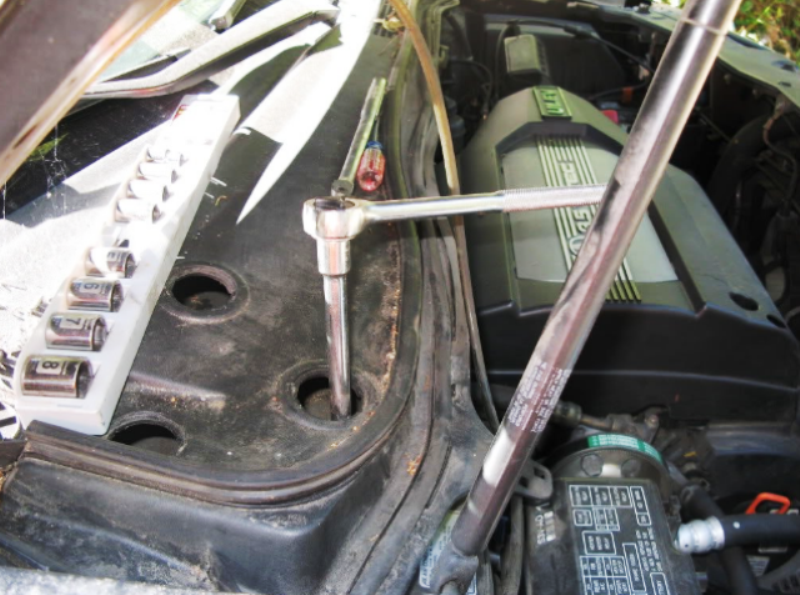
Step 4 – Remove the struts
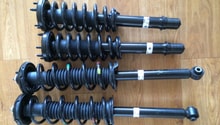
There are now just a total of five pieces of hardware holding the shock assembly to the car. The lower strut bolts also allow for alignment adjustment, so first scribe around them, or spray it with a little paint, so you can realign it properly afterwards. Now, remove the two lower 22mm bolts (green arrows above) and allow the steering knuckle to sag. Then, remove the three 14mm top nuts and the strut should drop down. Pull the strut and spring assembly out of the chassis.
Step 5 – Replace the springs
The stock coils on your MDX are compressed and under a lot of pressure. Spring compressors are usually available for rental at your local part stores and hold the spring down so you can let the pressure off slowly. Compress the springs, and loosen the one central top nut on the strut. Lowering springs will be shorter and less compressed, so installing them will be a bit easier.

Figure 7. Compress the springs. 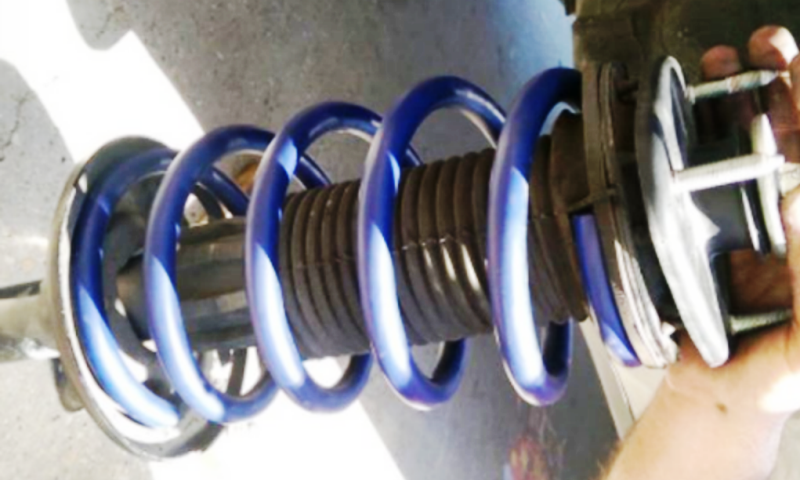
Figure 8. Install the new lowering spring.
Step 6 – Reinstall the front strut
Now all that is left to do is put everything back. Feed the strut up and catch the three upper mounting bolts to hold it in place. Use the floor jack to raise the lower control arm and steering knuckle, so the lower strut bolts can be inserted. Try to get them as close as possible to their original position, as marked earlier, then torque to tight. Reattach the end link, brake line bracket and everything else you removed. Then put your MDX back on the ground and admire the new stance!
Note: You may notice a little more settling over the next few days as you drive, and it may get up to a 1/2" lower when done.
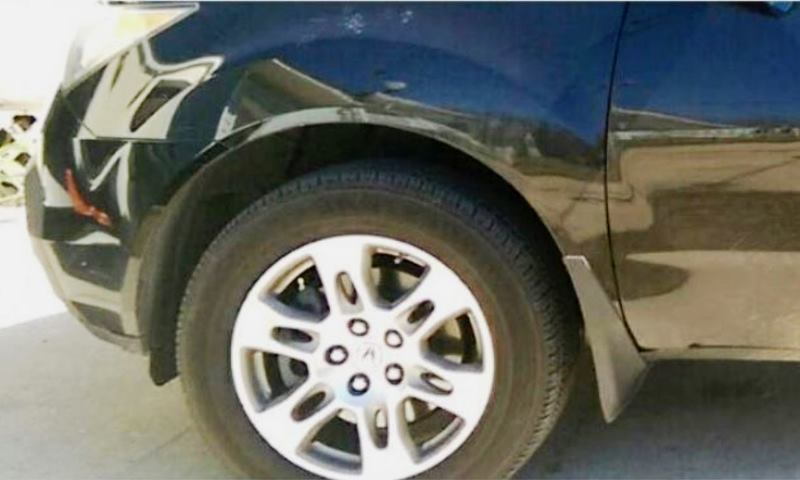
Figure 9. Stock ride height. 
Figure 10. H & R Sport Odyssey springs installed. 
Figure 11. MDX lowered 1.5" on H & R springs.
Related Discussion and Site
- CONFIRMED!!!! 07' MDX Lowered on Odessey Springs!!! - AcuraZine.com
- Acura MDX: How to Replace Shocks and Review - AcuraZine.com