Acura TL 2004-2008: How to Install Lowering Springs
If you want to drop the ride height on your Acura TL, a set of lowering springs will do the job at a reasonable price. Here's how to install a set yourself and save some serious money.
This article applies to the Acura TL (2004-2008).
In factory form, your Acura TL's suspension is geared towards comfort, and the ride height of the car definitely indicates that. However, some enthusiasts will lower their rides to close up some of that unsightly wheel gap to give their car a more sporting flair. This aesthetic choice is often paired with a set of aftermarket wheels with more aggressive fitment that pushes the wheel and tire closer to the fender opening, giving it a more "flush" look. Going beyond just the aesthetics, lowering springs have stiffer spring rates, which will reduce roll in the corners, making your TL feel as good as it will look. If this sounds appealing to you, then read on for the DIY details to get the job done.

Materials Needed
- Floor jack and jack stands
- 14mm open end/box wrench
- 10mm deep socket
- 14mm deep socket
- 12, 14, 17, and 19mm regular sockets
- Ratchet
- Penetrating oil
- Hex key wrench
- Spring compressor
Step 1 – Remove front suspension components
Jack the front of the car up and place it on jack stands. First, remove the two 17mm bolts and nuts from the lower control arm on each side (#22 and #24 in Figure 1). If you have trouble getting them loose, you can use a wrench on each side and try tapping it with a hammer to break it free. Next, remove the 14mm bolt (#20), then slide the fork down (#17 and #18) the strut and remove it.
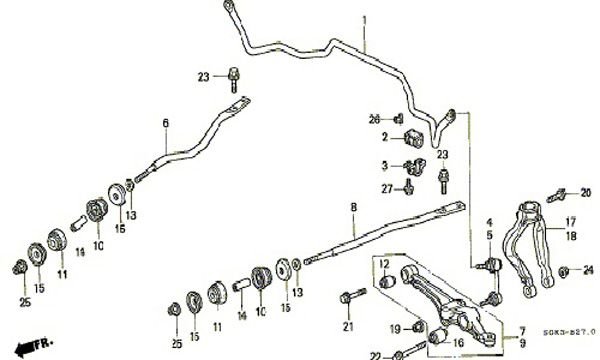
Figure 1. Control arm/suspension diagram. 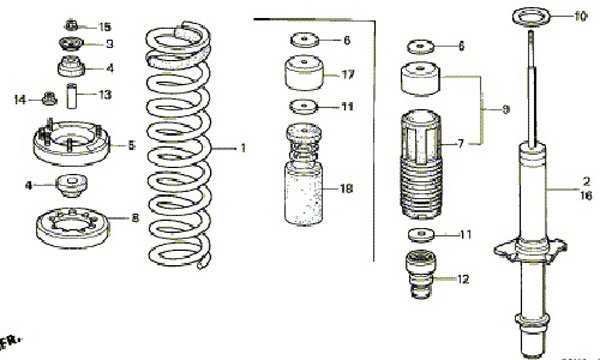
Figure 2. Strut/coil over diagram.
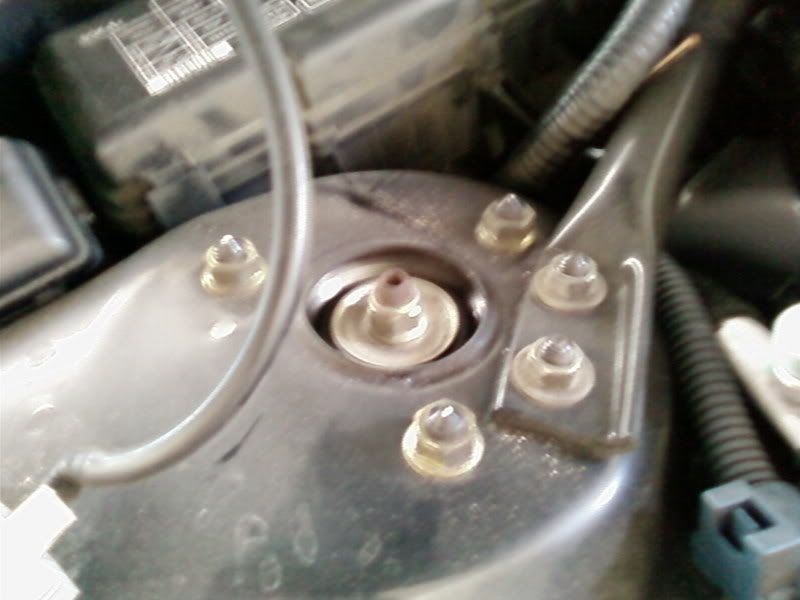
Pop the hood and remove the five bolts from the top of the strut tower (three 14mm and two 12mm). Remove the strut/spring assembly from the car, having someone press down on the brakes if you need additional clearance to pull them out.
Step 2 – Install front lowering springs
Before you remove the spring from the strut, mark the notch on the bottom of the strut and make another mark on the mounting bracket. This will make it easier to align the new springs when you install them. Install the spring compressors on the spring and push the clips in. Tighten both sides evenly. Use the hex key wrench and open ended wrench to remove the top mounting cover, making sure the top part is facing away from you and anyone else. Use a little penetrating oil if needed to break the nut free. Go very slow removing the nut, as the springs are still under pressure. Depending on which lowering springs you buy, the rubber bump stop might need to be trimmed. Always follow the instructions that come with your parts.
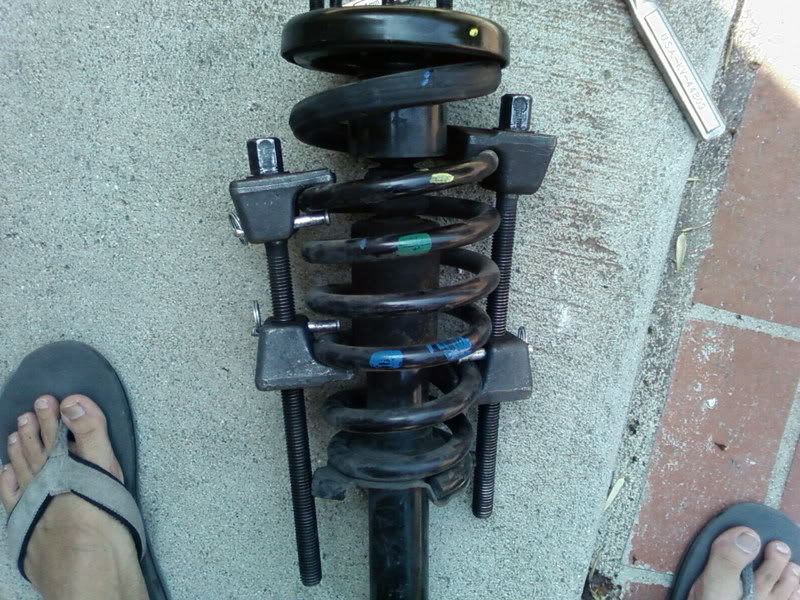
Remove the compressors from the springs by evenly loosening each side until they come off. Compress the new springs with the compressors and install them on the struts, making sure the bottom of the springs are sitting against the base. Make sure everything is back on the strut before reinstalling the nut and tightening everything back up. Reinstall the top mounting cover and align it with the markings, then tighten. Remove the compressors and slide the strut/spring assembly back into the car. Reinstall the five nuts on the strut tower. Slide the fork bracket back on the strut and reinstall the 14mm bolt. Reinstall the 17mm nut and bolt on each side.
Step 3 – Remove the rear strut/spring assembly
The rear seat must be removed to access the two top suspension bolts, which must be removed. Remove the two 10mm bolts near the cup holder/arm rest area of the back seat, directly below each side of the arm rest. Pull up and out to remove the bottom of the rear seat. Remove the 10mm bolt on each side by the doors, then grab the upper part of the rear seat and lift up on it to remove. Lift up on the rear deck lid and remove the two 14mm bolts.
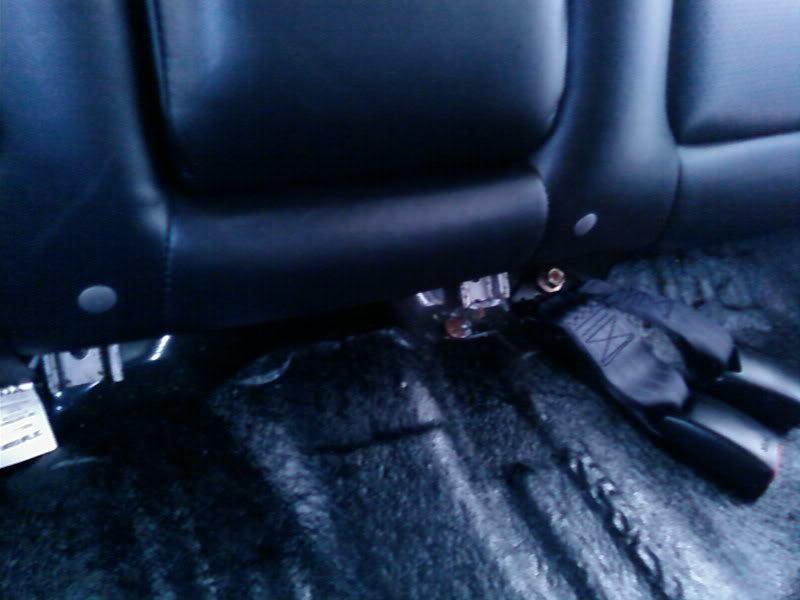
Figure 5. Remove the two bolts under the arm rest. 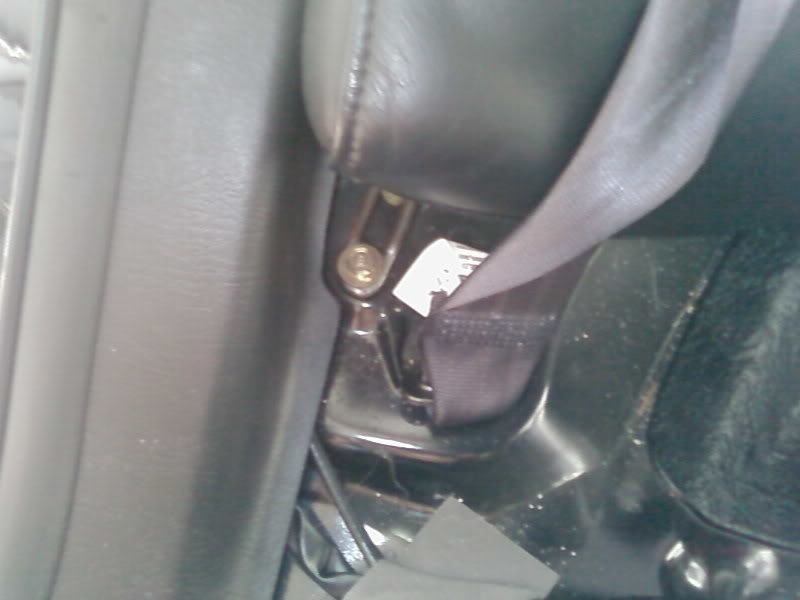
Figure 6. Remove the bolts near each door.
Remove the rear end links, held in place by 14mm bolts on each side (#6 and #7, #9 and #10). Remove the 17mm bolt from the lower control arm. Push the end of the strut away from you toward the bottom while someone pushes down on the brakes and remove it.
Step 4 – Install rear lowering springs
Modify the rubber bump stops if needed. Compress the springs as you did with the front and remove the top mount of each strut assembly. Compress the new springs and install them on the struts, then reinstall them. Line the struts back up with the link stabilizer and install the bolt, then install the 14mm bolt, but don't tighten either yet. Reinstall the end link, then tighten everything up. Reinstall the top suspension bolts and rear seat.
After everything has settled and the job is done, take the car for a test drive and then head to your local alignment shop to make sure everything looks good.
Featured Video: How to Install Coil-overs/Springs on Acura TL
Related Discussions
- DIY Lowering Dropping Your TL - AcuraZine.com
- Best Lowering Springs - AcuraZine.com
- Torque Specs for Shock Assemblies - AcuraZine.com
- Which Lowering Springs - AcuraZine.com