Acura TL 2009-2014: How to Change the Differential Fluid in SH-AWD
Raising and lowering your Acura TL SH-AWD's rear end a couple of times can get monotonous if you don't happen to have a hoist handy. But this article will show you why it's critically important to do so when changing your rear differential fluid.
This article applies to the Acura TL (2009-2014).
The concept of all wheel drive (AWD) has been around in the U.S. for a very long time. One of the first production AWD vehicles was the AMC Eagle, which debuted in 1980. Engineered by Jeep (then owned by AMC), the concept was later adopted by European car companies (the Audi Quattro) and Japan (the Subaru).
But early AWD vehicles suffered from not only very poor mileage, but extensive drivetrain wear as the front end virtually wrestled with the rear end over power.
With later vehicles the engine control module (ECM) matured into a powertrain control module (PCM), with its ability to quickly receive and process more input from a wider range of powertrain elements, such as the TCM, front and rear differential, wheel speed indicators, traction and stability control systems, etc. Which in turn allowed for an increased coordination between the major drive components, a smoothing-out of their behavior, and much better fuel economy than any of the earlier AWD versions. All of which not only made AWD much more practical, but also—because of its inherent road-hugging abilities in all driving conditions—very appealing.
SH-AWD, or “Super Handling - All Wheel Drive,” first appeared on a North American Acura vehicle in 2005—a sophisticated, full-time, fully automatic all wheel drive traction and handling system. Amazingly, it has the ability to simultaneously balance torque distribution to the right as well as left wheels of both front and rear axles.
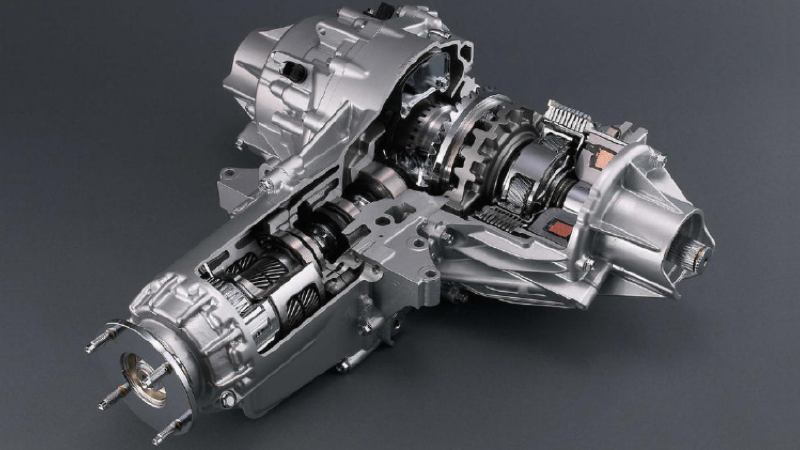
Significant to this system are:
- A clutch pack between the two differentials to help prevent windup between the front and rear end,
- An acceleration device in front of the rear differential to gear-up the speed of the rear end during handling (instead of having to brake or throttle-down the engine for control), and
- Clutch packs on either side of the rear differential to help balance power distribution between the rear wheels.
With the Acura TL, the engine is located directly over the transmission, which incorporates the front differential for the vehicle (it’s actually a transaxle). But unlike many systems that feed engine power to all four wheels, with the SH-AWD the transfer case—the component that siphons power going to the front wheels off to the rear wheels—is also part of the front differential. Thus, when you change the transmission fluid for your SH-AWD, you’re also changing-out the front differential fluid and transfer case fluid as well.
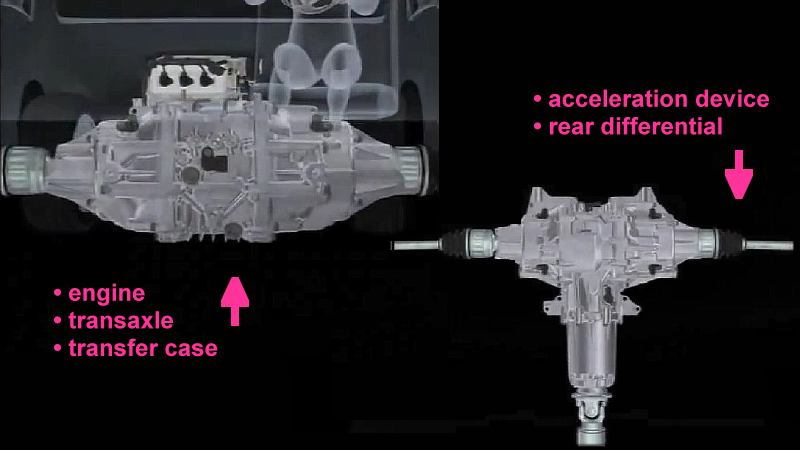
Like most recent-vintage cars, the 4th generation Acura TL will tell you when you should replace the rear differential fluid with its “Maintenance Minder.” It comes to this conclusion based on an algorithmic calculation that involves your mileage, the climate where you live, the driving conditions you deal with, as well as your driving style. If your service code includes a “6,” it’s because your Acura believes it’s time for you to change-out your rear differential fluid. And if and when it says so, you really should pay attention, because all wheel drive vehicles have never been simple, mechanically-speaking. And as the illustrations indicate, the SH-AWD system is anything but simple.


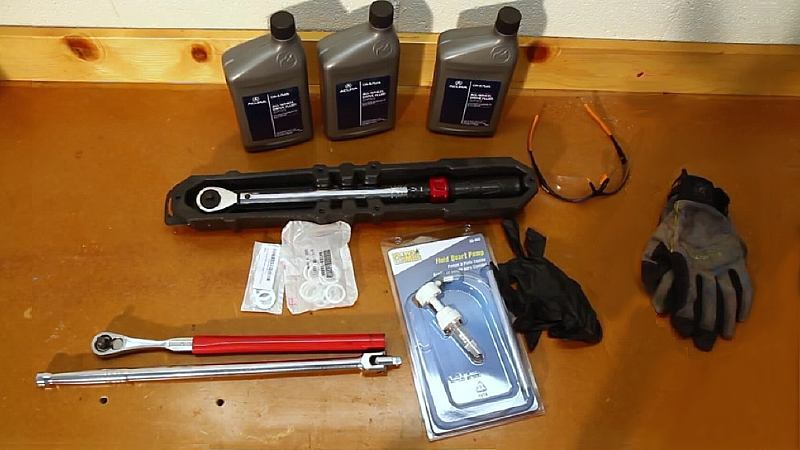
Materials Needed
- 3/8-inch socket wrench (long, and/or 3/8-inch breaker bar)
- 3/8-inch torque wrench
- Quart bottle pump and tubing ($7-$10)
- Spare crush washer for differential drain bolt/plug (19mm) and fill bolt/plug (20mm) ($3-$6)
- 3 quarts of AWD Differential Fluid, Acura DPSF 0820-9007A (2.6 quarts required)
- Drain pan, ideally with measuring markings
- Trolley jack, jack stands, and wheel chocks (optional)
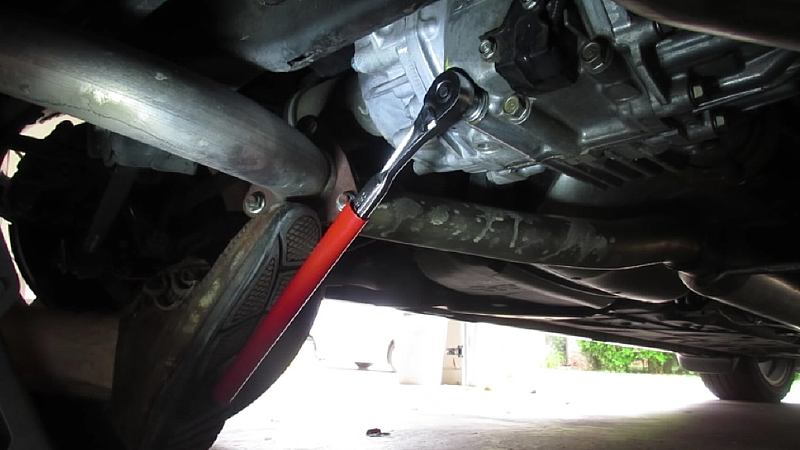
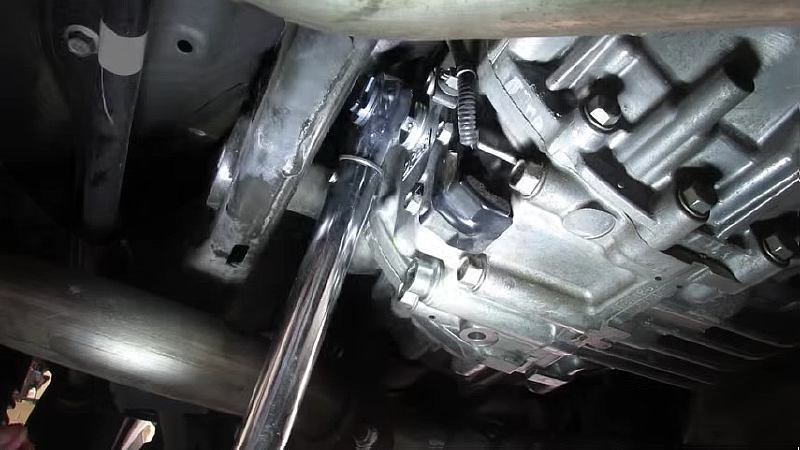
Step 1 – Raise the rear of the vehicle
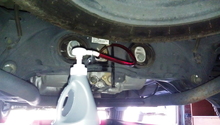
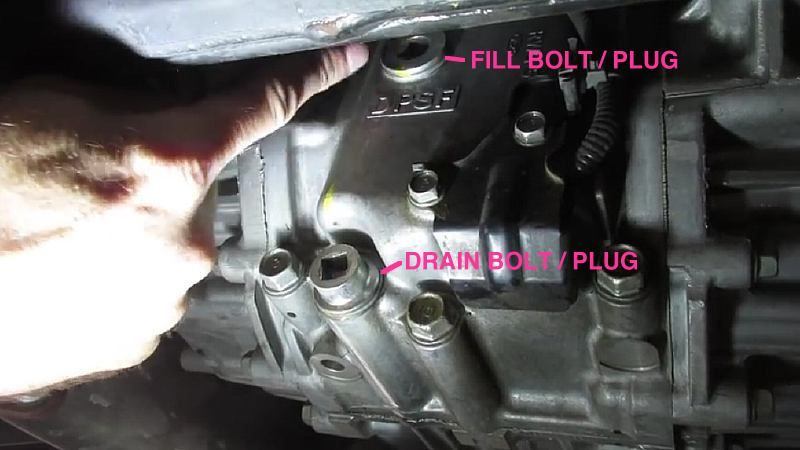
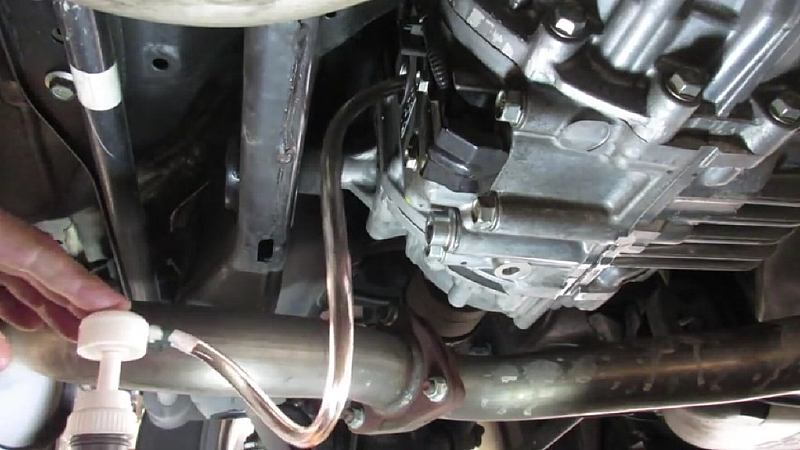
The rear differential drain bolt/plug is circled in red, with the fill bolt/plug located above it.
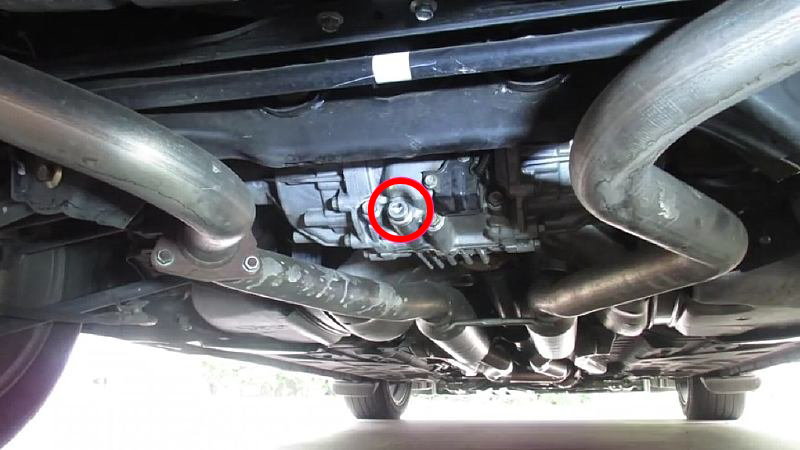
Chock the front wheels from the front. Then, with a trolley jack raise the rear of the vehicle from the center rear jack point just behind the rear bumper, which is also the location of the tow handle. Place a jack stand under a rear frame member on each side of the car.
Loosen the bottom drain bolt/plug, as well as the top fill bolt/plug, with the long wrench or breaker bar.
These can be very hard to break loose, but never start draining the rear differential if you can’t loosen the fill bolt/plug first, because if you drain the differential fluid and then find you can’t remove the top bolt/plug, you’ve put your car into an undrivable condition.
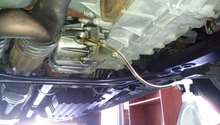
Step 2 – Drain the rear differential
With a drain pan in place, remove the drain bolt/plug.
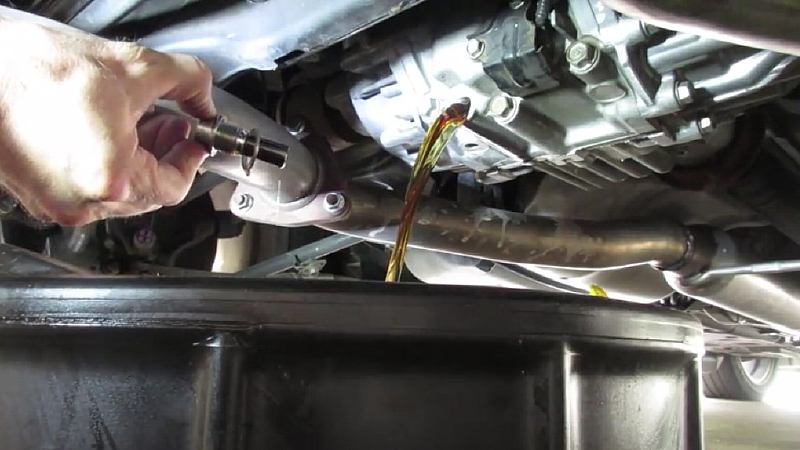
The draining fluid should be a caramel color. If it’s pink, that means it was the original differential fluid, which Acura no longer uses.
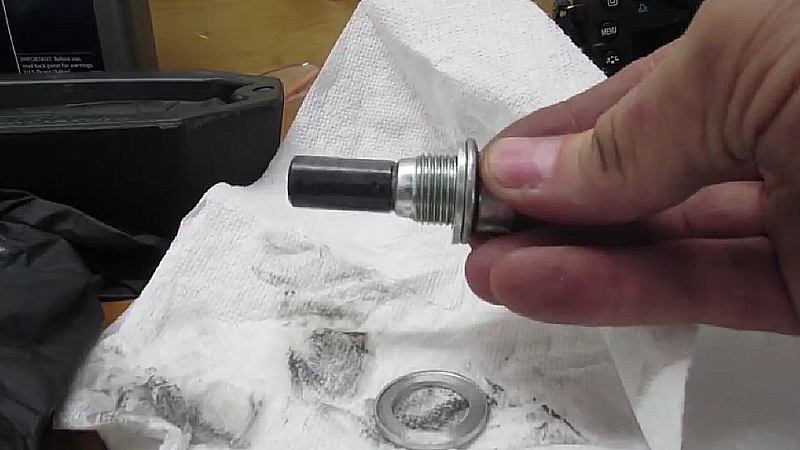
As the differential drains, clean any metal shaving off the magnet attached to the drain bolt/plug. Also, make sure the crush washer is in good condition; that is, not scratched or bent. If it is, a new crush washer needs to be used.
When the draining has stopped, remove the floor jacks and lower the rear of the vehicle to a level position. This allows the rest of the fluid to drain from the differential. If your drain pan has fluid markings on its sides, check to make sure that 26 ounces have drained.
Replace the differential drain bolt/plug to stop any dripping, and screw it in finger-tight.
Step 3 – Fill the rear differential
Raise the rear end again, and put the floor jacks back in place as you had them before. Then with a torque wrench, tighten the drain bolt/plug to 35 lb-ft (47 Nm).
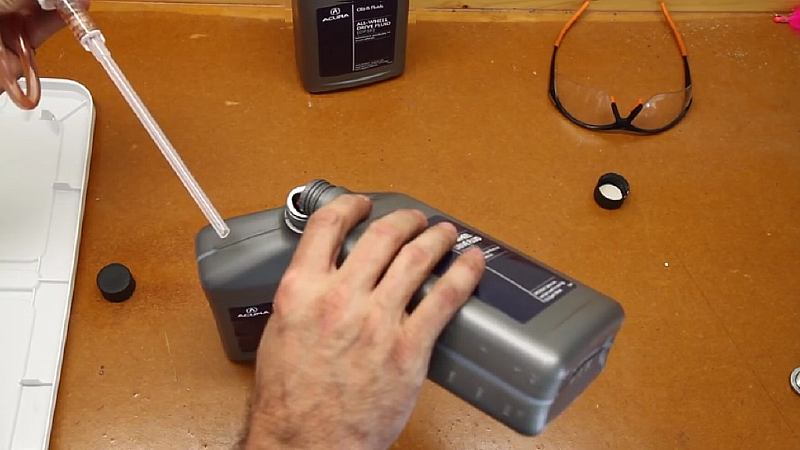
Next, fully remove the fill bolt/plug, located above the drain bolt/plug. Put the bottle pump into one of the bottles of rear differential fluid.
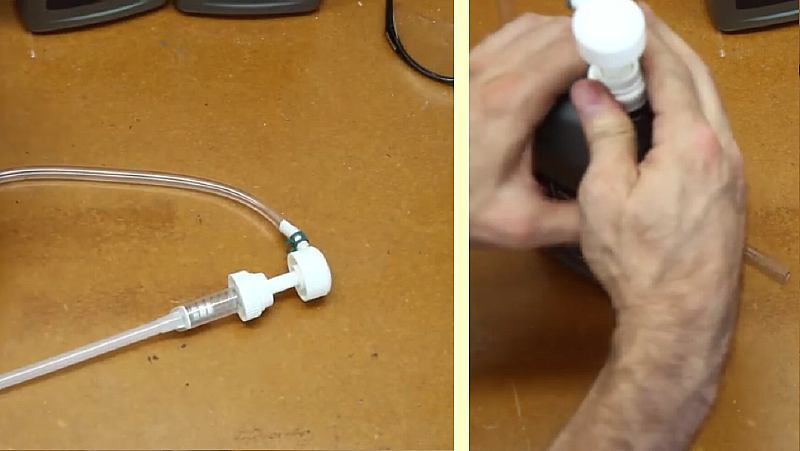
Insert the pump tubing into the fill hole and start pumping.
To accommodate different sized bottles, the feed line inside the bottle might not touch the bottom of your differential fluid bottle. If this is the case, so as to not waste any fluid, any that didn’t pump from the first bottle should now be poured into the next bottle prior to pumping from it. Repeat this procedure when going into the third bottle of differential fluid.
With the drain pan back in place, watch the side fluid level marking to be ready for when you go over the 26 ounce capacity and it starts to dribble back out of the fill bolt/plug.
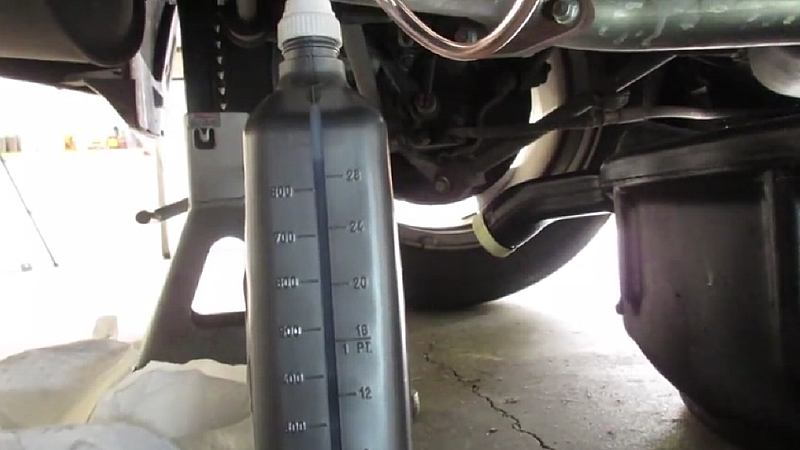
When it does this, stop pumping and again lower the vehicle to a level position with the drain pan still in place. This lets the excess fluid drain out, allowing the differential fluid to level off at the bottom of the fill hole, which is where it’s supposed to be after it reaches its proper level of 26 fluid ounces.
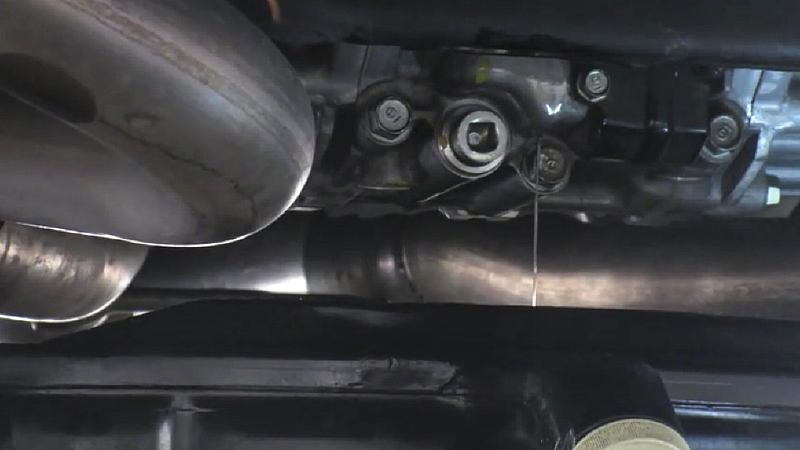
As the now-filled differential is dribbling to its level state, check to make sure the crush washer for the fill bolt/plug is not scratched or bent. If it is, it will need to be replaced. Also note that the crush washers for the drain bolt/plug is 19mm in diameter, while the crush washer for the fill bolt/plug is 20mm in diameter. Make sure you don’t mix them up during removal and replacement.
After the fluid has stopped dripping out, replace the fill bolt/plug. Tighten it as best you can if you don’t have room to use a torque wrench on it. If this is the case, you’ll once again have to raise the rear end onto jack stands. Then tighten the fill bolt/to 35 lb-ft (47 Nm).
Lower the car, clear the jacks, and remove the wheel chocks from the front tires. You're done, but don’t forget to dispose of the old differential fluid properly.
Featured Video: Replacing Rear Differential Fluid on Acura TL SH-AWD
Related Discussions
- SH-AWD Diff Fluid - AcuraZine.com
- Changed SH-AWD Diff Fluid on My 2012 - AcuraZine.com