Acura RDX: How to Replace Ball Joints
Bad ball joints can cause all sorts of problems with your suspension and the dynamics of your vehicle. Here's how to replace them to get your RDX riding smoothly and quietly once again.
This article applies to the Acura RDX (2007-2016).
Bad ball joints aren't exactly a difficult problem to notice, as they generally exhibit either noise or handling symptoms. These might include a clunking from the front tire area, shaking while driving down the road, and play in your steering. Ignoring these aren't a good idea, as it will lead to these symptoms getting worse, to the point where your tires wear prematurely, or you possibly loose control of the car. Replacing the ball joints in an Acura RDX is only moderately difficult, because in recent years Acura has made some serious improvements in the front suspension deigns in the name of durability and serviceability. Keep reading and we'll walk you through the process.

Note
If you need to replace the control arms as well, it will cost you $200.
Materials Needed
- Jack and jack stands
- 14 and 17mm socket and ratchet
- Pliers
- Breaker bar
- Hammer
- Ball joint remover tool
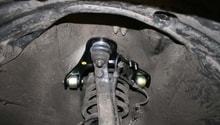
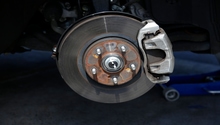
Step 1 – Remove knuckle/spindle from control arm
Loosen the lug nuts on the front wheels and jack the front of the car up, then place it on jack stands. Remove the front wheels and set aside. Remove the cotter pin from the knuckle assembly using a pair of pliers or wire cutters. Use a socket and ratchet to remove the nut holding the ball joint to the knuckle. If the nut proves to be stubborn and doesn't want to come off, you may need a breaker bar to get it loose. Separate the ball joint from the spindle by driving the pickle fork between the two and giving it a few good wacks with the hammer.
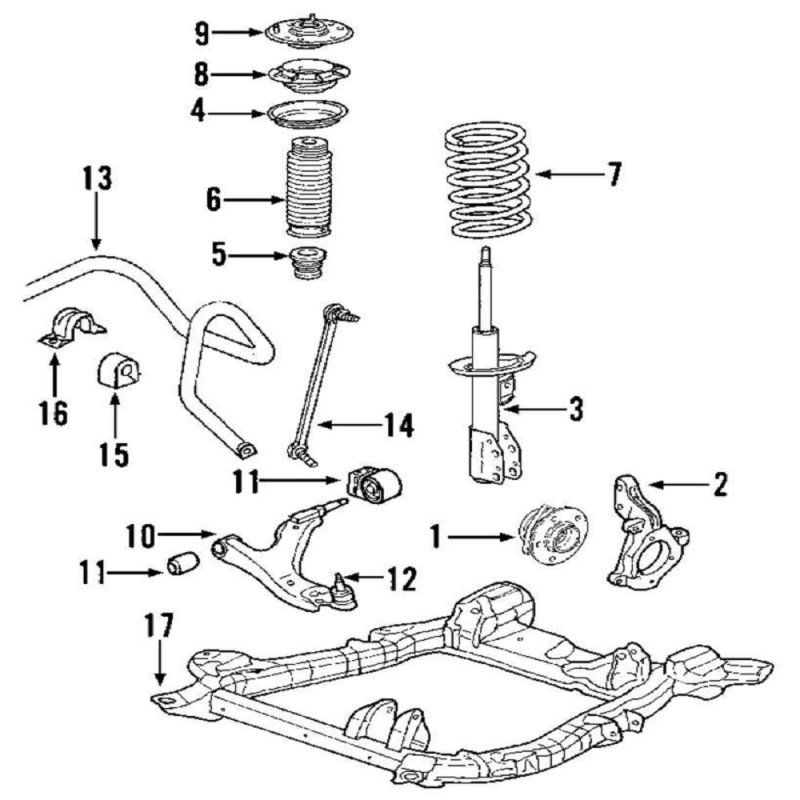
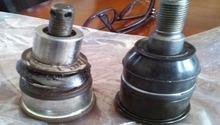
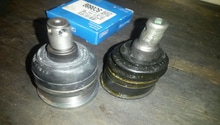
Step 2 – Remove the ball joint
To replace the lower ball joints, you'll need to separate them from the steering knuckle. Luckily for you, Acura used a simple to replace, bolt in ball joint design on the RDX, alleviating years of headaches among people who work on Hondas and Acuras. Unbolt the two nuts and one bolt holding the ball joint to the control arm and remove it.
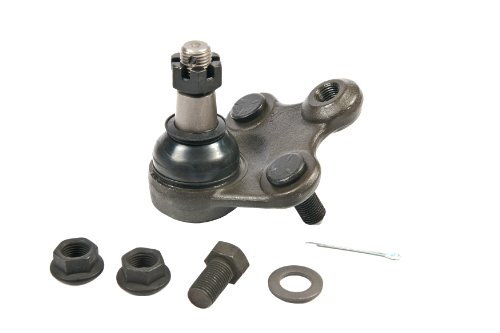
Step 3 – Install new ball joint
Install the new ball joint where the old one was, and torque the two nuts as well as (1) bolt to 43 lb-ft. Insert the ball joint in its place in the steering knuckle and tighten the nut top 40 lb-ft, then insert the cotter pin and bend over to lock. If you are just doing the one side, you are done, or move to the other side and repeat. Once both ball joints are replaced, bolt up the wheels and put the car back on the ground. Take it your car for a test drive. You may not need it, but at this point a professional alignment is a good idea.
Related Discussion, Site and Video
- Front Lower Ball Joint DIY - AcuraZine.com
- Ball Joing Knuckle Arm Replacement - HondaSUV.com
- Honda CR-V Upper Ball Joint Replacement - YouTube.com